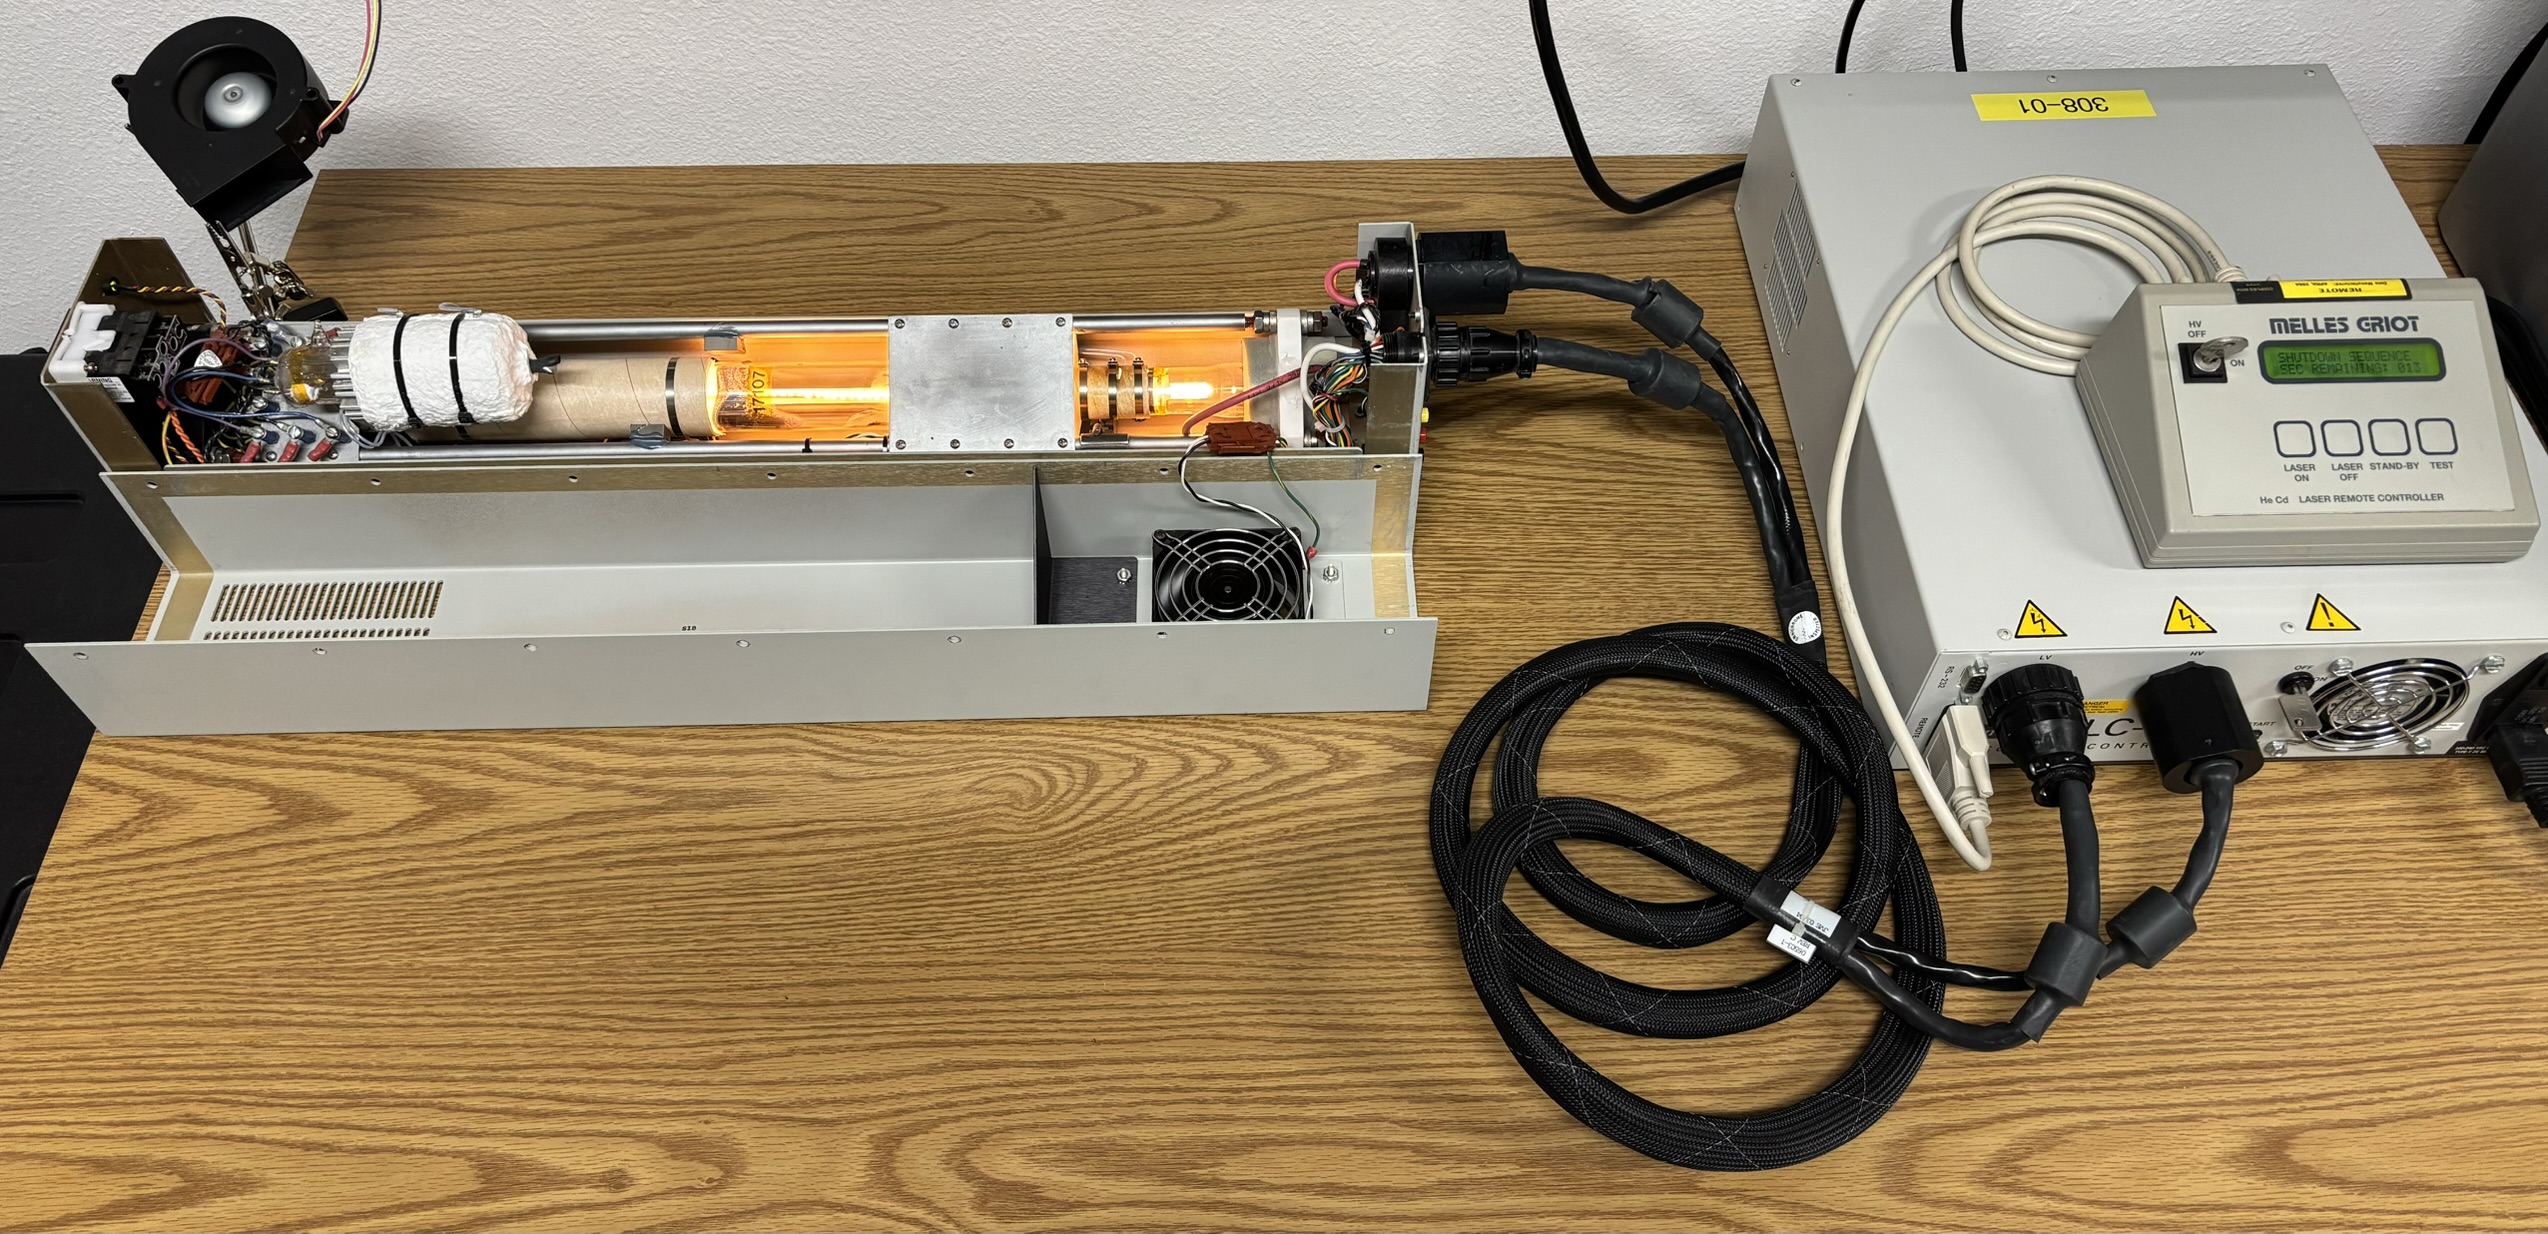
The Omnichrome Series 56 is a Helium Cadmium (HeCd) gas laser system manufactured by Melles Griot, who acquired Omnichrome in the late 90s. The laser head model number is 45-LRS-301-120 and has a rated output power of only 2.6mW. Helium Cadmium lasers are generally configured to output 442nm or 325nm laser light. We believe this unit in particular is the 325nm variant, but we have had difficulty confirming this, as you will read below. Helium Cadmium lasers are very similar to Helium Neon (HeNe) lasers, at least as far as the tube is concerned. HeCd lasers are significantly more complicated to drive and control in a stable manner, have a shorter life, and require much more power to run. Like HeNe lasers, HeCd lasers are not very powerful, usually anywhere from 10-100mW, even less with our unit. The Series 56 laser head is quite a beast! It's the biggest laser system we have acquired, and has a monster power supply to complement it. This laser system is comprised of 3 main parts: the laser head, power supply, and the controller. We were fortunate to receive all these components including the required cables when we purchased this system. It is more common to see individual HeCd laser heads or power supplies being sold online, entire systems do not come up often.
Laser Head
As mentioned earlier, the laser head is an absolute unit weighing nearly 25lbs at 3 feet long! It's a pretty unassuming putty-colored metal case from the 2000s. The yellow labels were installed by the previous owner of this system. A very small asset tag label revealed that this laser system was (at some point) owned by Purdue University. We were quite amused by the labels that read "Do not store stuff on laser." Must have been an issue...

On the top of the laser head is the cooling fan, specification label, and another label requesting the laser not be used as a shelf! The model identifier of laser head is 45-LRS-301-120, and it was manufactured in April of 2004.

Taking a look at the front of the laser head, we have the typical Melles Griot beam shutter and output window, along with an hour counter that reads around 2,900 hours. Helium Cadmium lasers usually do not have a very long lifespan. This is because as the system is running, Cadmium is being vaporized and slowly depleted. There is a finite amount of Cadmium in the tube (usually only a couple of grams), and when it fully depletes, lasing ceases permanently. Interestingly, HeCd lasers will maintain a relatively constant output power throughout their operational life, and suddenly die when the final bit of Cadmium is used up. Some speculate that Omnichrome models were designed to run for only around 5,000 hours, perhaps a form of planned obsolescence. On the rear of the laser head, we have the typical high voltage (P4) and low voltage (P2) twist-lock connections similar to what is used on Melles Griot Argon Ion lasers. Additionally, there are 4 diagnostic connections for monitoring laser parameters. The two potentiometers towards the bottom are used to adjust the filament current (VR) and the high voltage power supply (VT). Lastly, the button labeled Cd REMELT serves an interesting purpose. This is for activating the Cadmium re-melt procedure, which we will explain later. There are 4 test points on the back of the laser head for monitoring and adjustments.

Taking a look inside of the laser head reveals a beautifully laid out system of components. A small fan mounted to the top side of the casing provides some steady ventilation across the tube and components. If you decide to run a HeCd laser head with the cover or fan removed, be sure to provide some external ventilation. The laser tube is secured at the ends within a triangular arrangement of three metal rods and some mounting plates. This laser tube uses internal mirrors, although other models of HeCd lasers can use external mirrors. There are a few magnets glued to the metal rods around the tube. These are strategically placed during assembly and calibration as a method of fine beam positioning and alignment. Beneath the cardboard sleeve towards the center of the tube is the re-melt heater. Regarding the other components contained within the laser head, they require further explanation so we'll break it down in the sections below.

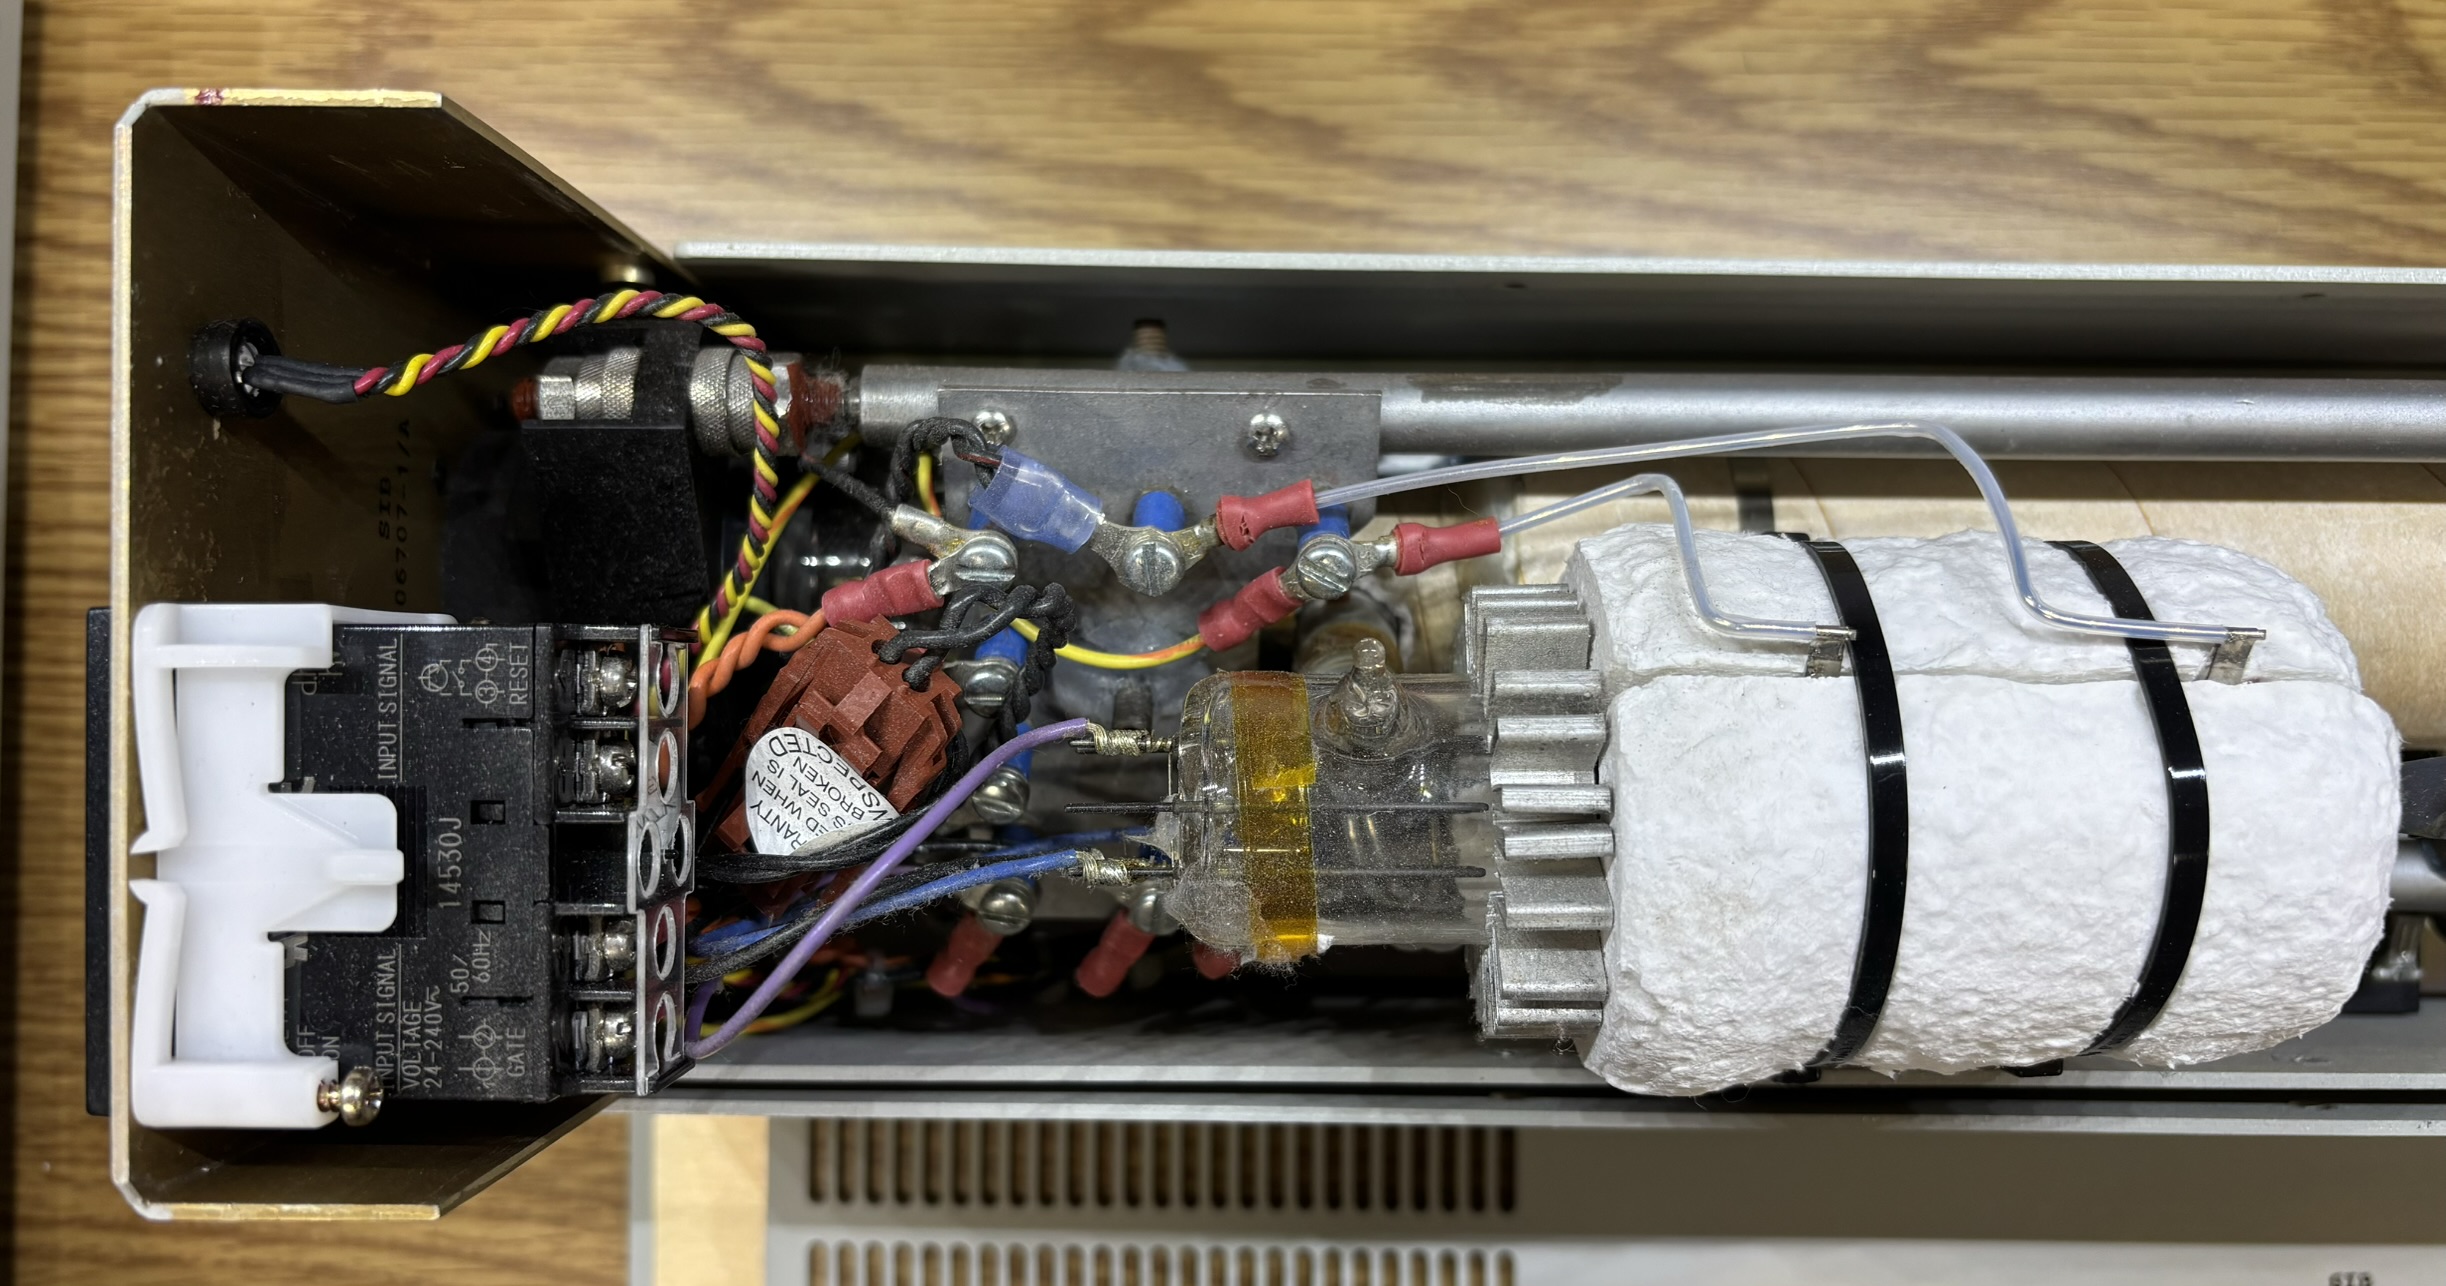
This section is the front of the laser head, and the cathode end of the tube. There are actually two heated cathodes, one is purely a spare in case the primary cathode fails. Since the cathodes are contained within the sealed tube, they cannot be realistically serviced, hence the spare. If they both fail, you have a paperweight! The rear connections of the hour counter are clearly visible. The two-pin connector for the hour counter has a nice warranty sticker on it to discourage tampering. Disconnecting or tampering with the hour counter on a laser is like messing with the odometer on a car, not a nice thing to do. Aside from that, we can see the connections for the LED on the front of the case. The glass element with the white insulating material wrapped around it is the helium reservoir, one of many interesting parts of the HeCd laser. The Helium in a HeCd laser is necessary to enable the electrical discharge within the tube, and facilitates the excitation of Cadmium vapor, which is the actual lasing medium. However, the Helium is slowly consumed as the laser is operated and needs to be replenished occasionally. To accomplish this, a closed-loop control and monitoring system monitors the helium pressure within the tube, and enables a heater to release additional Helium when needed. Below this is a metal plate with some electrical connections and screw terminal junctions. Below that are the two heated filaments (cathodes). HeNe lasers do not require a heated filament or cathode, but this is needed in HeCd laser systems due to the higher current being passed through the tube. Lastly, the output coupler is located at the end of the tube and very difficult to see as it is obscured by all the other components.
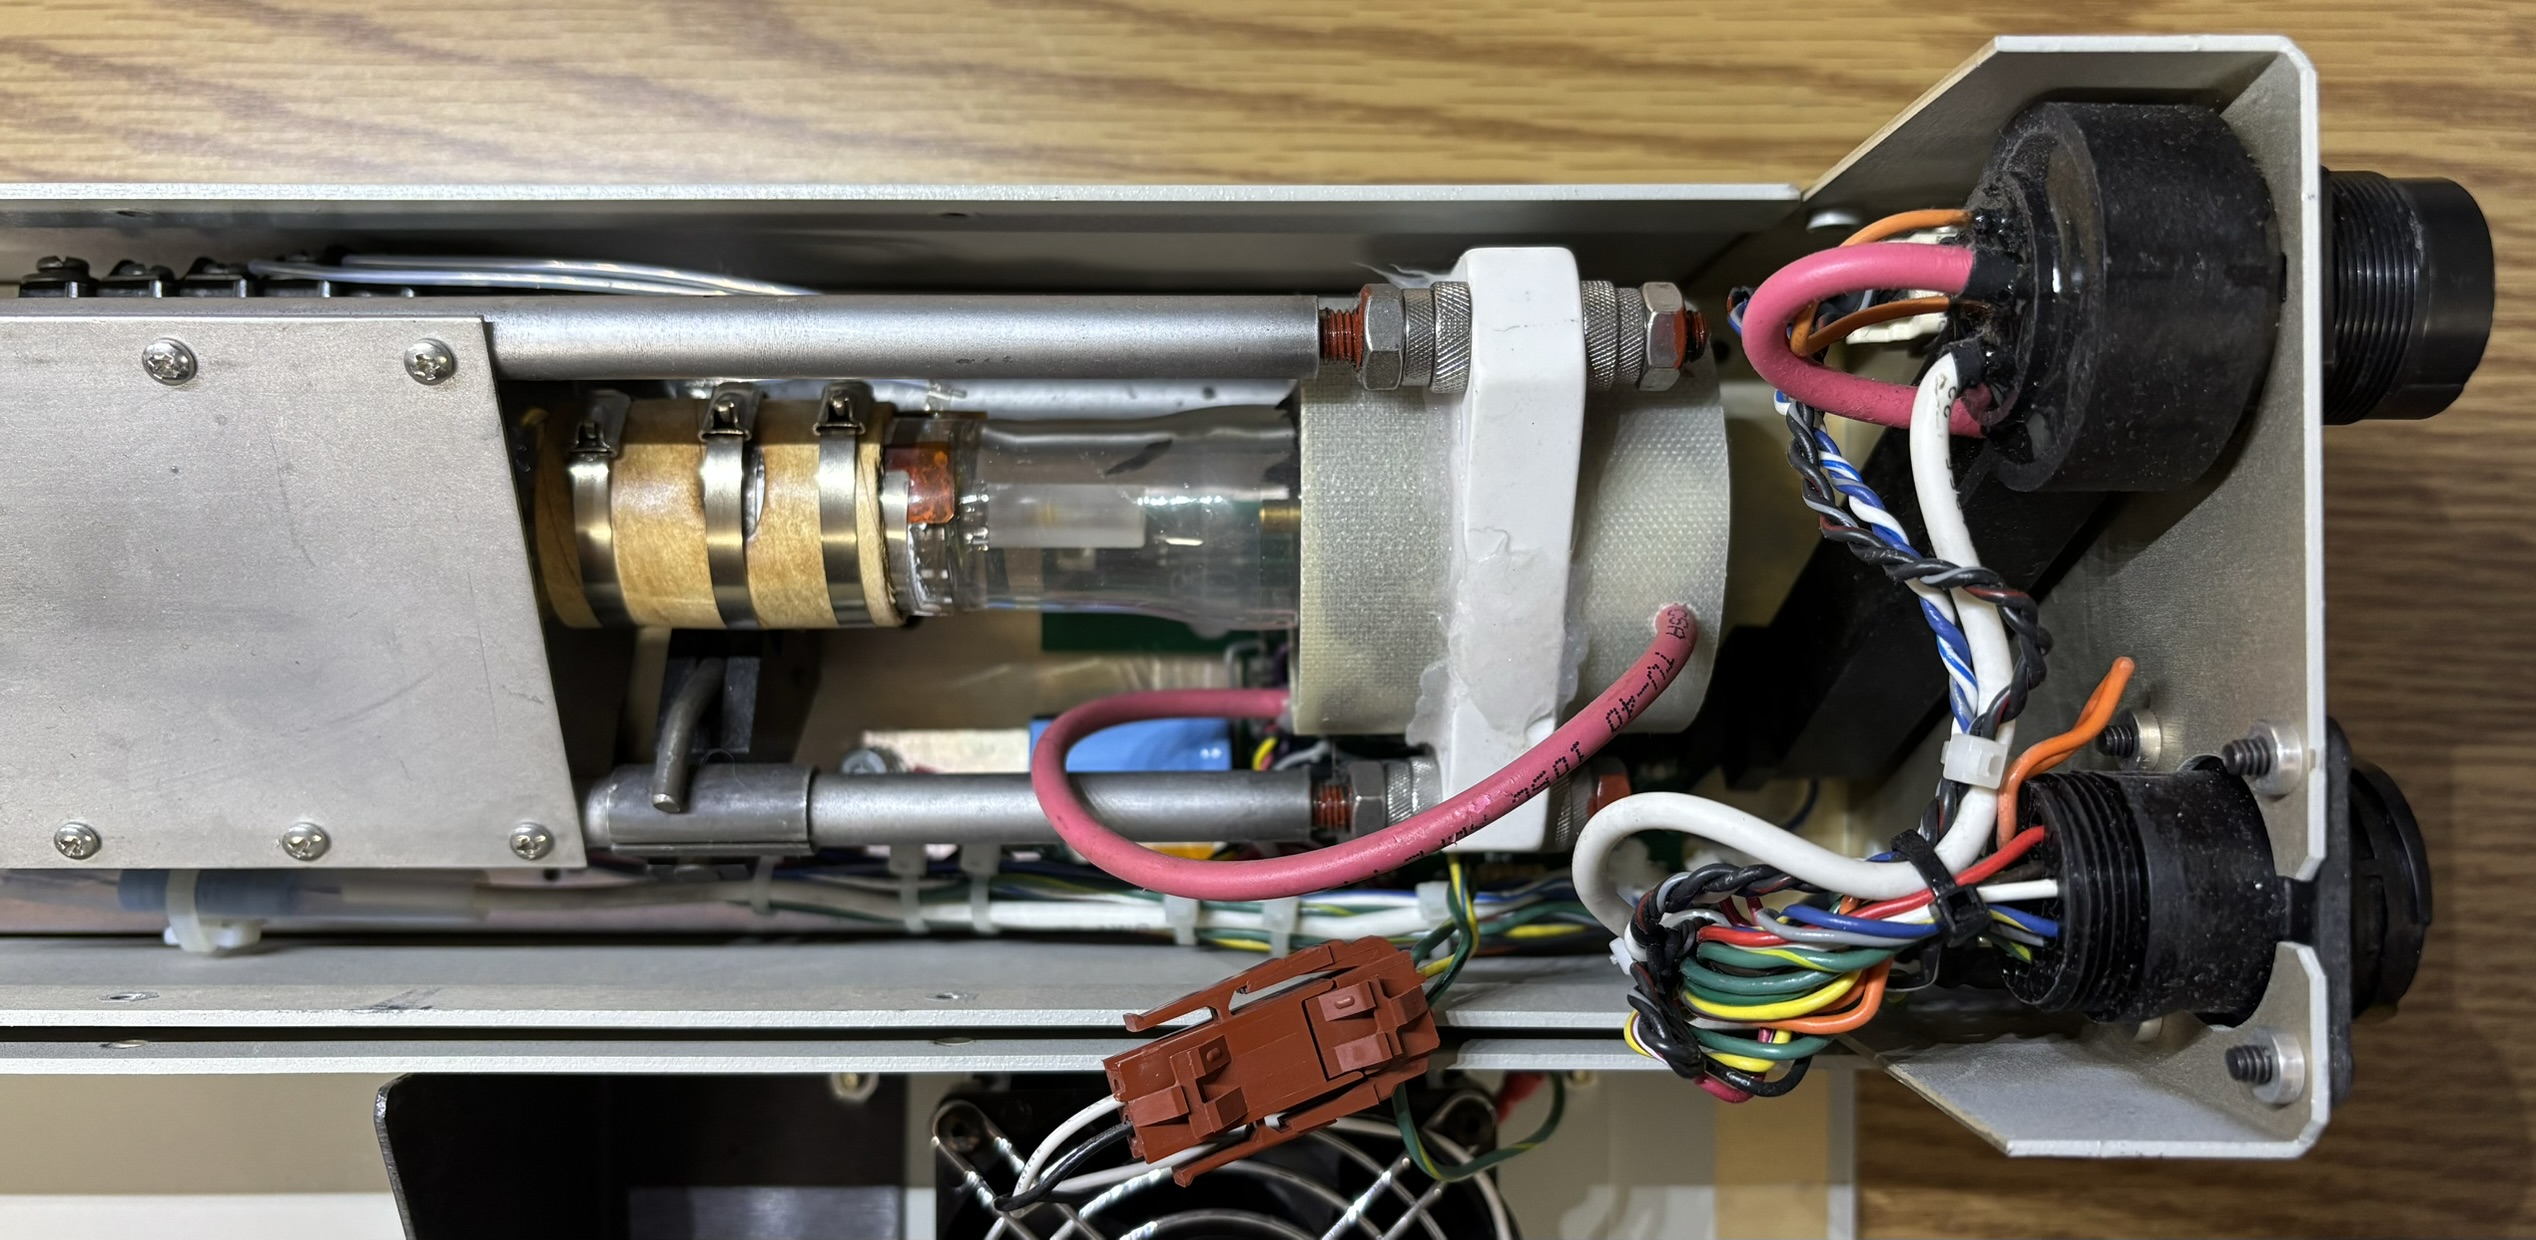
This section is the rear of the laser head, and the anode end of the tube. Most obvious is the heavily insulated rubber anode connection with high voltage cable. This wraps around the end of the tube and does not appear to be easily removable. It also obscures any mirror adjustment, but since the Omnichrome HeCd lasers generally use internal mirrors, this is not really a concern. The brown cardboard-like material wrapped and secured around a small section of the tube is the cadmium heater. Obscured by this is the cadmium reservoir within the tube. Lastly, we can see where the connections from the HV and LV plugs break out within the laser head.
The image below was taken while the laser system was running with the cover removed. While it's a beautiful view of the plasma contained within the bore of the tube, it reveals multiple potential issues with this laser system. Firstly, we can clearly observe what we believe is "plasma beading" which is the bead-like structure the plasma has taken on, towards the center of the tube. In most HeNe or HeCd lasers, the plasma will be a straight, narrow line within the tube. We are not entirely sure what causes this (gas impurities perhaps?), but it does not bode well for this laser. Additionally, there are spots of cadmium buildup within the tube, most visible near the label that reads "17107". This is another sign that our laser may not be in good health. If cadmium vapor condenses on parts within the tube, especially the mirrors, it can degrade performance and even prevent lasing entirely.

Power Supply
Like the laser head, the power supply is a behemoth and weighs nearly 25lbs! It's also quite nasty in terms of electrical danger. High voltages are generated within this power supply at more than enough current to terminate your existence, if you were to come into contact with it. Use extraordinary caution when operating the laser head or power supply with any covers removed. There will be exposed high voltage connections and you will not get a second chance. The same applies for many other gas lasers such as Argon Ion lasers. The majority of HeNe laser power supplies are not lethal, but can still provide a painful shock and should be used with care as well. Also, check all connections before turning on the power supply, as voltage arcs can be dangerous and damaging to equipment. The LC-500 power supply is extremely complicated compared to other gas laser power supplies. As mentioned earlier, it is responsible for generating and managing high voltage at significant current, and multiple low voltage rails as well. Due to the nature of HeCd lasers, the power supply must sequence power on and off in the proper manner for the laser to run and shut down properly. In older HeCd power supplies, this was all done with analog logic. The LC-500 is more digital in nature. Say what you will about that, but the LC-500 is an extremely well built, reliable, and stable HeCd power supply. It will most certainly outlast the laser head by an order of magnitude. We aren't completely sure how interchangeable the LC-500 power supply is with different HeCd laser heads than the original one, though we really don't see why it would be an issue. The power supply seems to have a way of detecting the parameters of the laser head when it boots up.
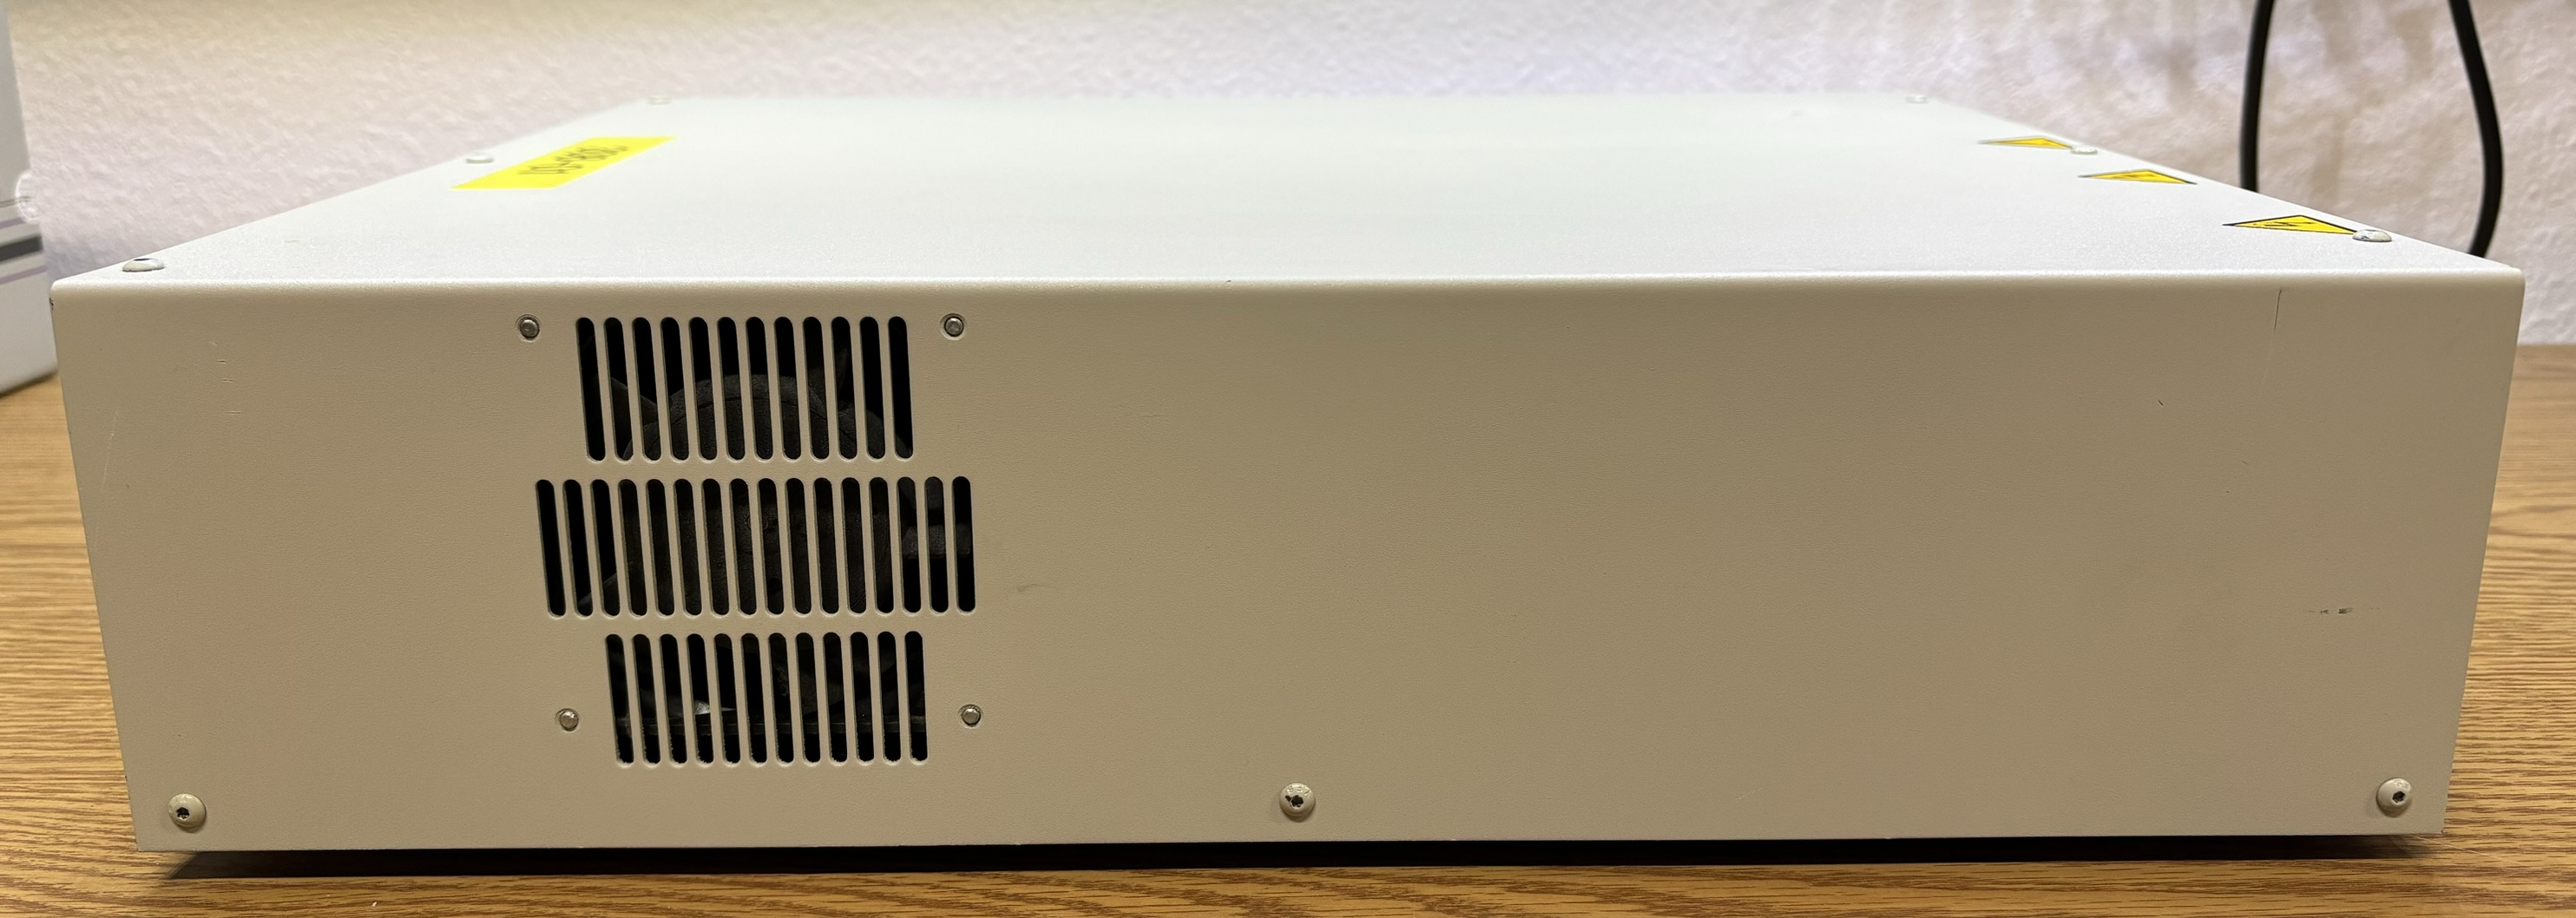
The side of the power supply is pretty unassuming, there is just a cut-out for one of the two cooling fans.
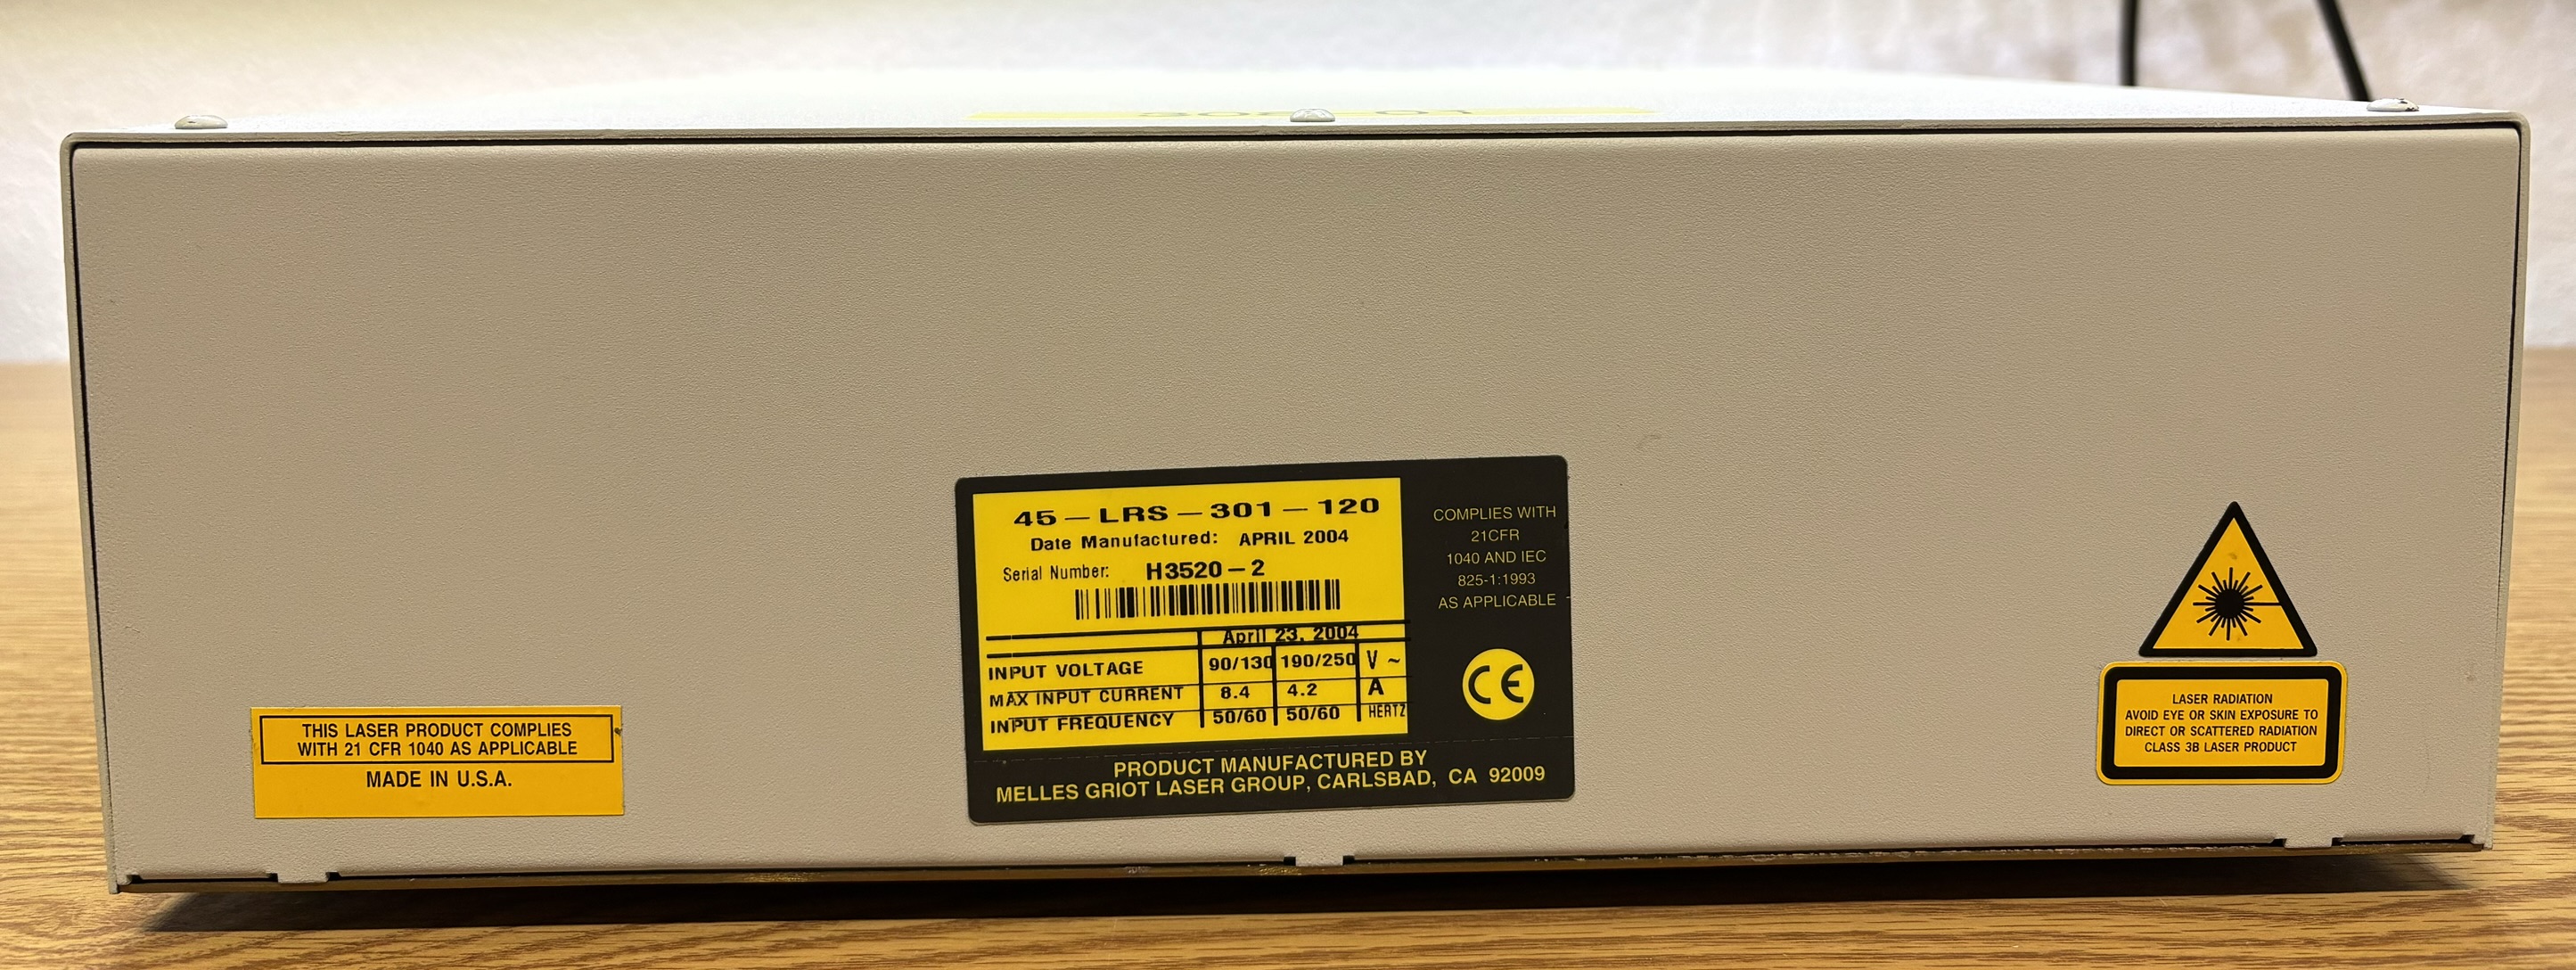
On the back is the information sticker. The model identifier matches that of the laser head (45-LRS-301-120). It was manufactured in April of 2004. It is also worth noting that the serial number prefix (H3520) matches that of the laser head. This indicates that the laser head and power supply were (at some point) calibrated to one another. You can often interchange power supplies and laser heads, but you will likely forego any calibration if you choose to do that.
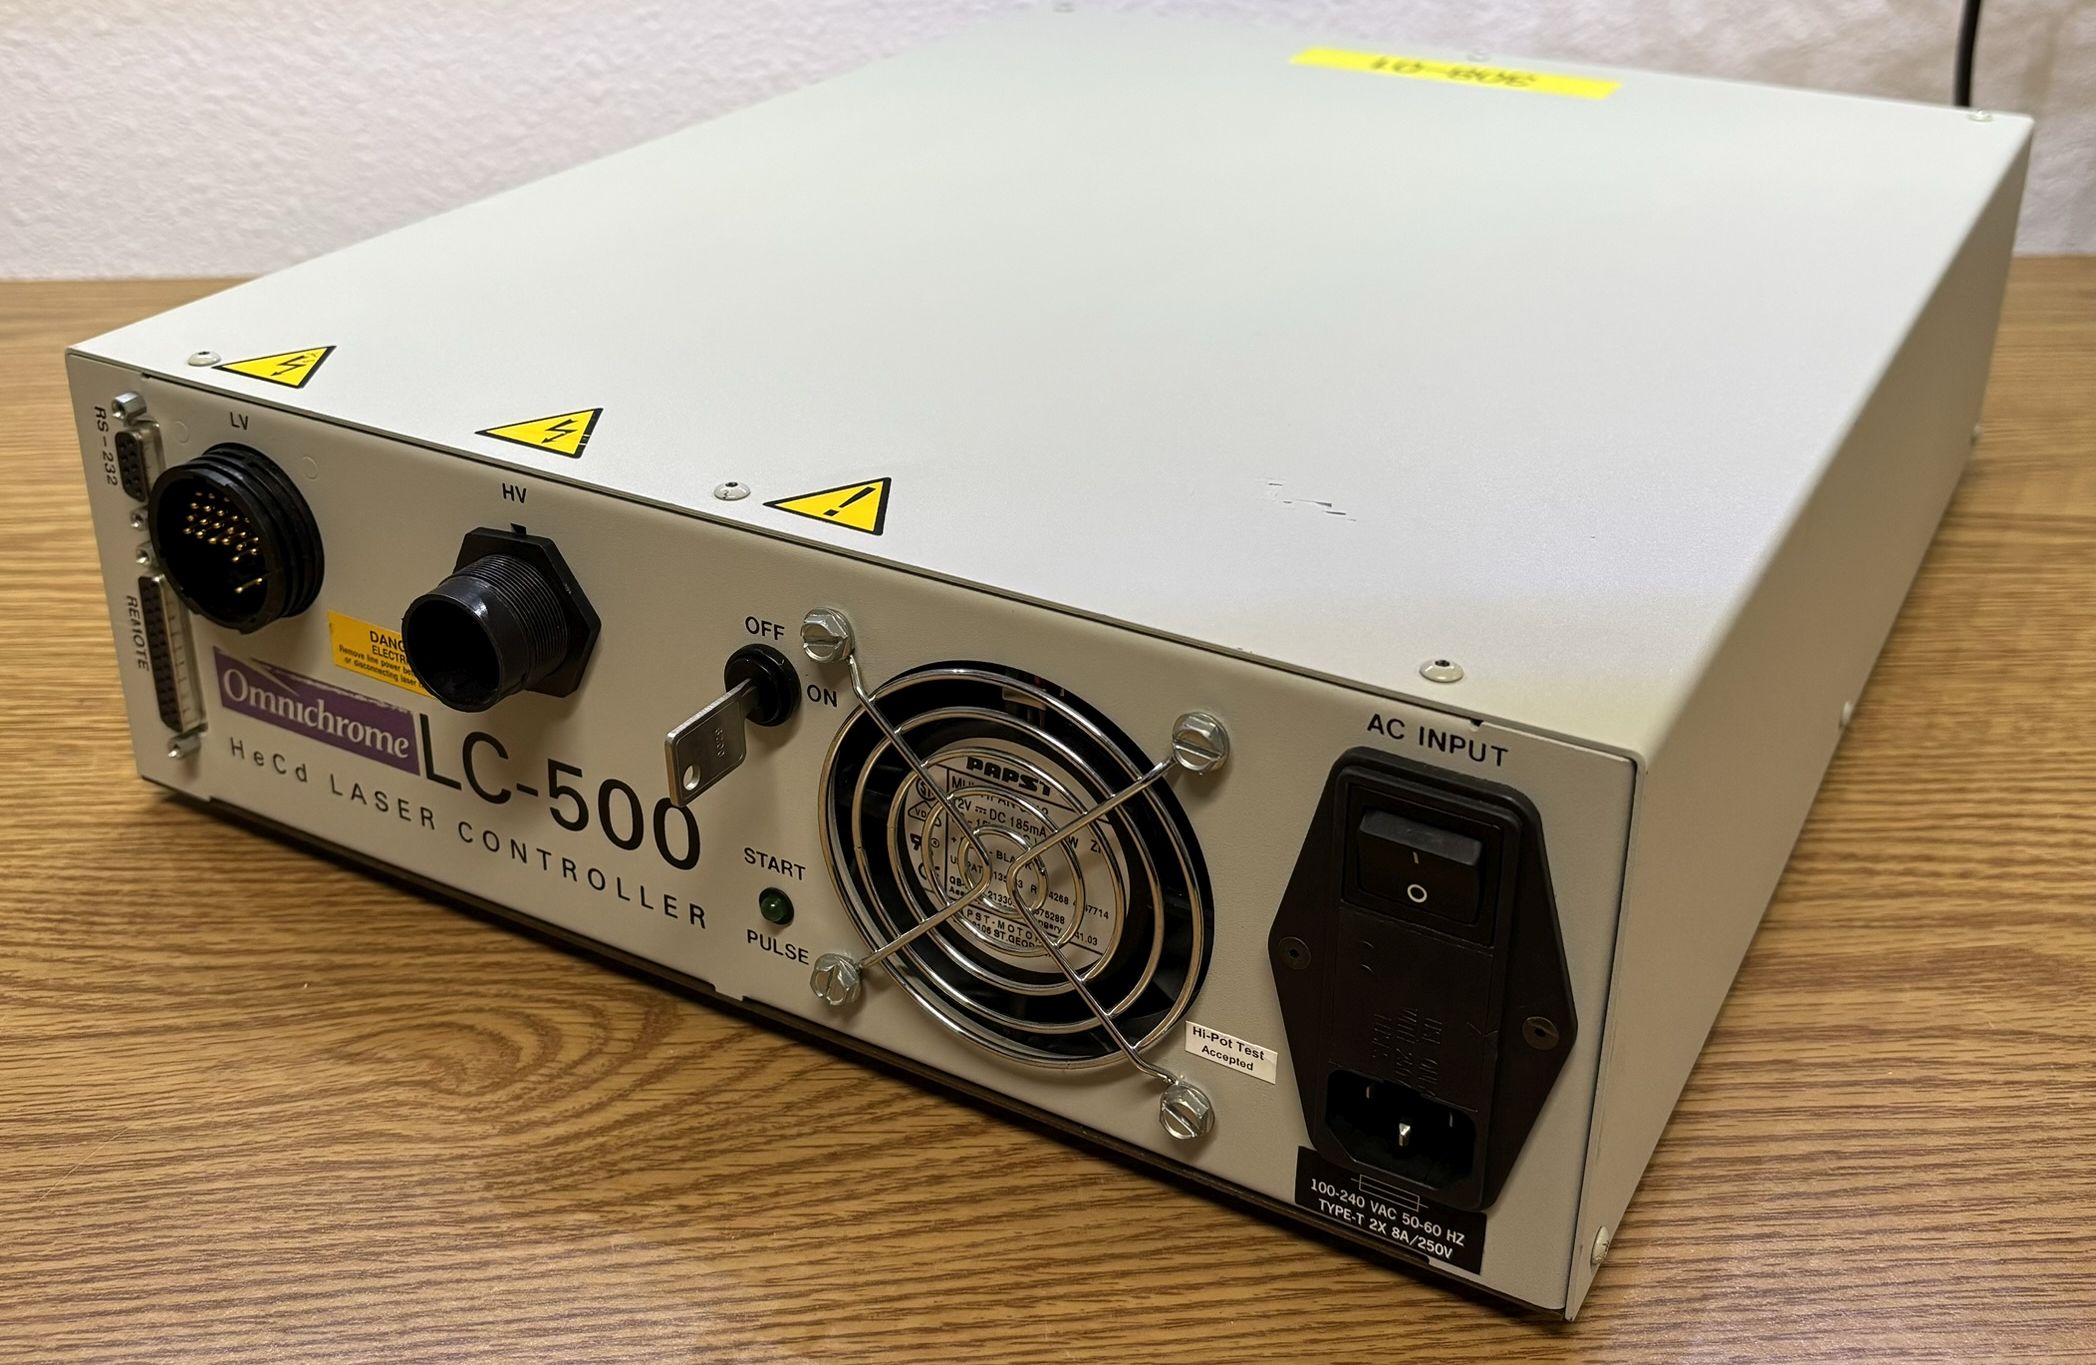
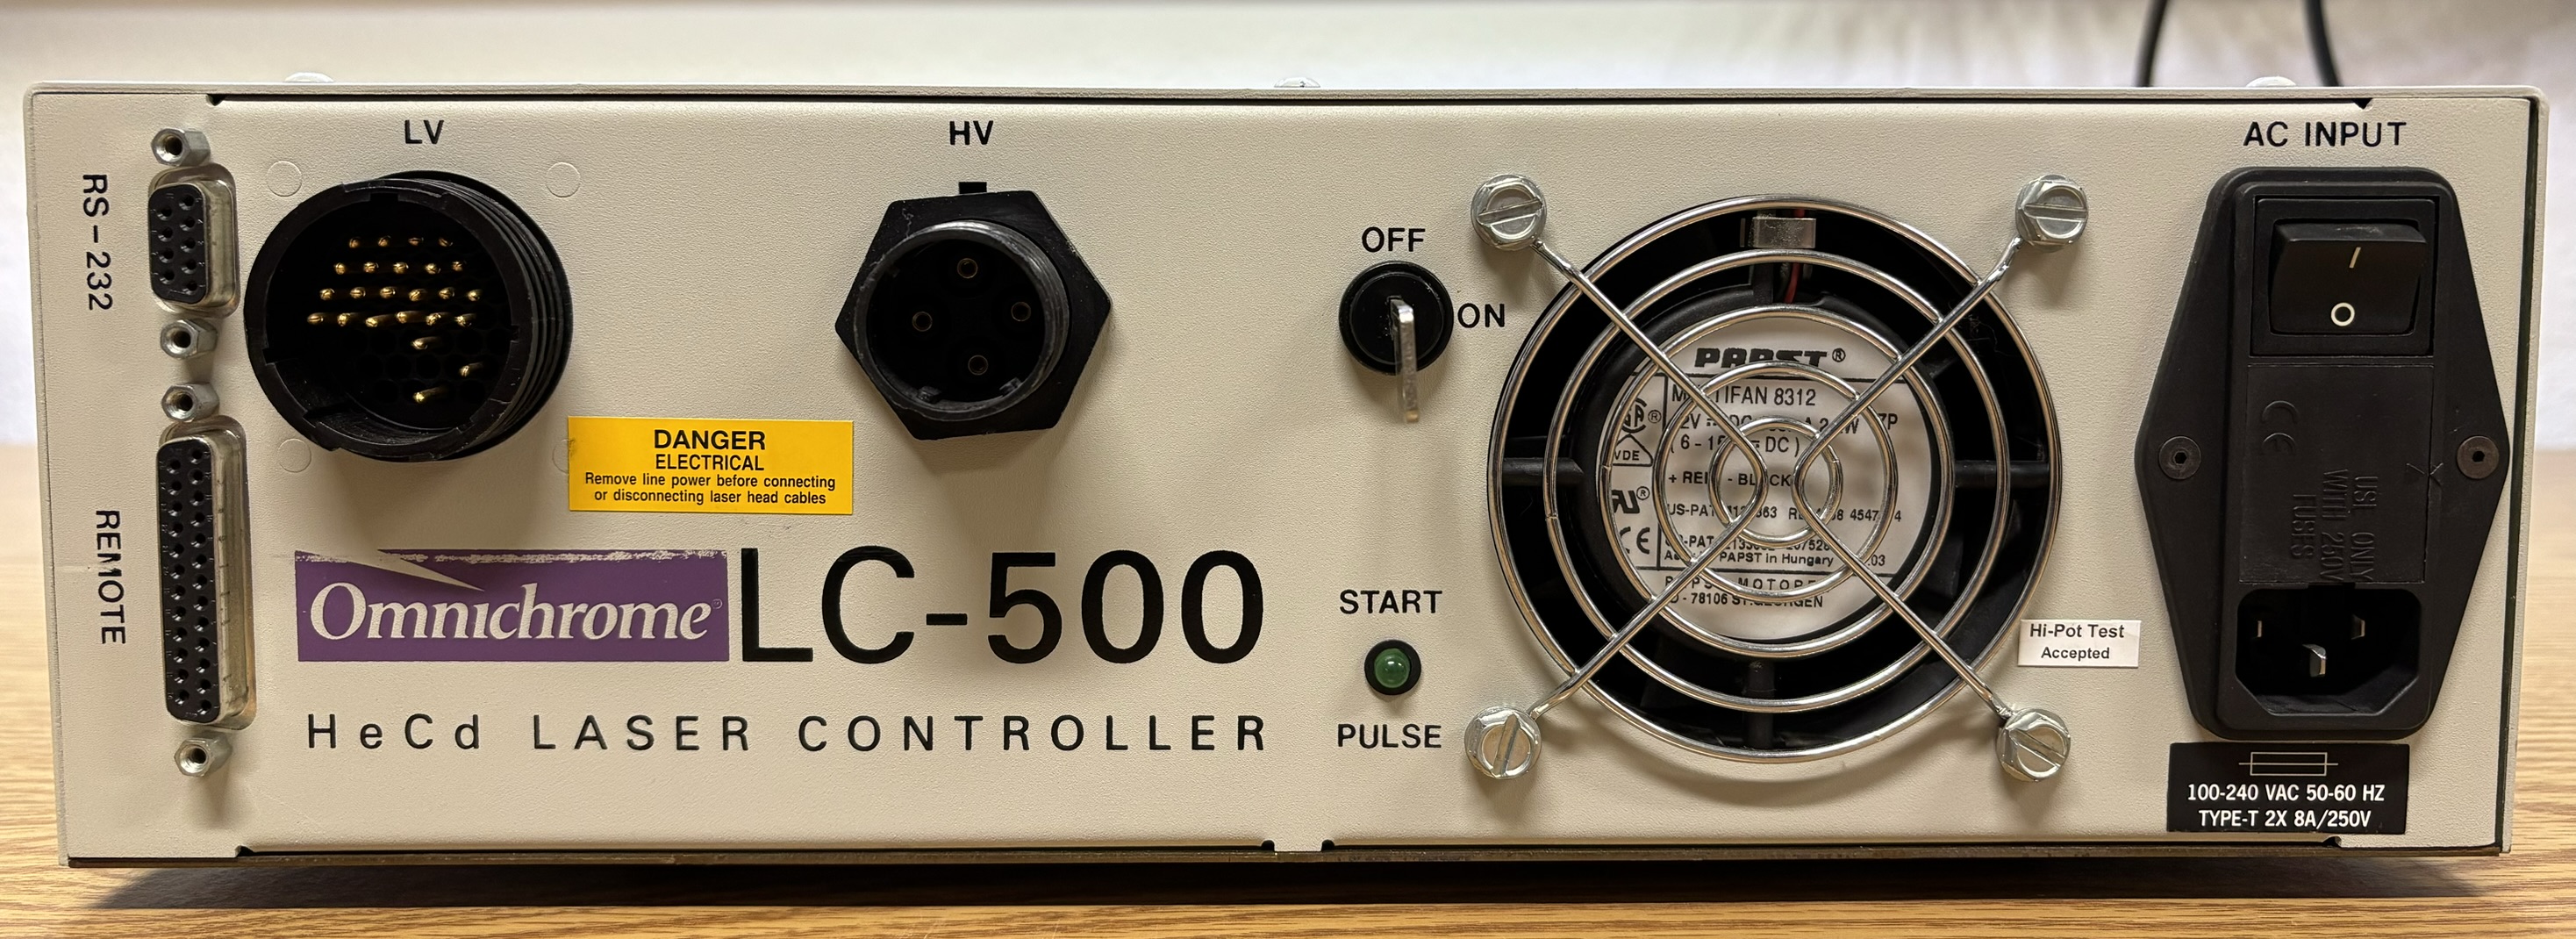
There are several connections and controls on the front of the LC-500. All the way to the right, is a standard IEC 15A AC power input connector with a fuse and power switch. Unlike the power-hungry Argon Ion laser power supplies, this HeCd laser system only uses about 300 watts of power during normal operation. Next on the front is the cooling fan followed by the interlock key-switch and start pulse indicator LED. Next is the high voltage connector for the laser head umbilical cable. After that is the low voltage connector for the head umbilical. The high voltage (HV) connector is a 4 pin specialty twist-lock connector for the heated filaments within the laser head along with other high voltage components. The low voltage (LV) connector is used for monitoring and control over the laser head. Lastly, there is a DB-25 connector for the remote controller and a DB-9 RS-232 serial port.
Based on our testing, the RS-232 serial interface communicates at a baud rate of 9600 (full serial parameters: 9600/8/N/1) and will output a prompt but not echo text. Sending an invalid command will result in an output of "ER 0". Sending a BREAK character followed by a carriage return (hit enter) resulted in the message "OVERCURRENT LOCKOUT". We are not sure if this indicates an issue with our system or is just a weird bug, since it still displayed that message when the power supply was on but the laser was turned off. While we were unable to find any documentation that contained serial commands, we were able to compile a list of commands from the EPROM dump described in the next section. The list of commands that we tested has been provided below along with descriptions. There are some commands that were accepted but returned no output, and a few commands where we are unsure of the purpose. Notably, there are two "SERVICE ACCESS" commands that require no special sequences to execute, be careful with the IRESET and QRESET commands as they will immediately reset their respective parameters with no warning!
| COMMAND | DESCRIPTION |
|---|---|
| MODE | Get system mode, returns one of the following: [03 LASER WARMUP] [02 SHUTDOWN SEQUENCE] [04 LASER ON] [05 LASER IN STANDBY] [01 LASER OFF] |
| IRESET | SERVICE: Reset tube hours and counters |
| QRESET | SERVICE: Reset power supply hours |
| CF | |
| VERS | Get firmware version |
| LASER | |
| TBCUR | Get tube current |
| TBVOLT | Get tube voltage |
| CDCYC | Get cadmium duty cycle |
| TDIODE | Get temperature diode value |
| HEDMD | Get helium demand (heater) status |
| PWRTM | Get power supply hours |
| TBTM | Get tube running hours |
| STBYTM | Get tube standby hours |
| HETM | Get helium timer hours |
| SHUTDWN | |
| HSHUTDWN | Get hot shutdowns counter value |
| TBST | Get tube starts counter value |
| ECHO | |
| STATUS | |
| PARAMS | |
| LPOWER | |
| REMELT |
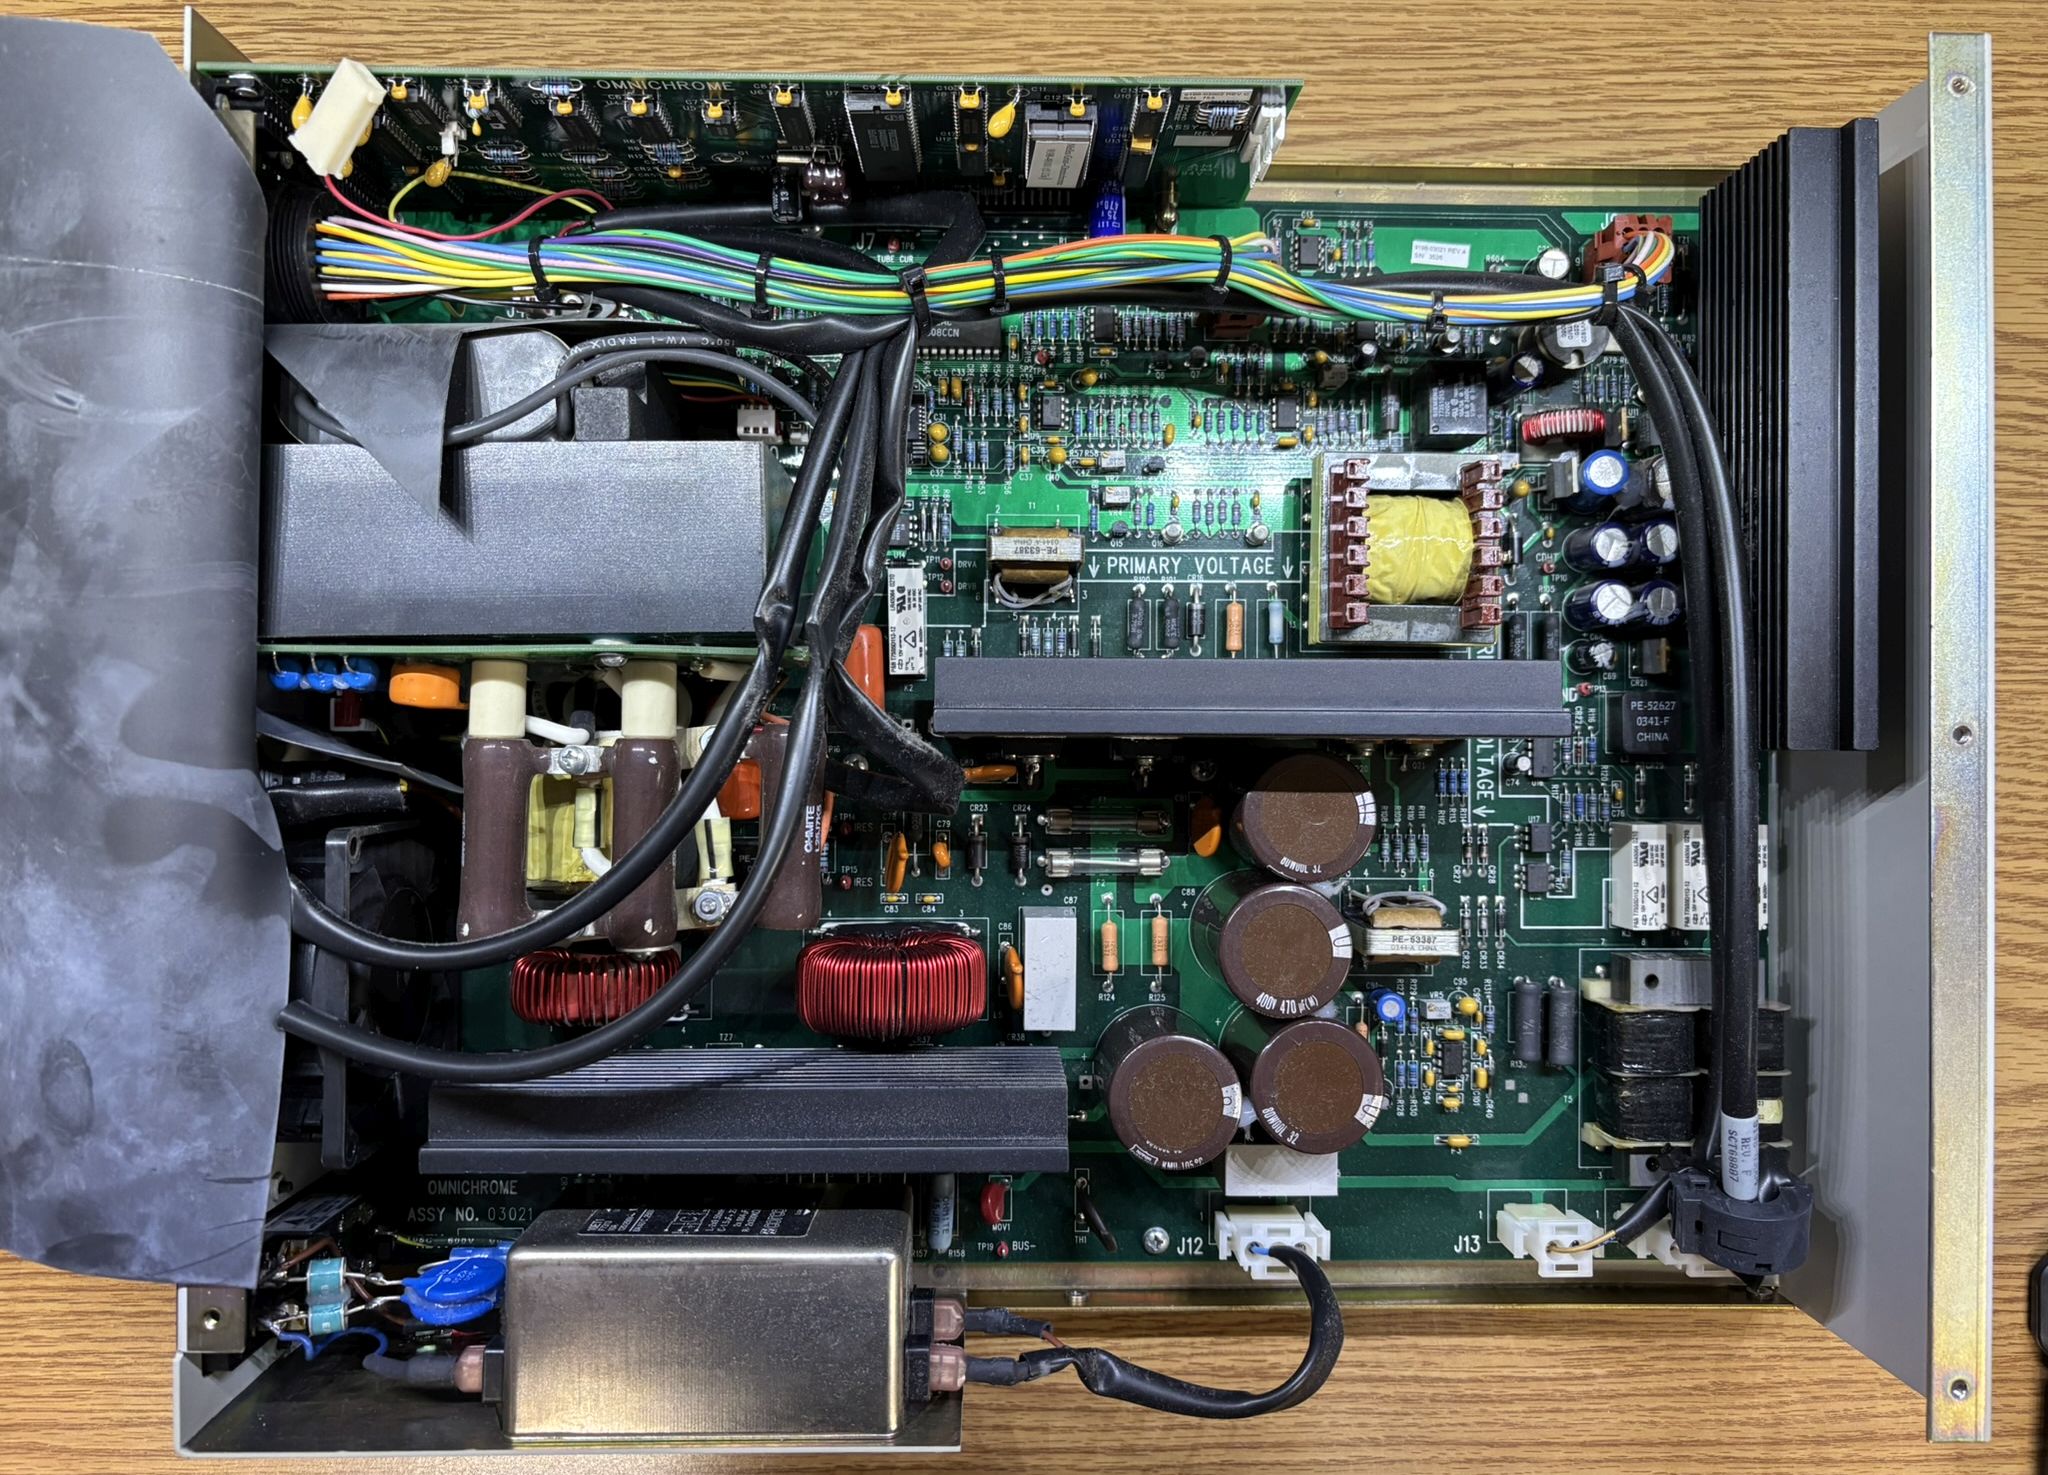
With the top cover of the power supply removed, we can see all of the dangerous high voltage components! Beware that some of the heatsinks are live! The LC-500 differs greatly from the fully analog model 100 HeCd laser power supply from Omnichrome. The LC-500 is a much more modern and digitally-controlled design, which allows for detailed monitoring of the laser system and remote control. Having seen the inside of the model 100, we must admit that the LC-500 is not as elegant in terms of design.
This is the digital control board of the LC-500 power supply, which connects to the bottom circuit board via a pin-header-type connector. It is also secured with a metal standoff and the screws on either side of the DB-9 an DB-25 connectors. For 2004, this was pretty advanced when it comes to digital control. The chip with a sticker on it is an AM27C256 EPROM (with erase window) which stores the system firmware. The Phillips P80C32SBPN is an 8-bit microcontroller and serves as the central processor for the power supply. There are several 74HC series chips on the digital board, which are simple CMOS logic devices such as line drivers/receivers, gates, latches, and flip-flops. The TC232CPE is an RS-232 transceiver which is likely used for the serial port. The ADM691AM is a microcontroller supervisor chip which can also be used for other low-level functions. Lastly, the 8-pin 93C46EN is a serial EEPROM, which is likely used to store configurable parameters such as calibration data and operating information. Overall, this is a very simple digital control board. It would be easy to reverse-engineer assuming the data can be extracted from the EEPROM and ROM. It's nice to see an easy-to-understand design like this, but it's likely just due to the age of this system. Digital control circuits in modern laser systems are quite challenging to understand and reverse-engineer.
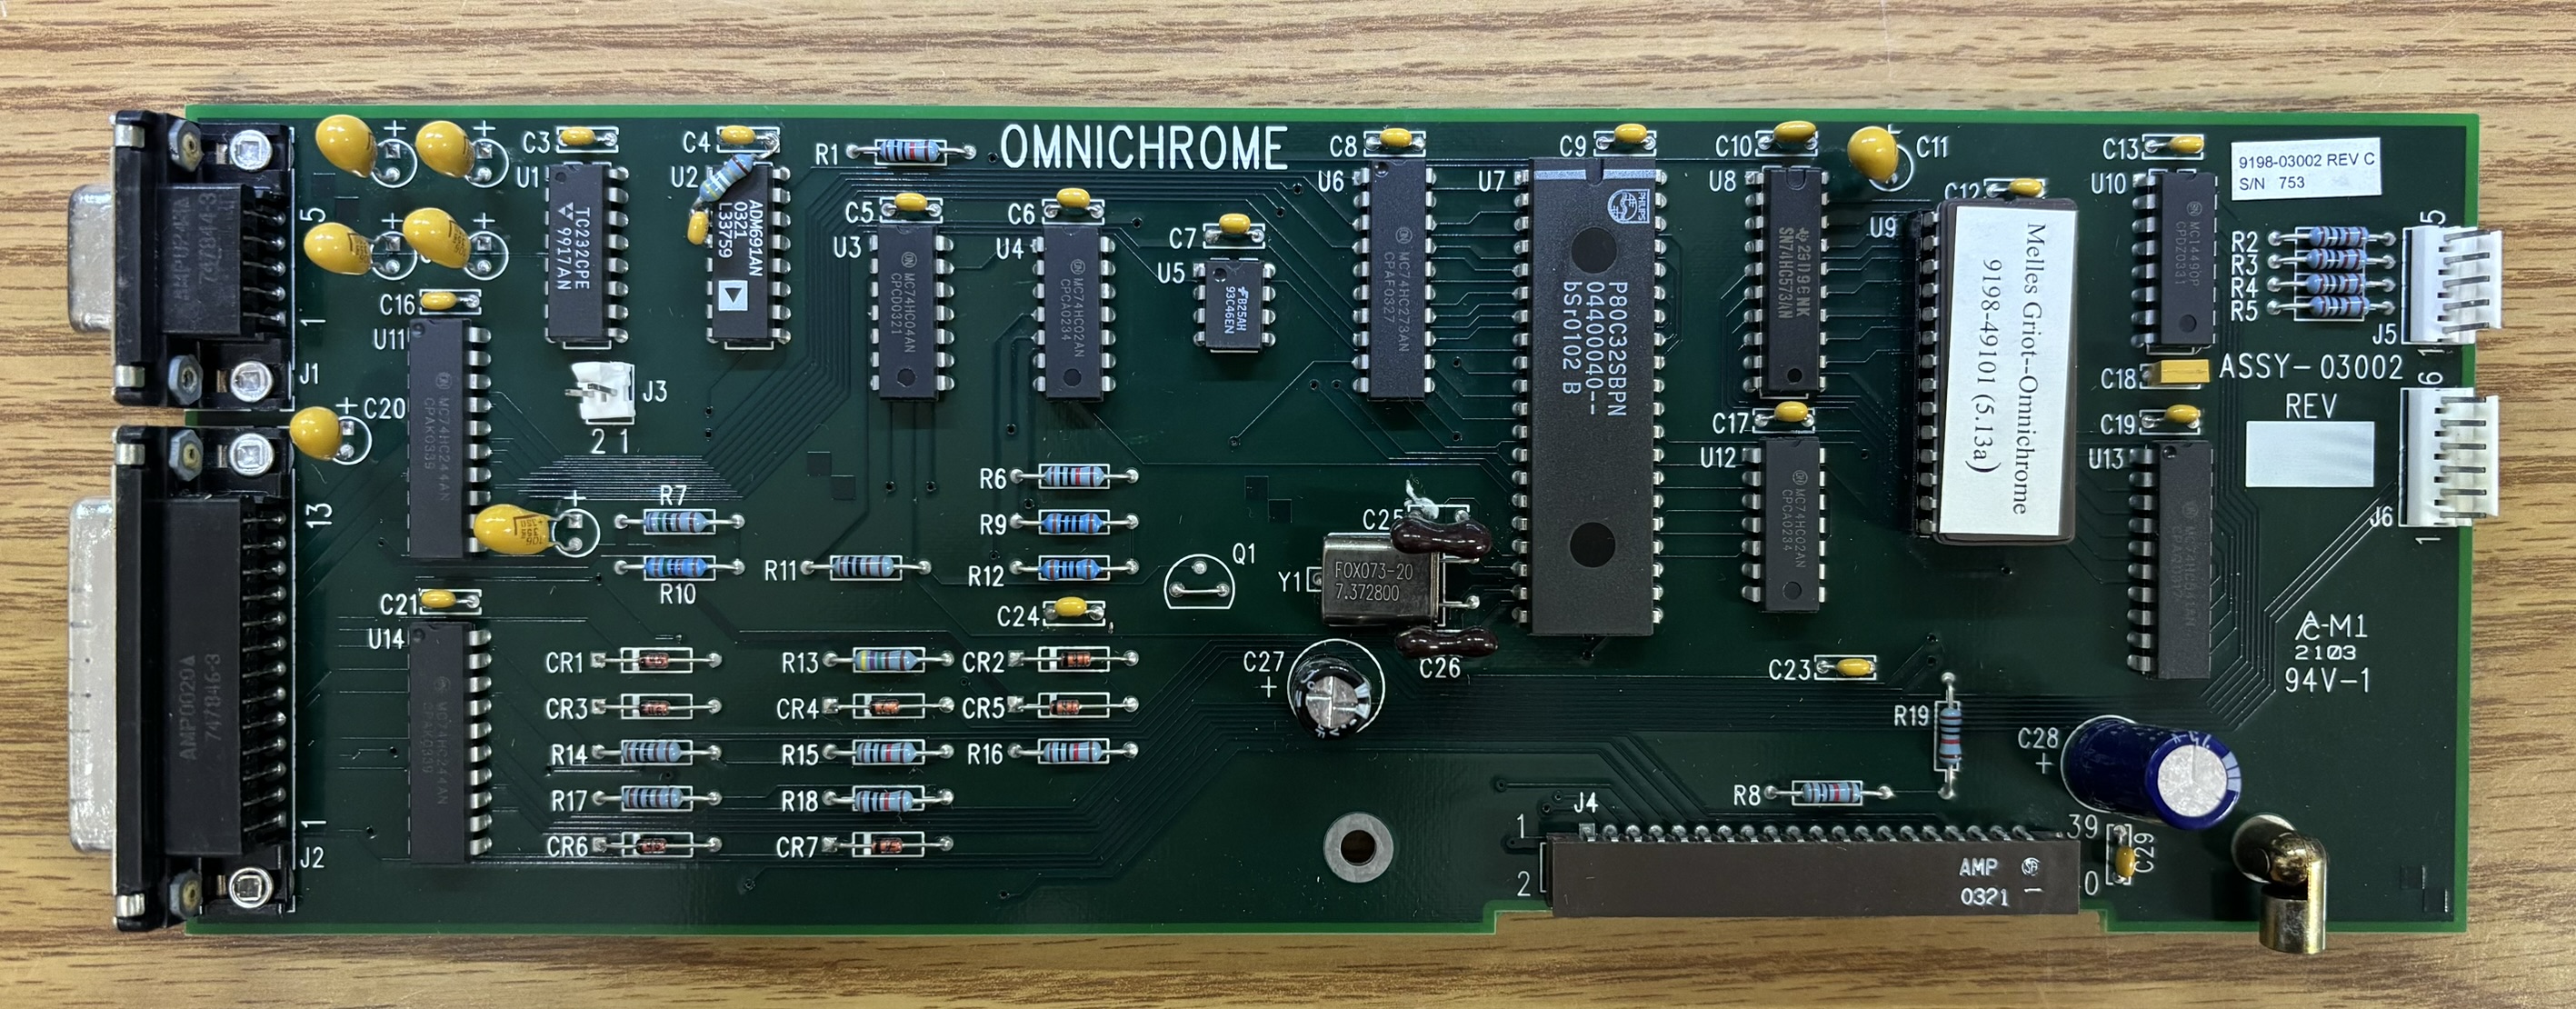
We extracted the contents of the AM27C256 EPROM and have provided links to the data dumps below. ASCII-readable portions of the data refer operating and service mode commands that we were able to test and compile into a table above.
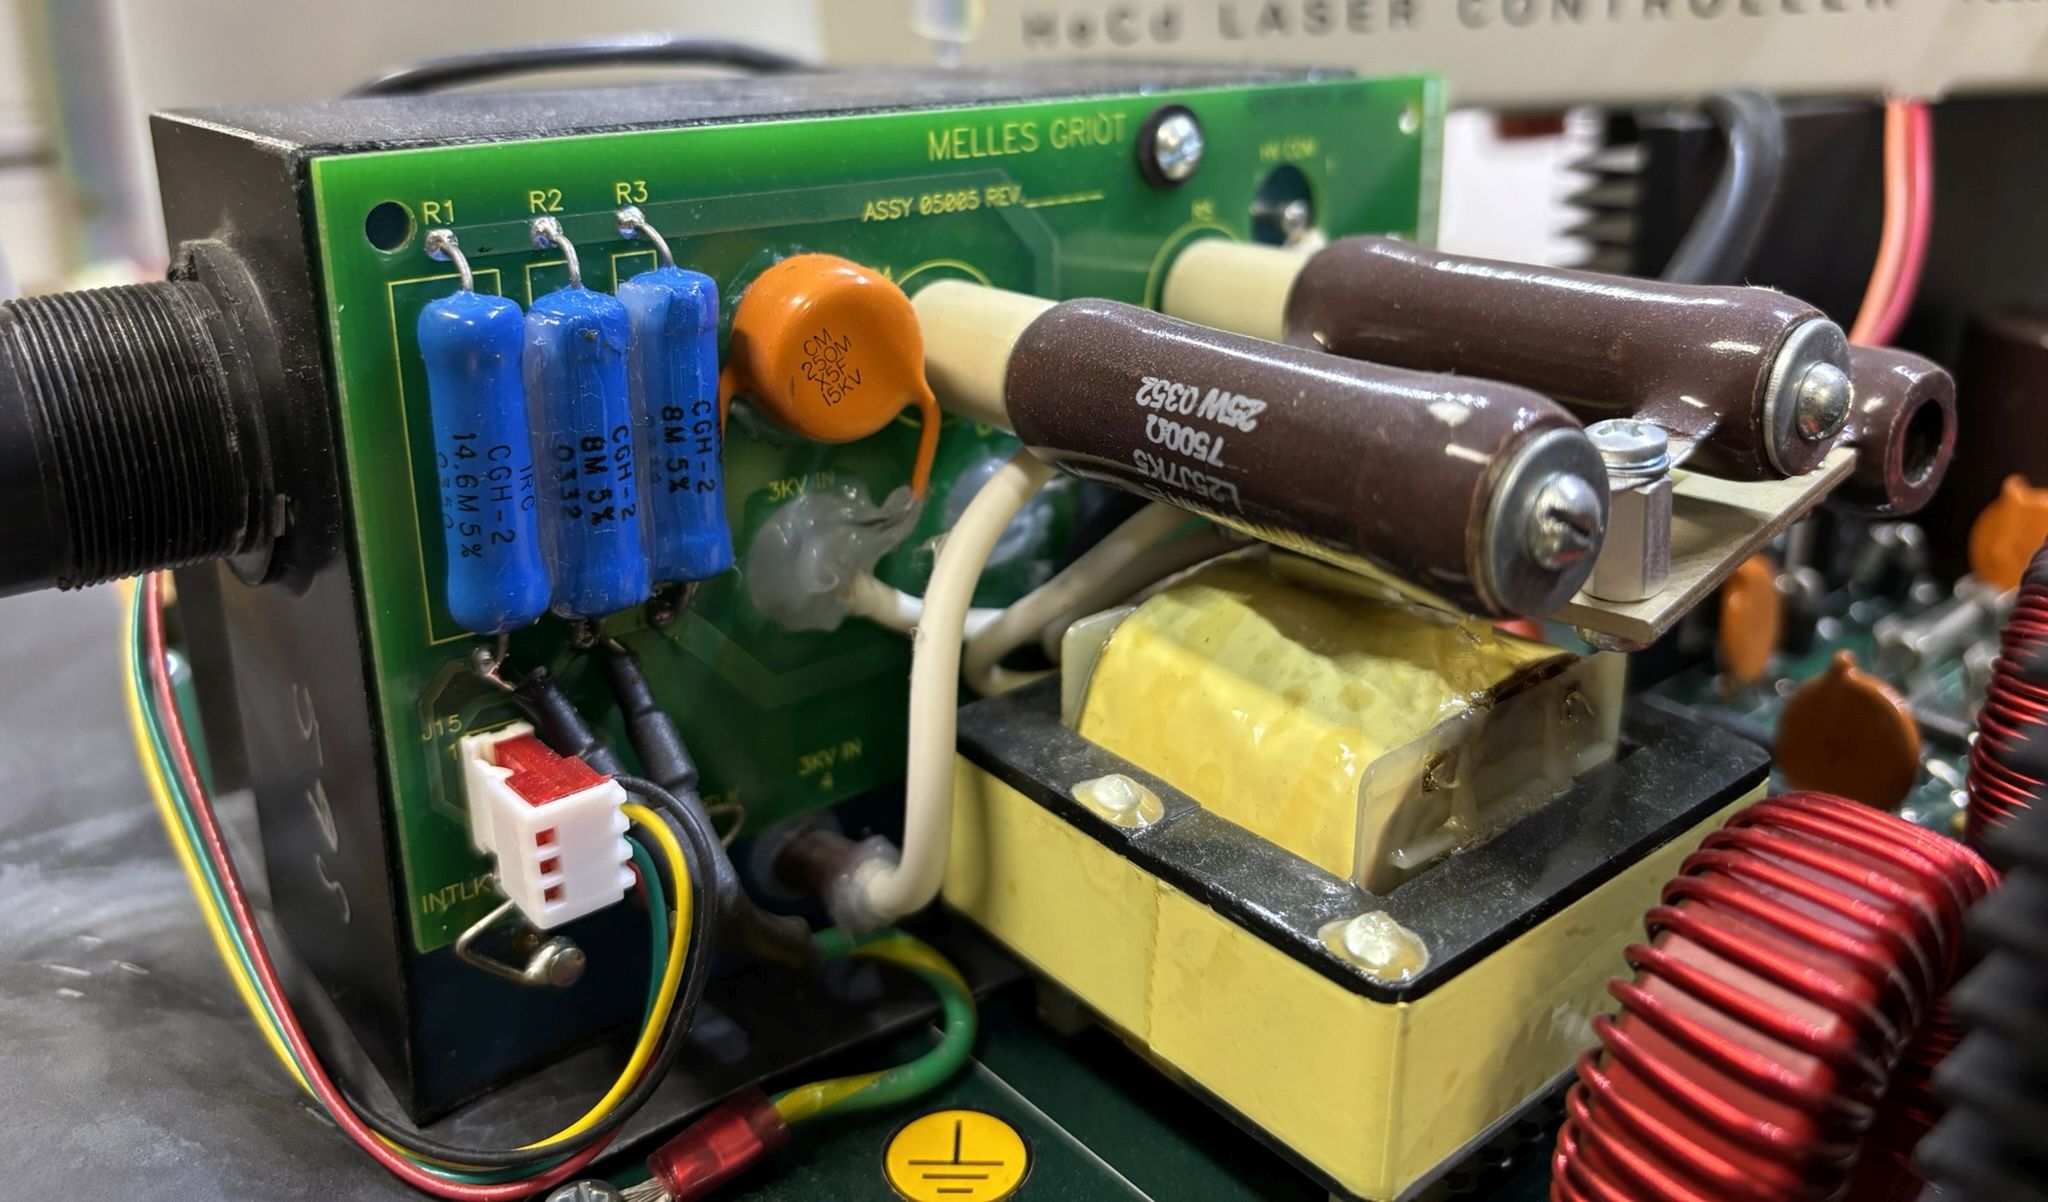
This is the high voltage module and section of the LC-500 power supply. It's primarily a potted module with the HV connector bonded to it. This connector is what sticks out of the front of the case. It has a small board mounted to the side with some large resistors and related circuity.
Remote Controller
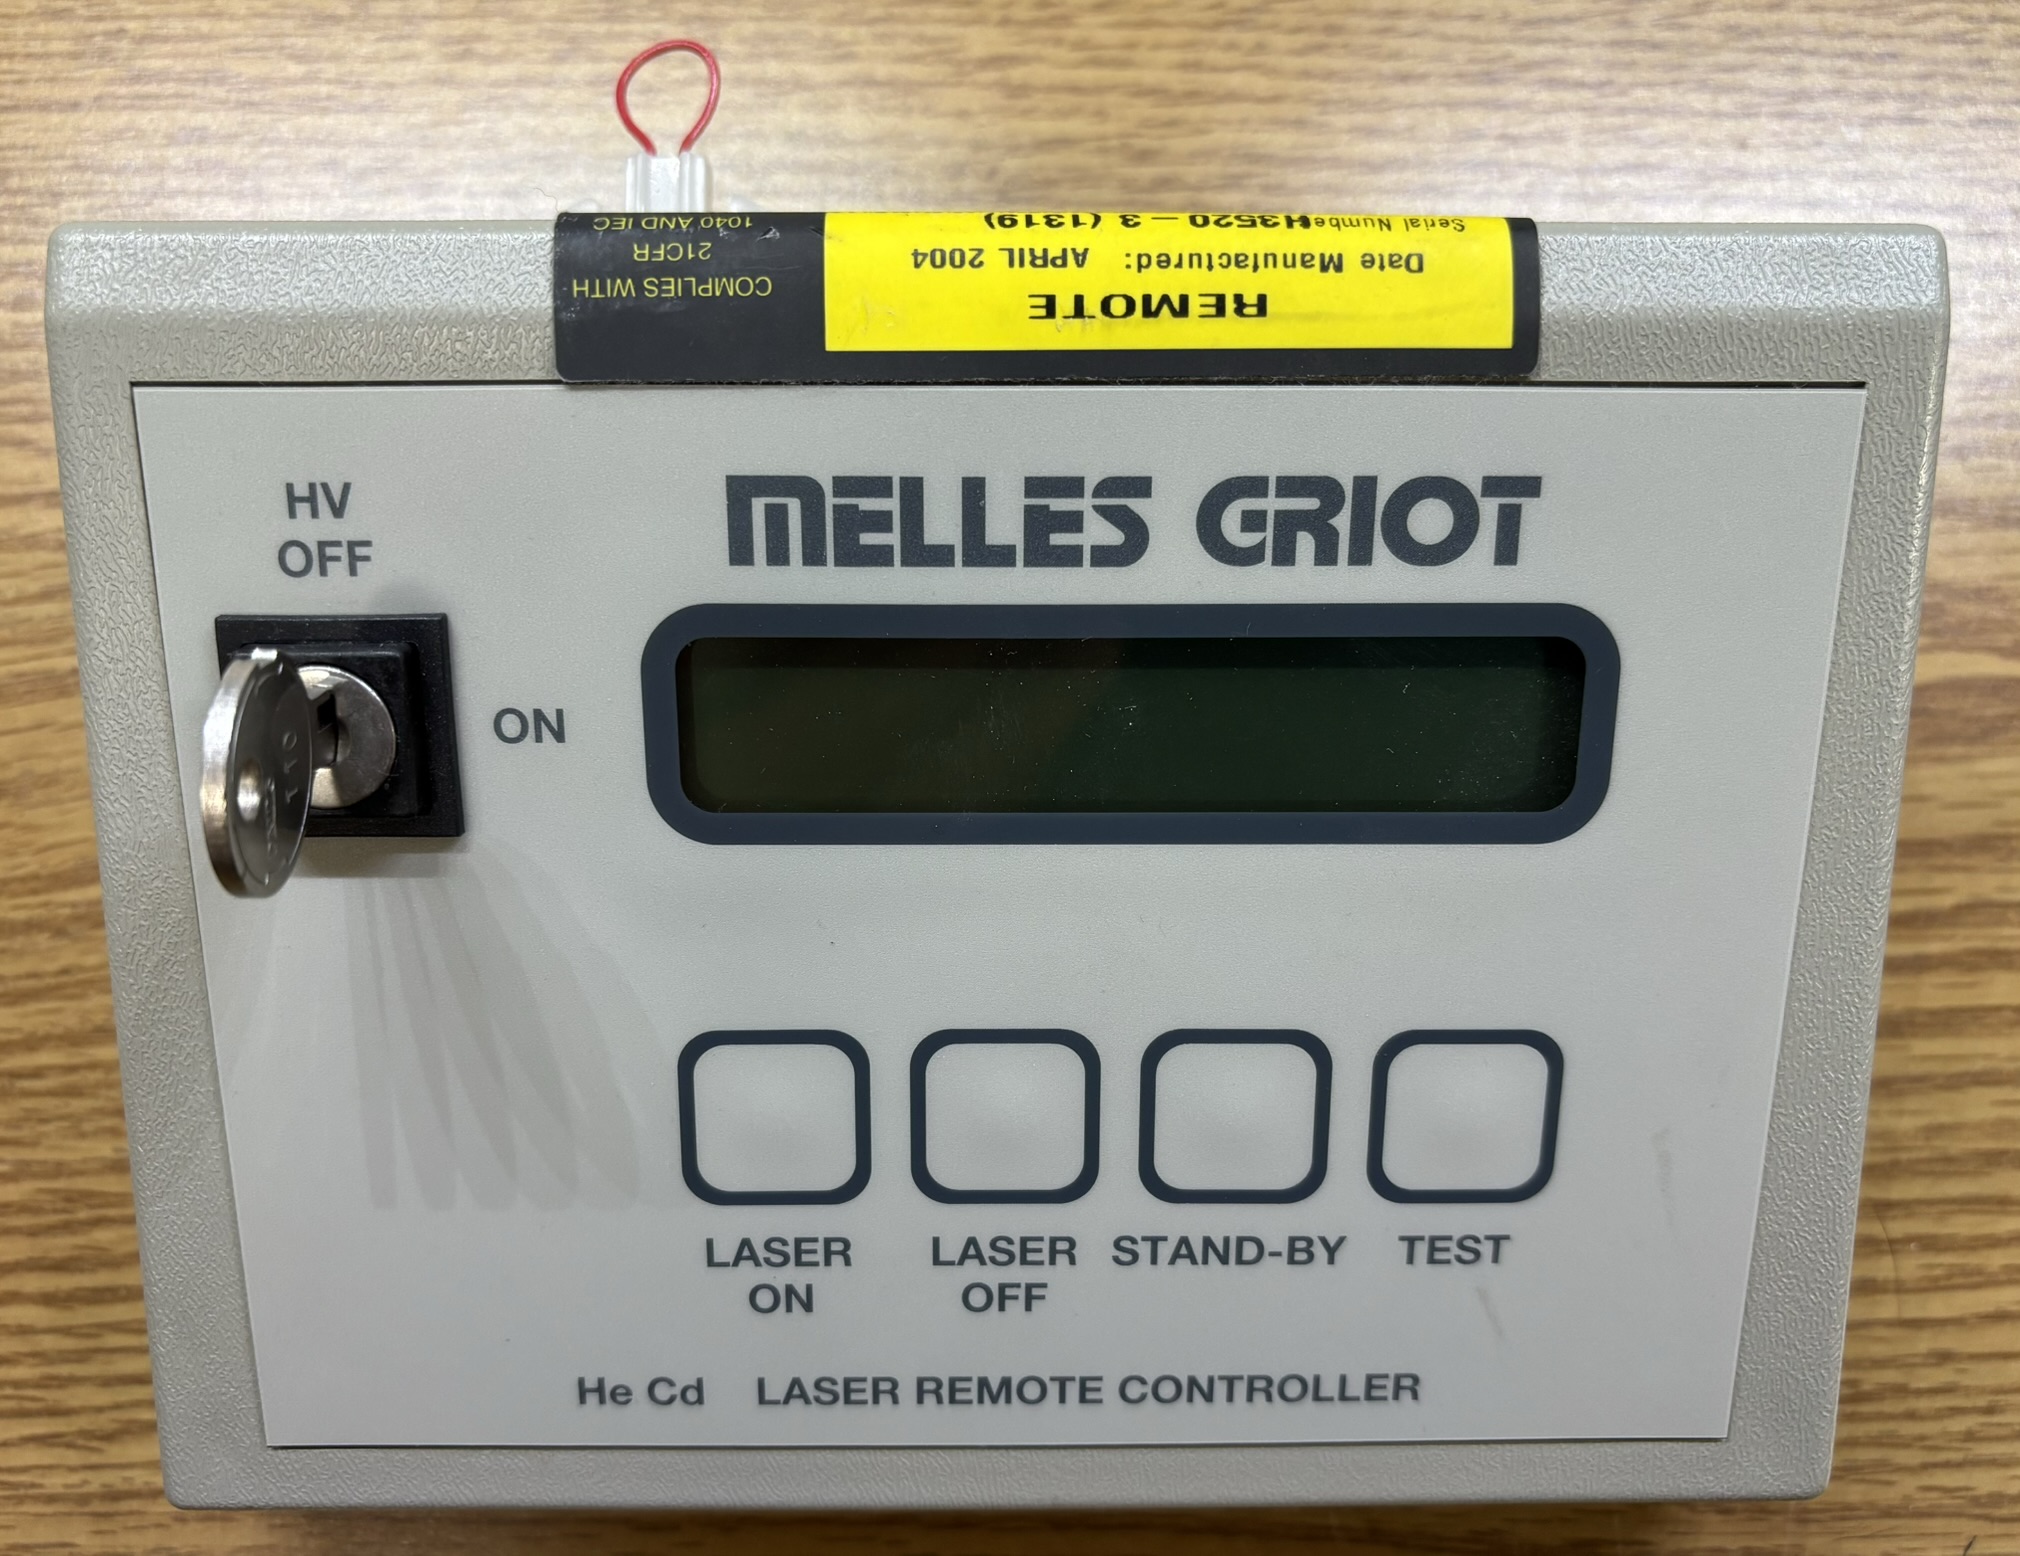
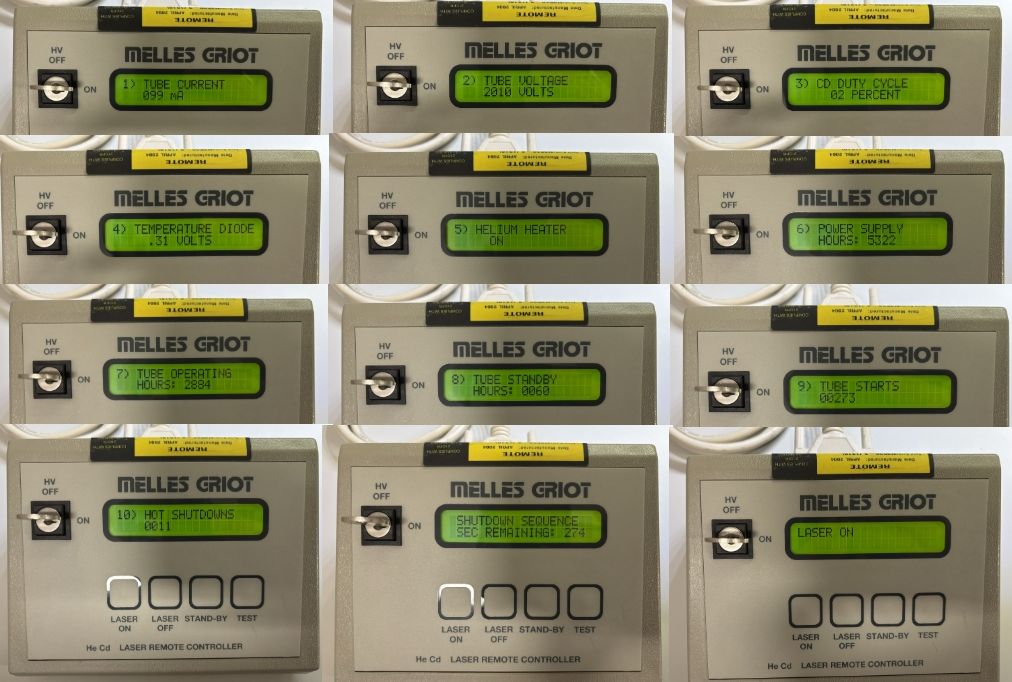
The Omnichrome remote controller is typically used with the LC-500 power supply to operate the laser system. It connects to the DB-25 "remote" connector of the LC-500. We have not yet obtained a pin-out for this remote connector. Due to the lack of available information combined with the general lack of interest in HeCd laser systems, this information is scarce. It is likely not worth our time to reverse-engineer the system and construct a pin-out. However, if you are interested in a pin-out for this laser system or the LC-500 controller, please let us know. We are willing to put in the work if you feel you could benefit from this information. The remote controller provides a simple user interface to operate and monitor the laser system. The key-switch labeled HV is part of the interlock chain, but should ONLY be used in emergencies to immediately shut down the laser system. As we will discuss later, HeCd laser systems require a special shutdown sequence to followed in order to avoid damage. This key-switch must be turned on for the laser to operate and can be safely switched off once the laser has completed the shutdown sequence. The four buttons are the primary means of controlling the system. The "LASER ON" button starts the preheat process, engages high voltage and the cadmium heater and will (eventually) strike the tube and start the system. The "LASER OFF" button initiates the shutdown sequence if the system is running, the shutdown sequence takes about 5 minutes. The "STAND-BY" button will place the laser system into standby mode, which reduces output to near-zero and also turns off the cadmium heater. You can return the laser to normal operation by pressing the "LASER ON" button. Lastly, the "TEST" button simply cycles between 10 different operating parameters (displayed on screen). Below is a list of the parameters.
1. Tube Current (mA)
2. Tube Voltage (V DC)
3. Cadmium Duty Cycle (0%-100%)
4. Temperature Diode (Forward Voltage)
5. Helium Heater Status (ON/OFF)
6. Power Supply Hours
7. Tube Operating Hours
8. Tube Standby Hours
9. Tube Starts Count
10. Hot Shutdowns Count
Pressing the button repeatedly times will step through each parameter. After about 5 seconds the LCD display return to the current laser status such as "LASER ON".
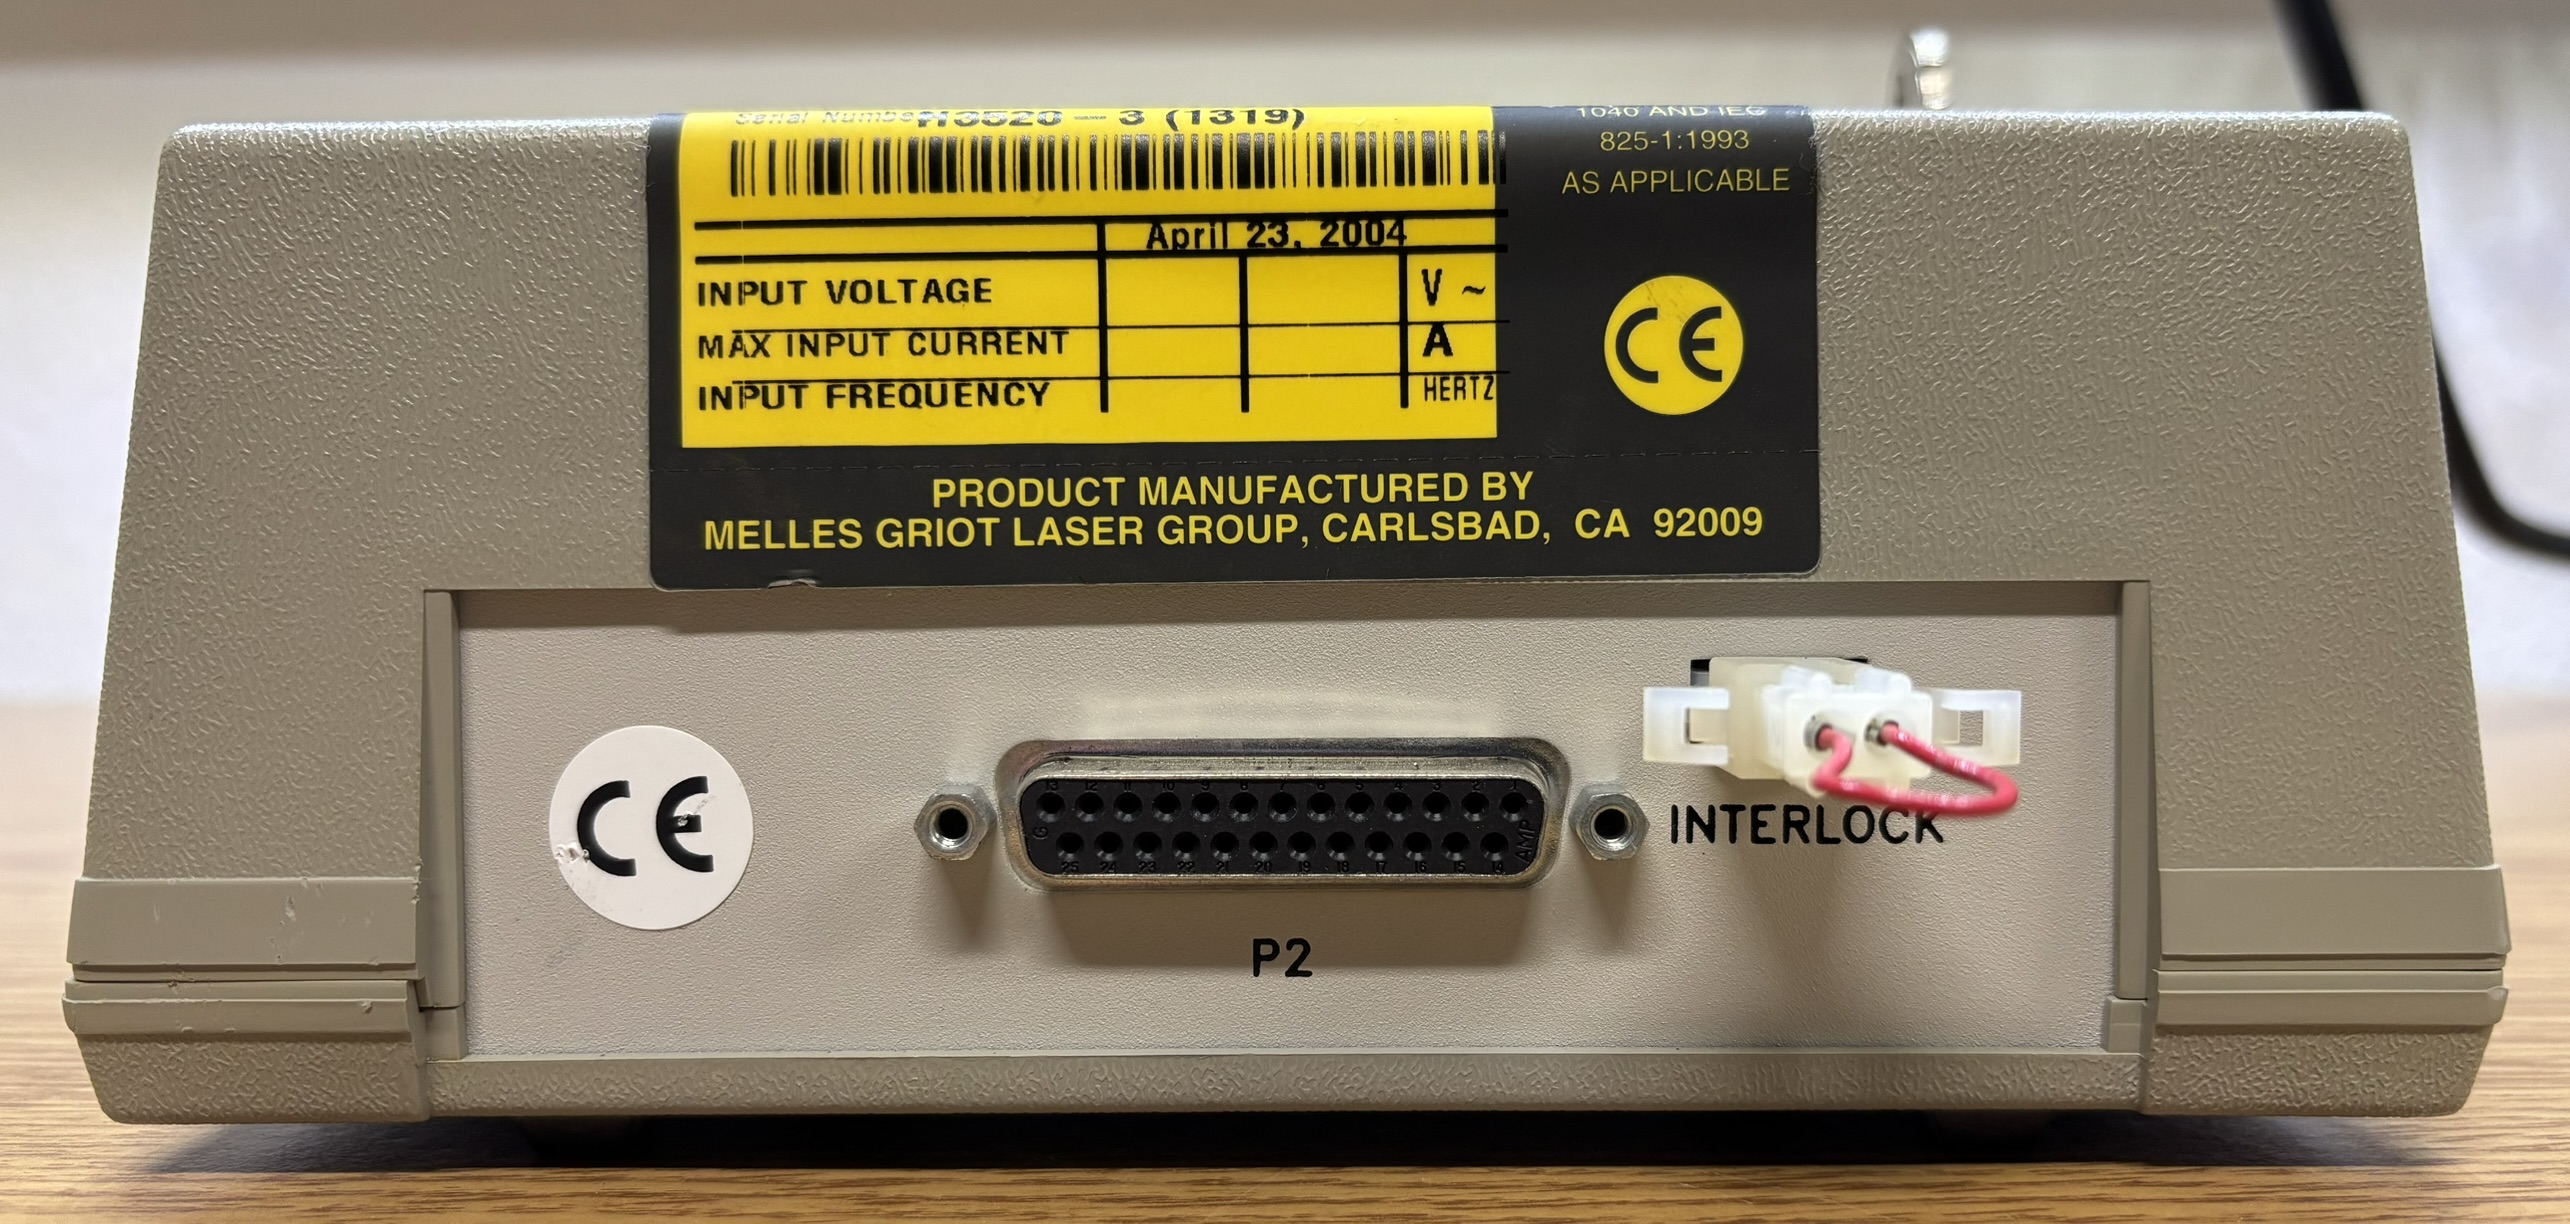
There is not much to see on the back of the controller, just the DB-25 (P2 REMOTE) connector and an interlock jumper. The identification sticker matches that of the laser head and power supply.
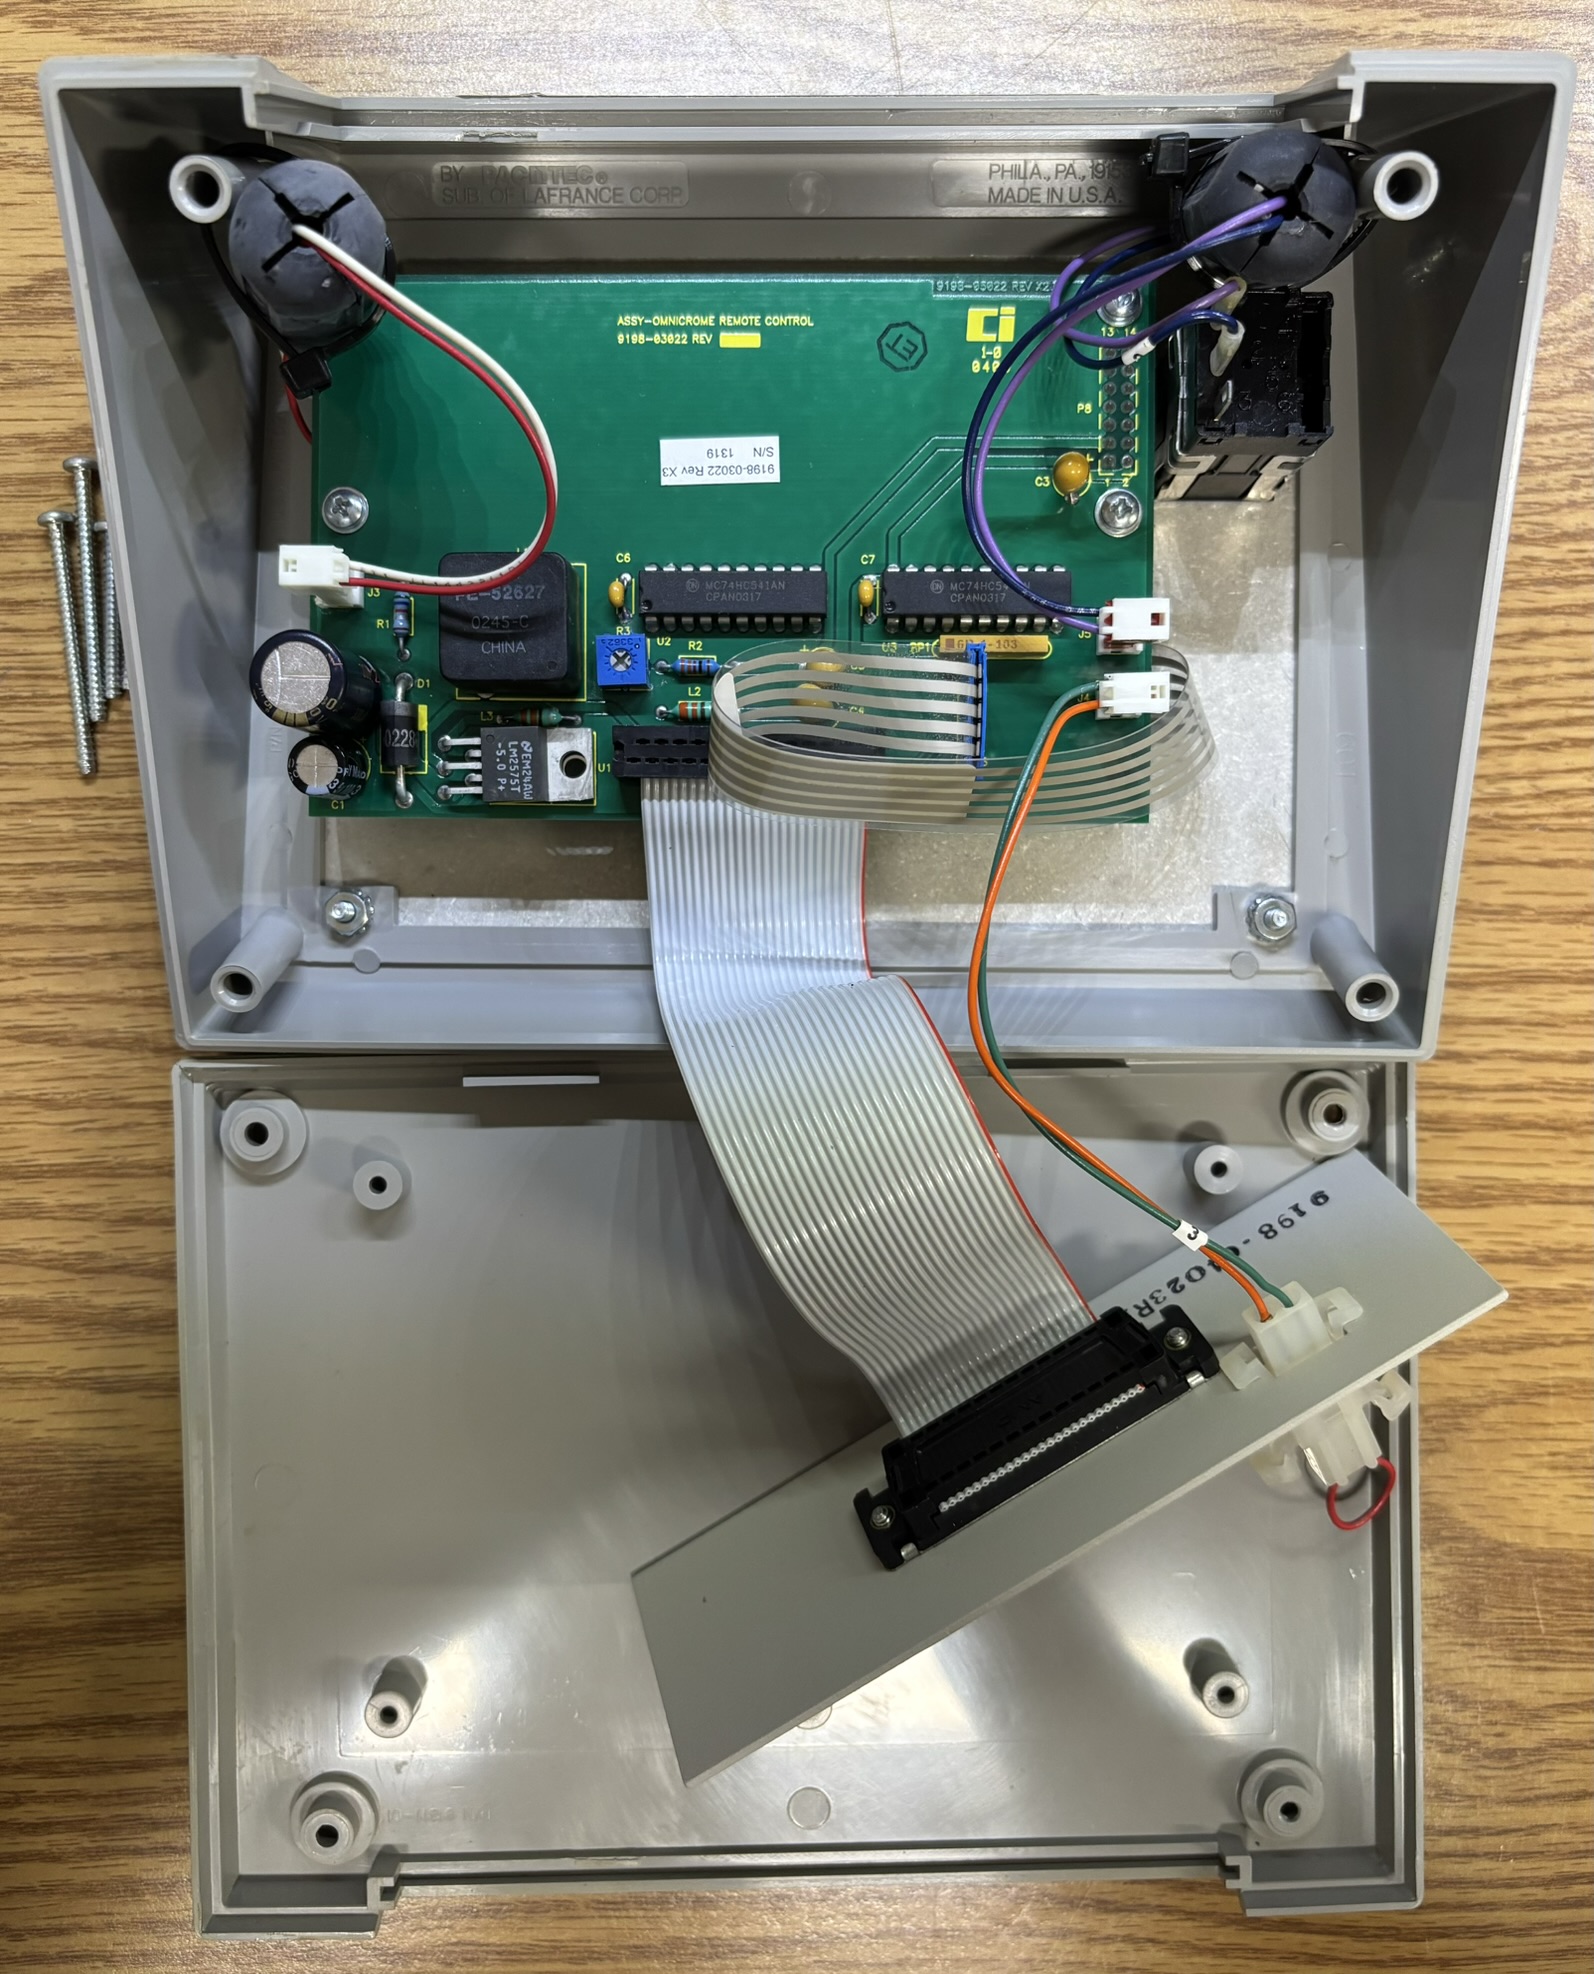
Taking a quick look inside the controller, we can see the connections for the buttons, key-switch, and interface connector along with a small circuit board. The two identical chips on the circuit board are ON Semiconductor MC74HC541A CMOS line drivers/receivers. It is likely that along with power and interlock, a very basic serial interface is used for communication between the remote controller and power supply. There is also some power regulation circuitry on the board. Mounted on the reverse side and connected with a dual row pin header, is the LCD display.
Below is a collection of images taken of the controller displaying various statuses and parameters. The majority of the images below were taken while the cadmium re-melt procedure was in progress, so these may not necessarily indicate typical operating parameters of this laser system.
HeCd Laser Operation: Important Notes!
Shutdown Sequence: A very important detail to consider when operating a Helium Cadmium laser system is the shutdown procedure. You CANNOT just turn off or unplug a HeCd laser (yes some manufacturers say it's fine but you really shouldn't). You need to follow the proper shutdown procedure recommended by the manufacturer, and often also built into the power supply and controller. In the case of this Omnichrome system, to shut down the laser, you would press the LASER OFF button on the controller. This shuts off the cadmium heater and will generally suspend lasing, but then starts a 5-minute timer and shut down procedure. This allows for the Cadmium vapor to re-condense back to a desirable location within the laser tube over a few minutes. This matters because the cadmium can condense and solidify on parts (such as mirrors) within the tube where it can cause problems if power and heat is removed suddenly. At best, this can degrade laser performance, at worst, it can make it no longer functional. This is why some HeCd laser systems have a Cadmium re-melt function. Here is a list of possible scenarios that could result in a hot shutdown
- An unsuspecting lab partner, who is unfamiliar with HeCd lasers, turns off the laser system by the key-switch
- An emergency situation requires that the laser system be immediately shut down using the key-switch or AC power switch
- A power outage causes the system to lose power (consider using a UPS)
Cadmium Re-Melt: You may have noticed that we mentioned a cadmium re-melt procedure several times in this write up. This is a very specific function unique to HeCd laser systems, which serves an important purpose. This feature turns on an auxiliary heater and attempts to re-melt cadmium that has built up in undesirable areas of the tube. The cadmium re-melt function is typically activated by a button on the laser head, usually recessed to prevent accidental activation. When we activated the cadmium re-melt on this laser system, several things happened. Firstly, the re-melt relay within the laser head clicked on, and the LED above the re-melt button illuminated. Next, the laser head fan actually stopped, this is intentional. The re-melt heater was engaged and we noticed a slight burning smell, this is expected. The procedure lasted for about 5 minutes. Once complete, the relay turned back off and the fan was restarted. At this point, the laser returns to normal operation. The cadmium re-melt is not a procedure that should be run frequently, it is only intended as a last resort to (attempt to) revive the system from damage caused by hot shutdowns. We aren't sure what the effects of repeatedly running the cadmium re-melt procedure would be, but we wouldn't recommend it. During the cadmium re-melt on our unit, we noticed a blue glow near the front of the laser head, and it did actually lase for a minute or so, but died out quickly after.
Lack of Output Power Control: Most HeCd lasers do not provide any means of output power control, monitoring, or feedback via a light sensor. Due to the design and operational requirements of the system, a pre-determined output power is the best way to ensure stability of the already sensitive laser system. Therefore, you will likely never see a HeCd laser with an output power adjustment mechanism or even an output power monitoring feature. It's just on or off! (or in standby)
Finding information about Helium Cadmium lasers is extremely challenging due to how uncommon and short-lived they are. There are just not many left in working condition, therefore the interest in HeCd systems is significantly less than many other laser systems. We were able to obtain the laser system and power supply datasheets from the Wayback Machine archive of the Melles Griot website. We have provided direct links to the PDF datasheets below.