To quote the Medtronic website: "The Nellcor bedside SpO2 patient monitoring system, PM100N, provides at-a-glance access to real-time patient respiratory status information including continuous SpO2 and pulse rate monitoring and trending data. The compact monitor can be placed at the patient’s bedside or easily transported using the convenient, built-in handle. With home care and sleep study modes, the PM100N has functionality for non-hospital settings. The system has password-protection to ensure safe utilization by non-clinical users, and the ability to conveniently download data for further data analysis. The monitor incorporates the latest Nellcor digital signal processing technology for accurate, reliable readings even during low perfusion, motion, and other forms of signal interference, as well as SatSeconds alarm management to help distinguish meaningful alarms from transient events."
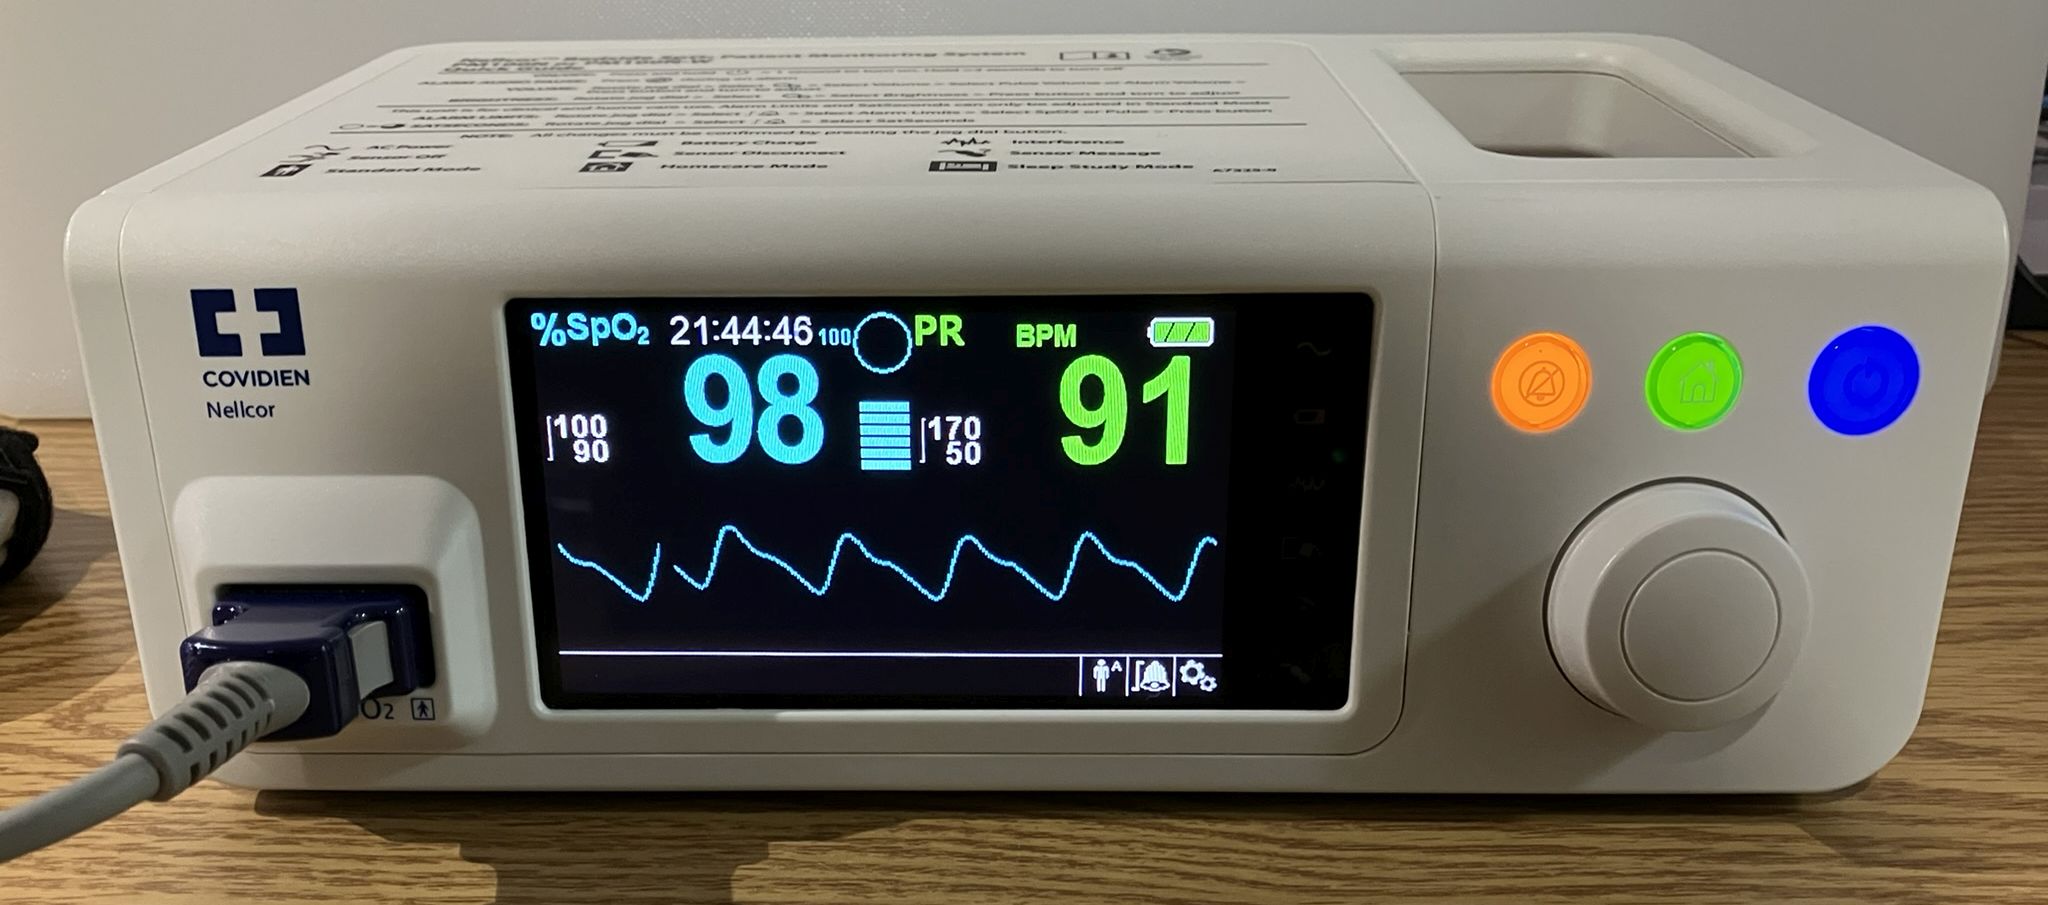
The unit has also has selectable modes for adult, pediatric, and neonatal patients. It can be powered externally using a standard, non-grounded IEC power cable, or by a removable Lithium ion battery. However, it is important to note that the unit will not power on without the battery installed, even when connected to AC power. There is a USB-A port for firmware updates that only becomes active when the unit is placed in firmware update mode. There is also a mini-USB port used for connection to a computer for data download and real-time monitoring. By default, the mini-USB port operates as a USB-to-serial adapter at 19200 baud, ASCII format.
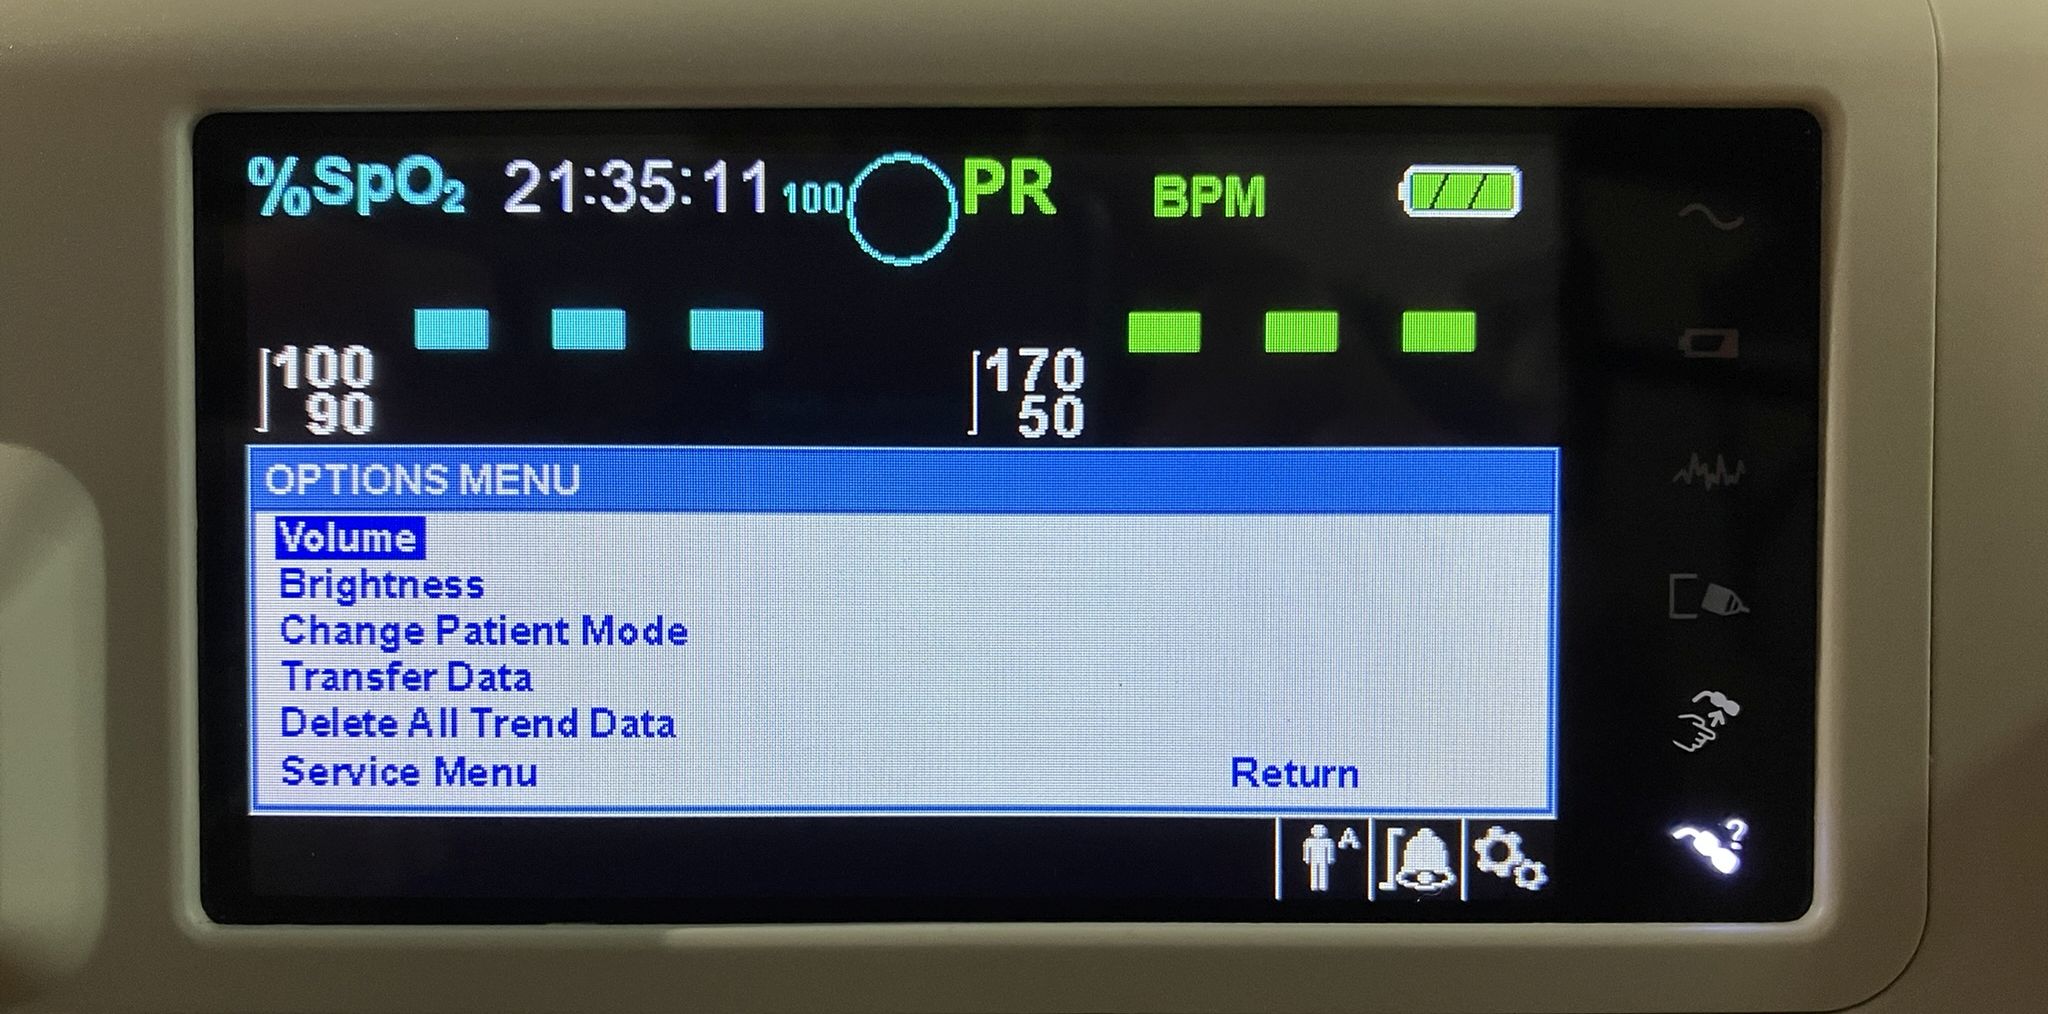
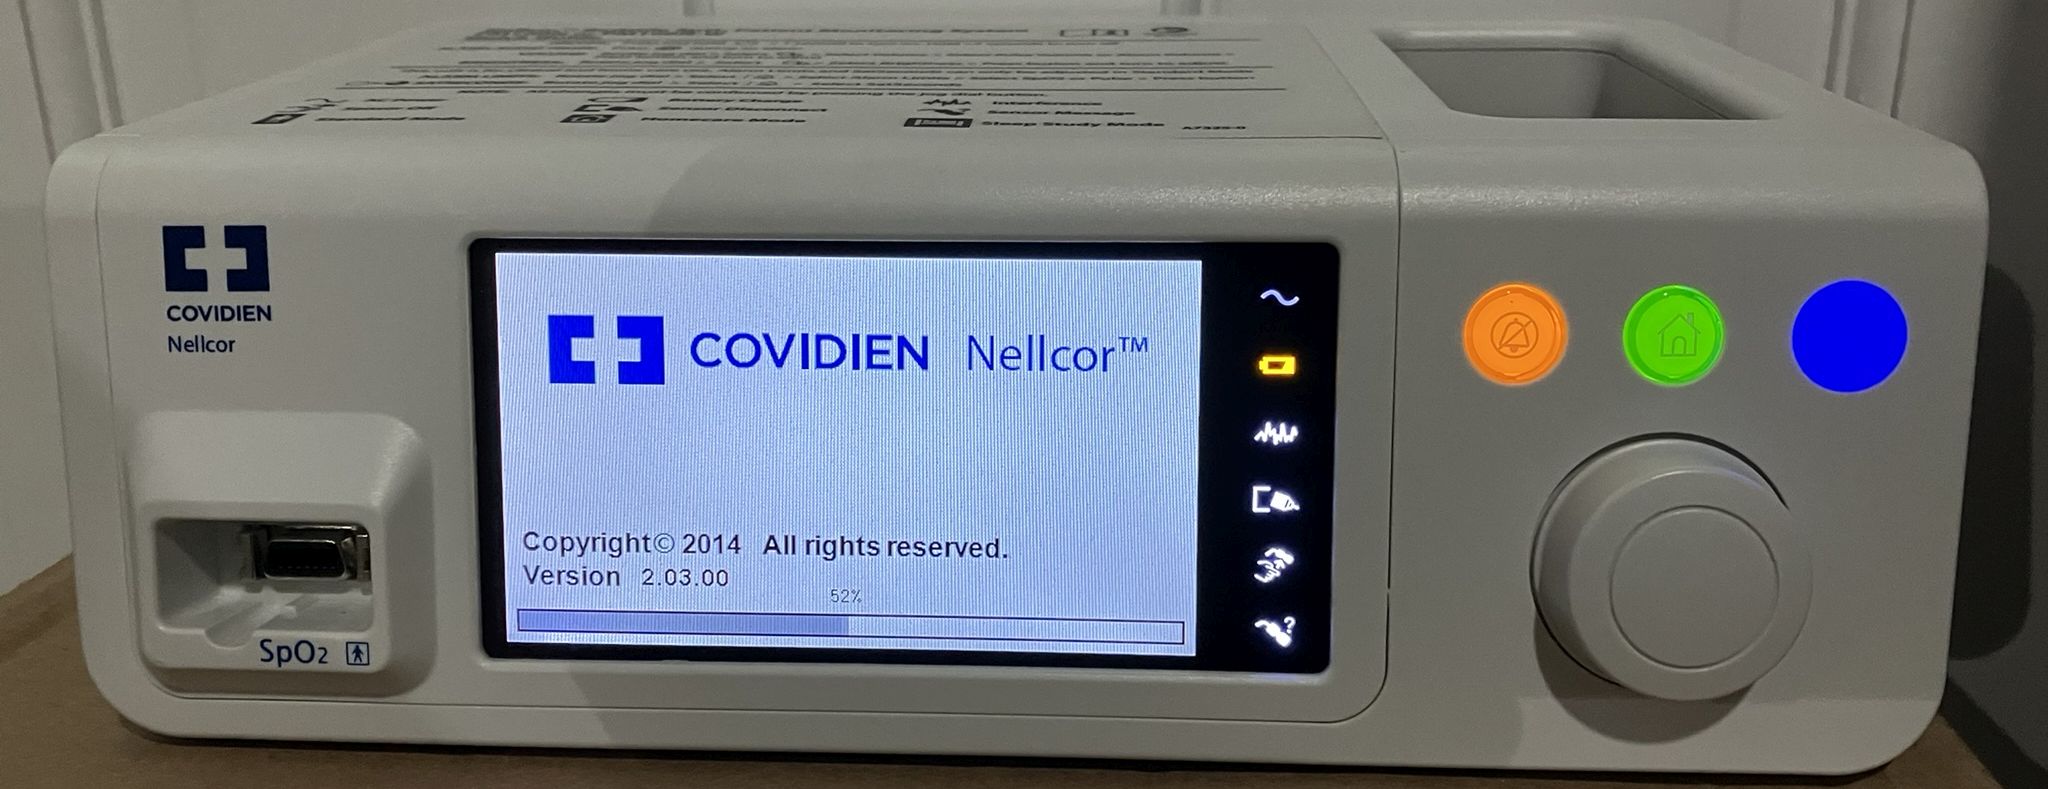
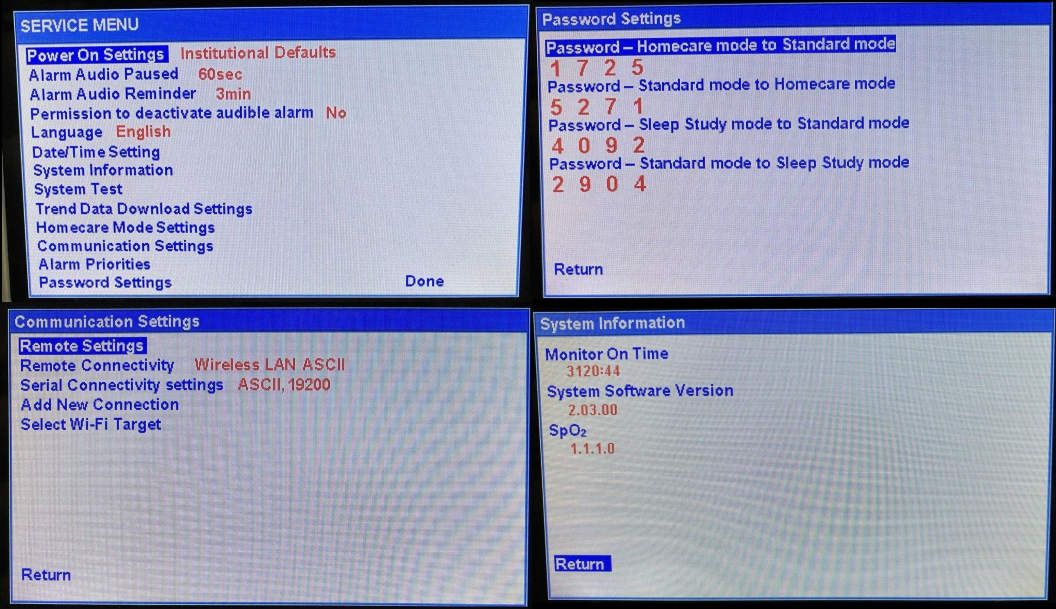
The challenge we faced with this unit was it arriving to us in "homecare mode". This is one of 3 operation modes and is the least useful. In homecare mode, you can only change the most basic settings and limited information is shown on screen. You also cannot access service mode while in homecare mode. This facilitated the need to switch the unit into "standard mode". This is the typical default mode that exposes all features and settings and allows entry into service mode. Switching to standard mode was no easy task as the previous practice that owned this unit had changed the passwords. Also, for some reason the Covidien override and master passwords provided by Medtronic tech support during an hour-long phone call did not work! We took an unconventional approach that certainly voided the unit's warranty! We disassembled the unit to expose and manipulate the electronics inside. Before opening the unit, we removed the power cable, the SpO2 cable and the main battery that keeps the unit running while not plugged into AC power. Upon opening the unit and examining the circuit boards, we immediately noticed a small CR2032 coin-cell battery installed on the main control board mounted to the front of the case. This is similar to a CMOS battery in a computer that provides power for storing low-level configuration settings and is also responsible for keeping the clock running. Originally we were going to remove and replace the battery after leaving it out for a couple of minutes in hopes that it would potentially clear or reset the passwords if they were stored in volatile memory. However, we decided to be slightly more aggressive and power the unit back up without installing the coin-cell battery. Much to our surprise, we were at this point able to transition out of homecare mode to standard mode using the default homecare-to-standard mode password that was provided by Medtronic support. The unit then prompted to delete trend data, which we did as the data is of no use to us. We were now provided with the typical standard mode menu options and display. We went straight for service mode using the service mode password also provided by Medtronic support and were able to access the service menu and settings within. Here we noticed that the power on settings were set to "Institutional defaults". The password settings screen revealed even more interesting information. All of the passwords had been changed to something other than the defaults. This was likely done by the previous institution. We decided to restore factory defaults at this point and power-cycle the unit to get everything to a clean slate. After verifying that it powered up to factory defaults, we re-installed the coin-cell battery and reassembled the unit. After restoring factory defaults, the password settings screen on the service menu reflects the original Covidien default passwords. We set the date and time and were able to get the unit up and running perfectly, with access to all the features and settings! The PM100N bootup/POST screen is pictured below.
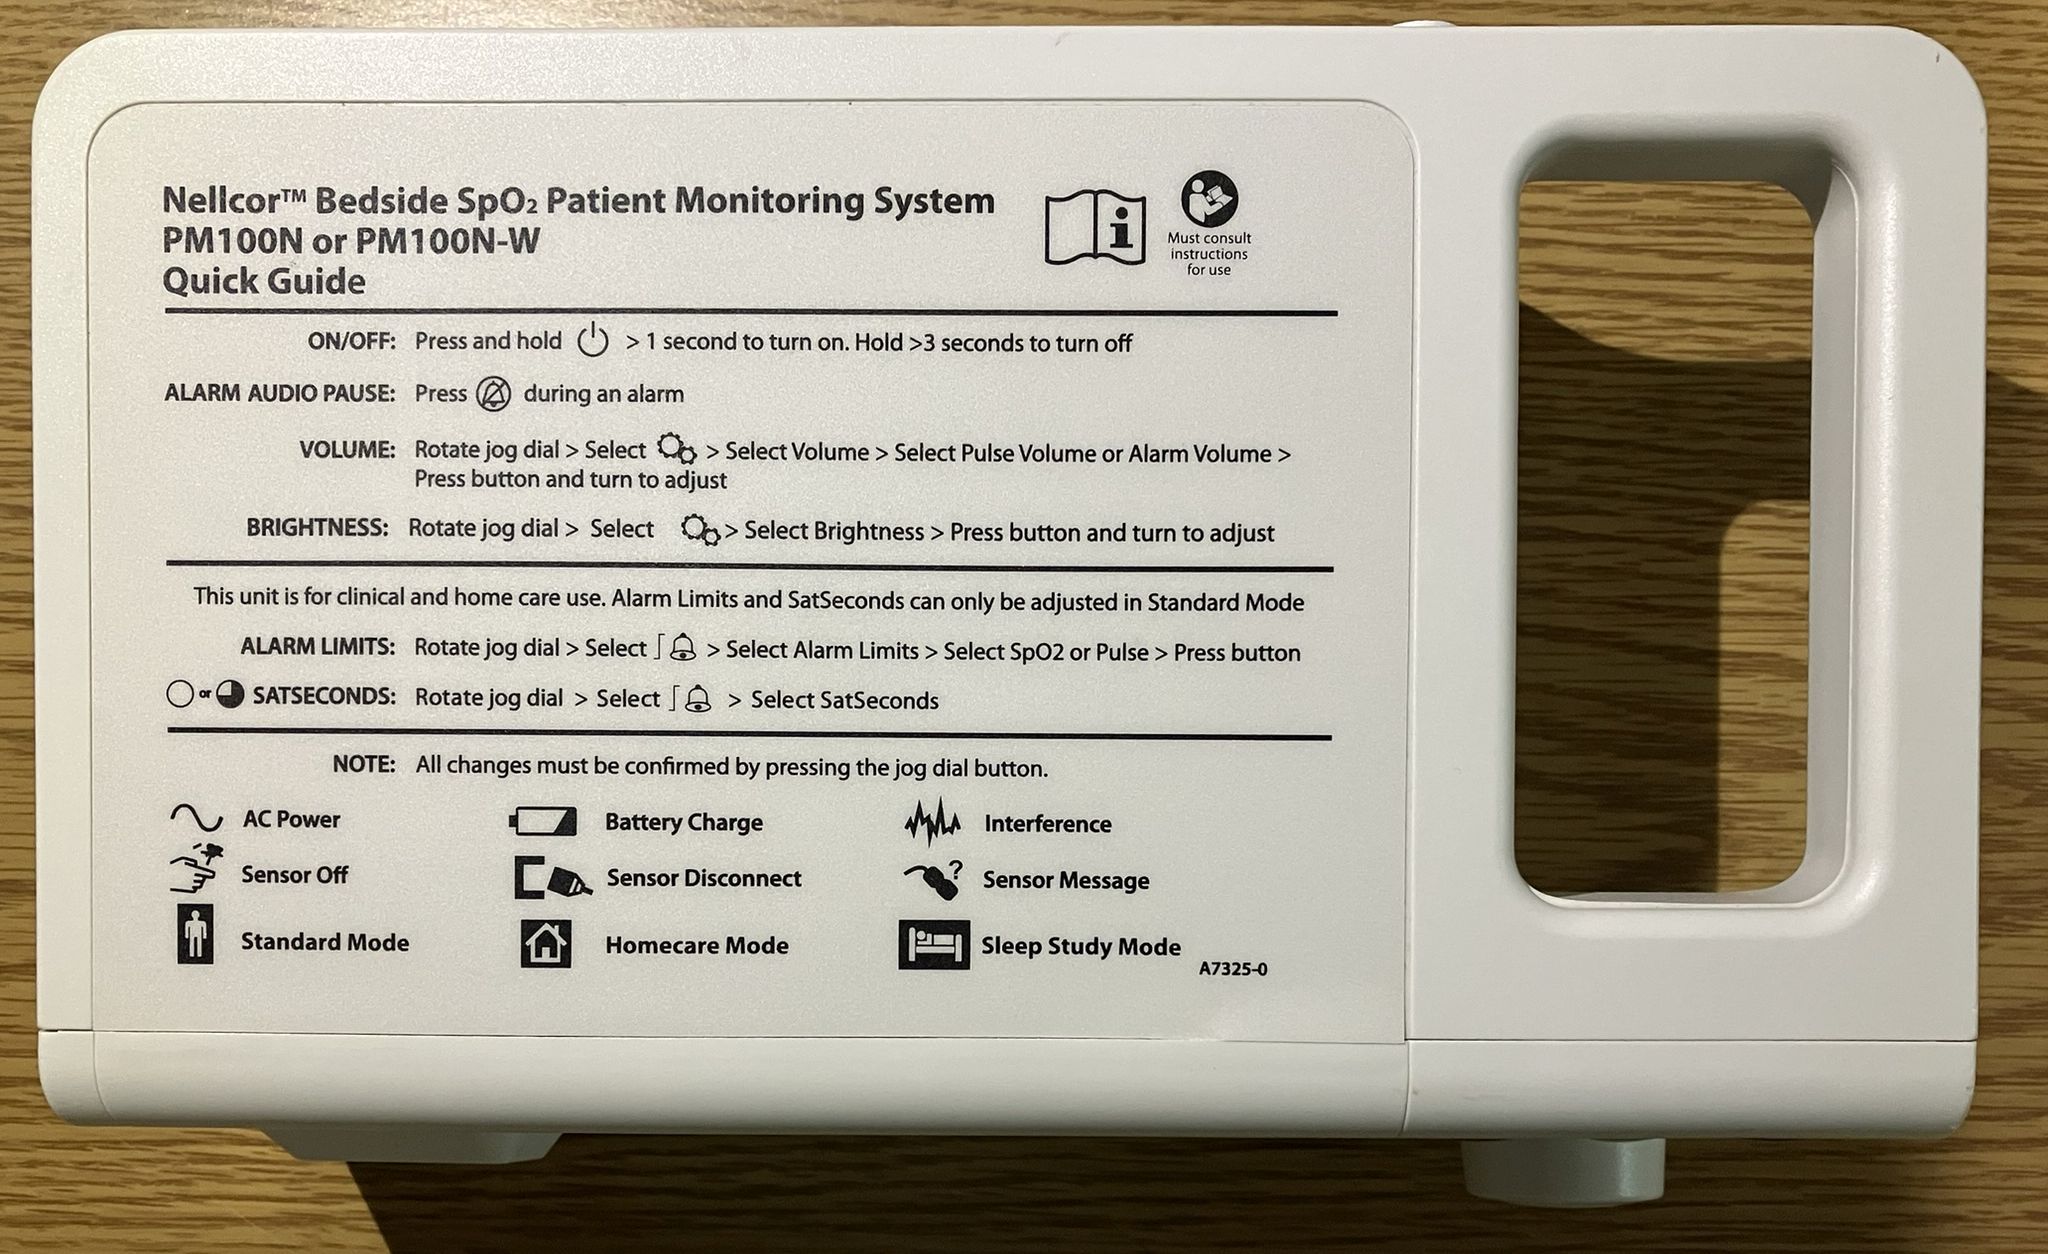
Top of the unit, with instructions and general information sticker. The case is built in such as a way to also act as a carry handle.
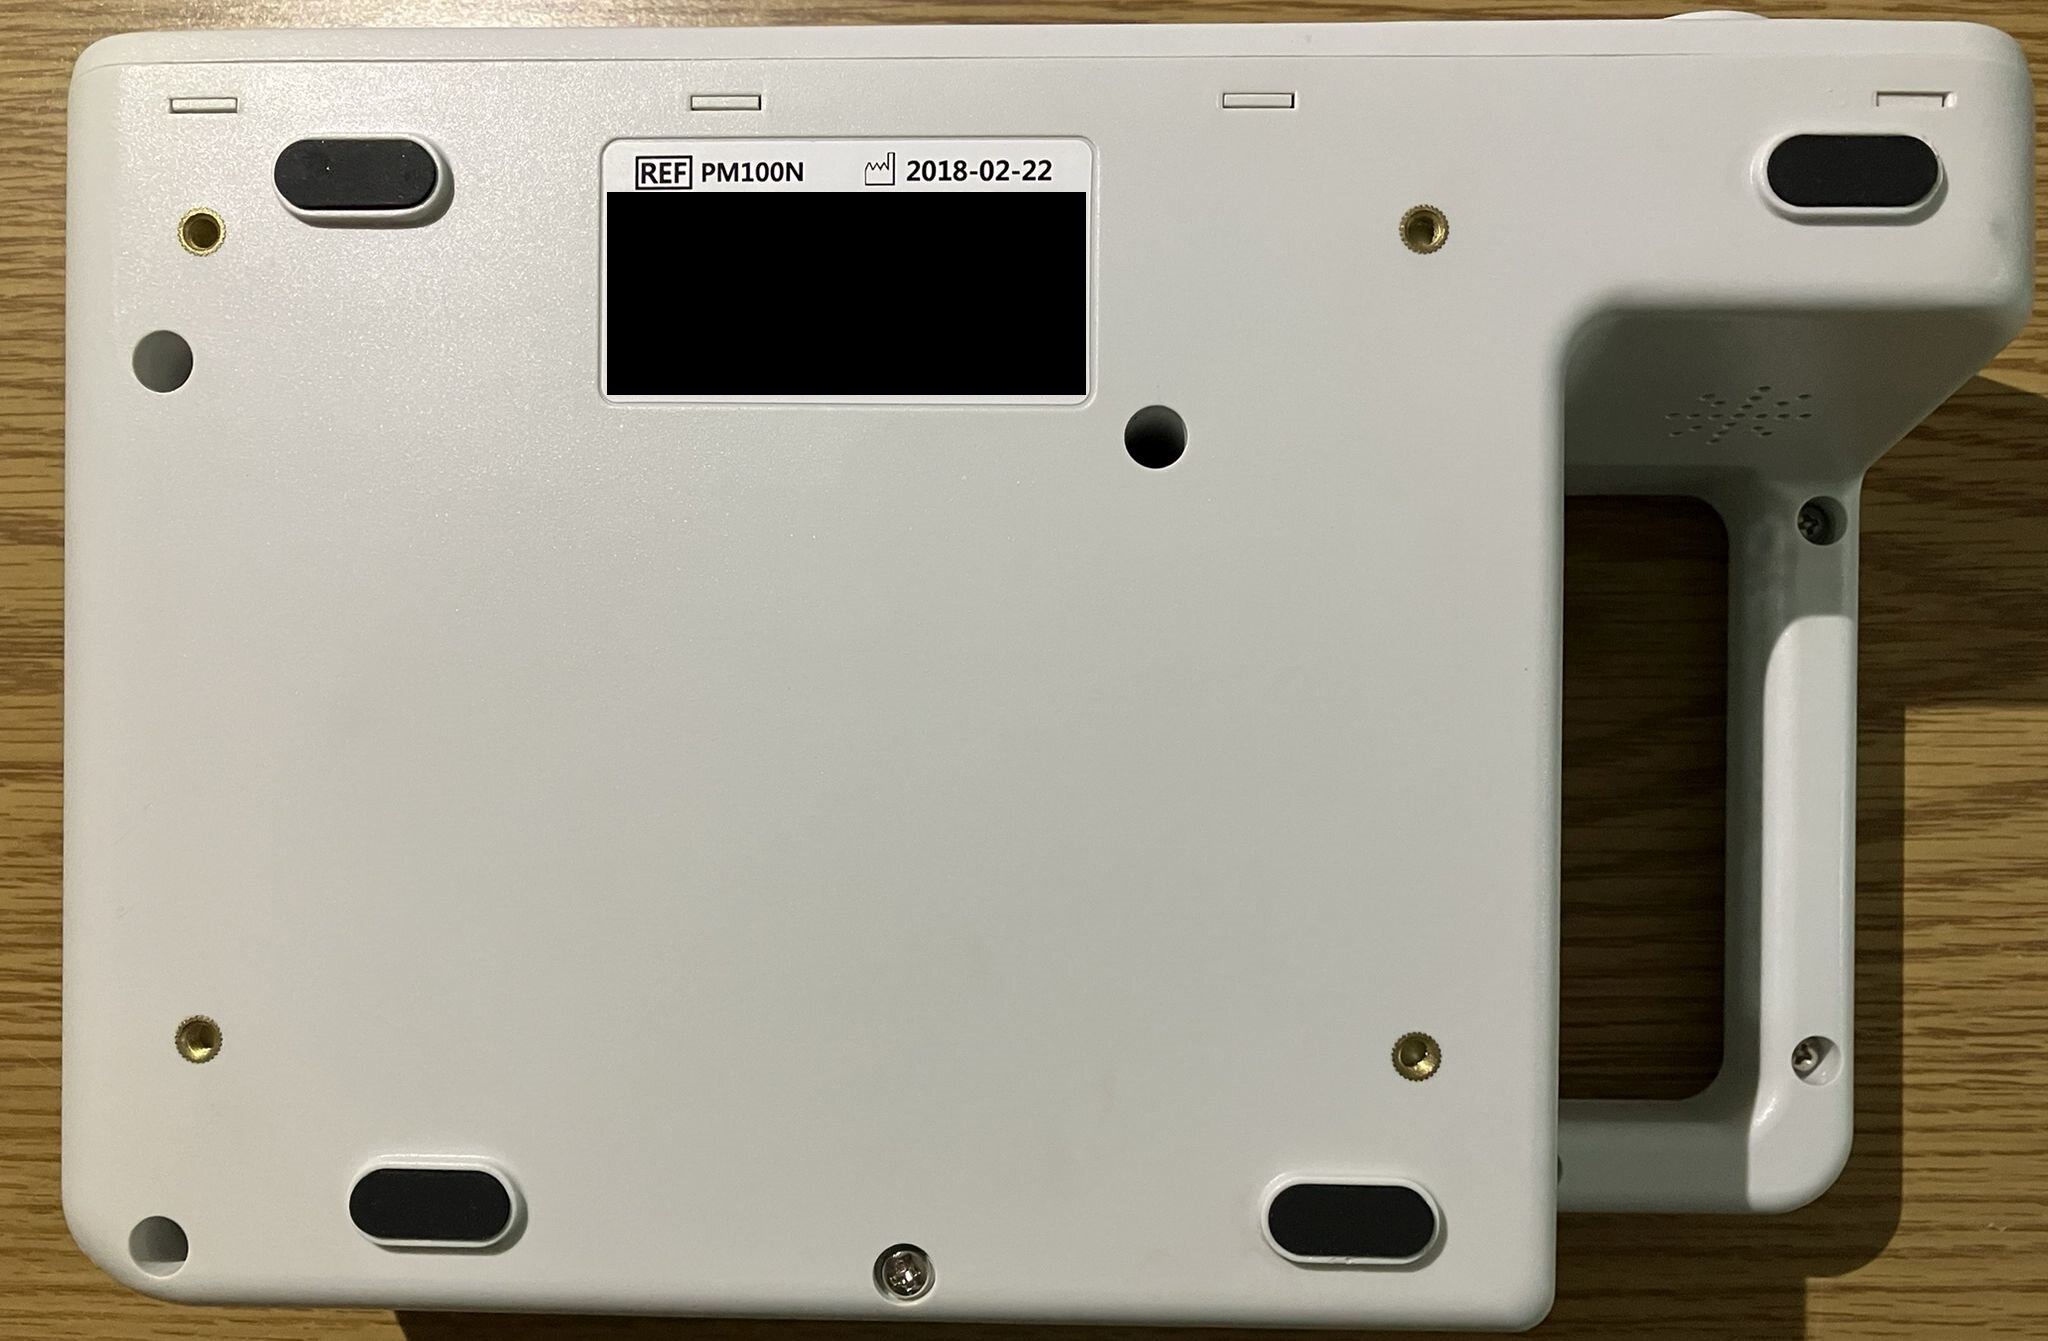
Bottom of the unit with information sticker (serial number obfuscated) and mounting holes for attaching the unit to a mobile cart.
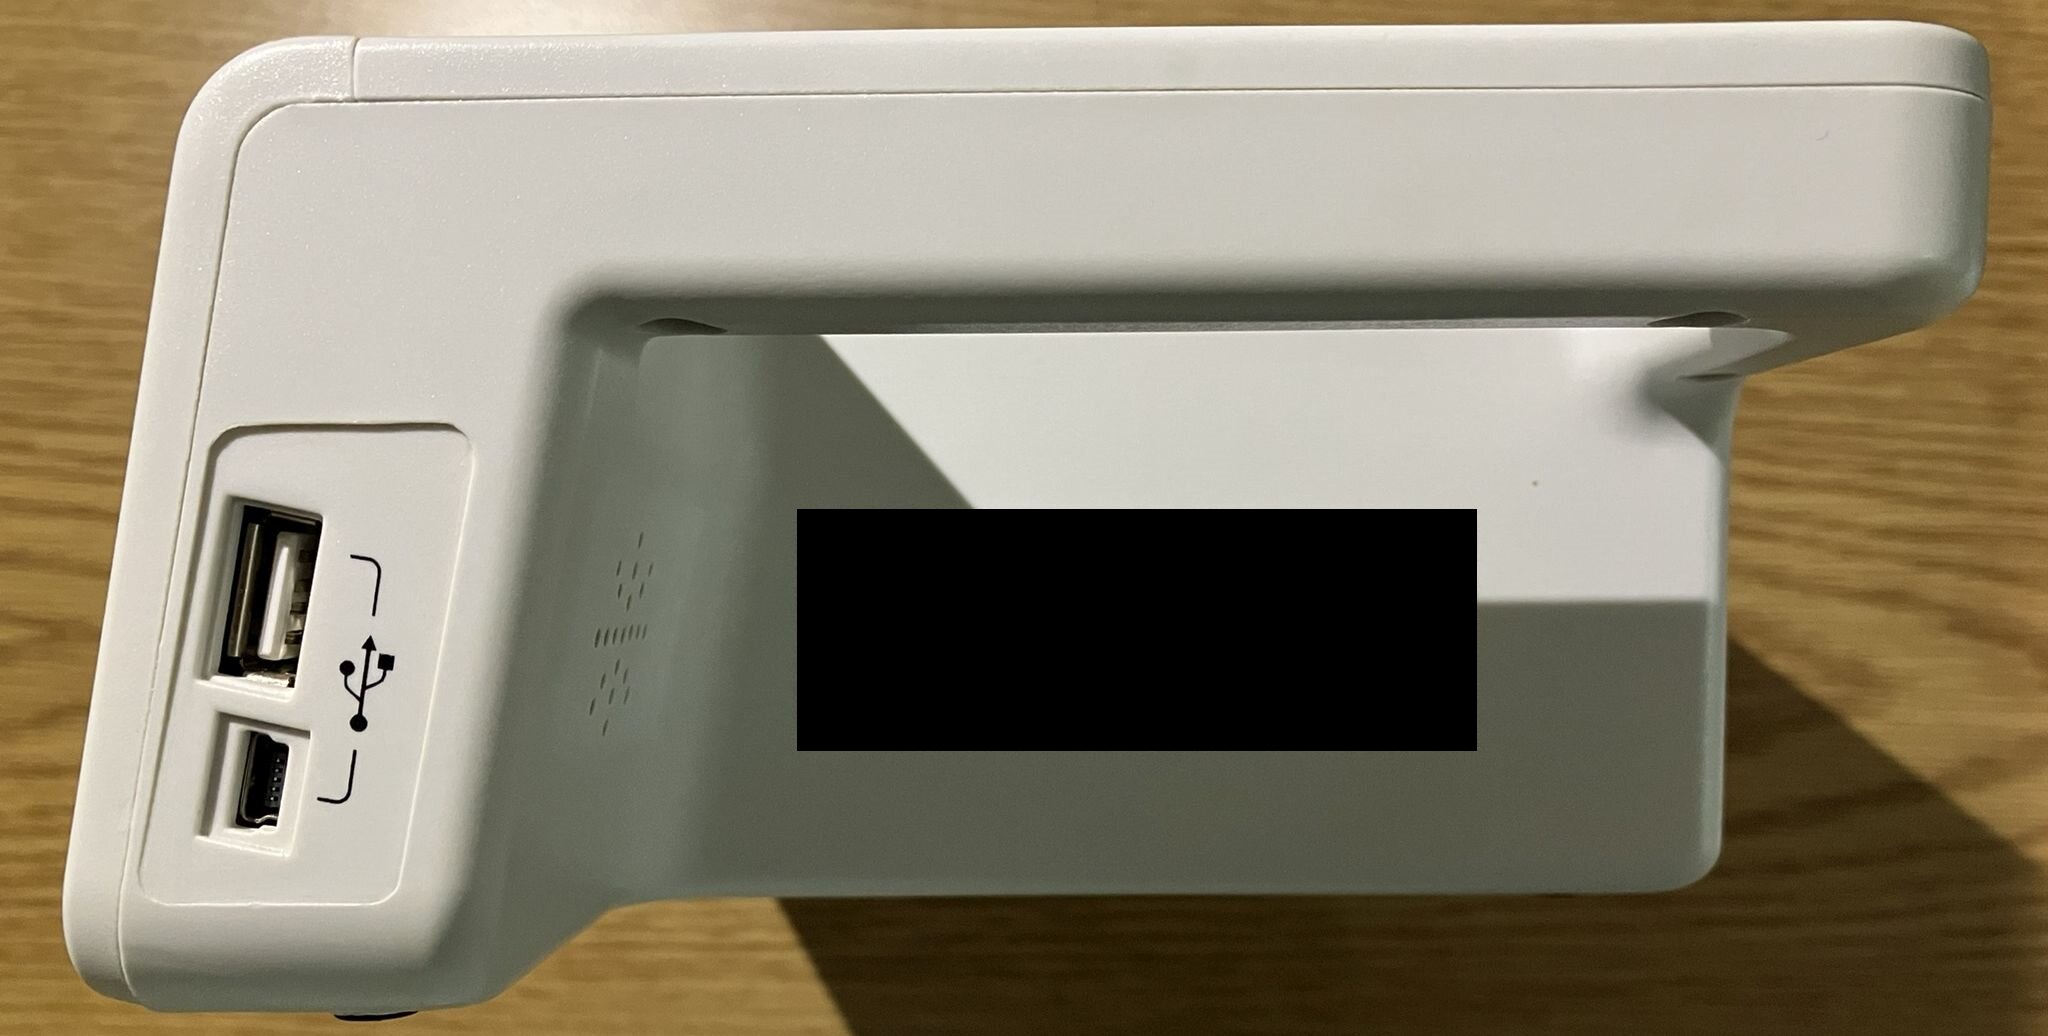
Side of the unit, with USB ports for PC connection (Mini-B) and firmware updates (Type-A). An organization asset information sticker has been obfuscated.
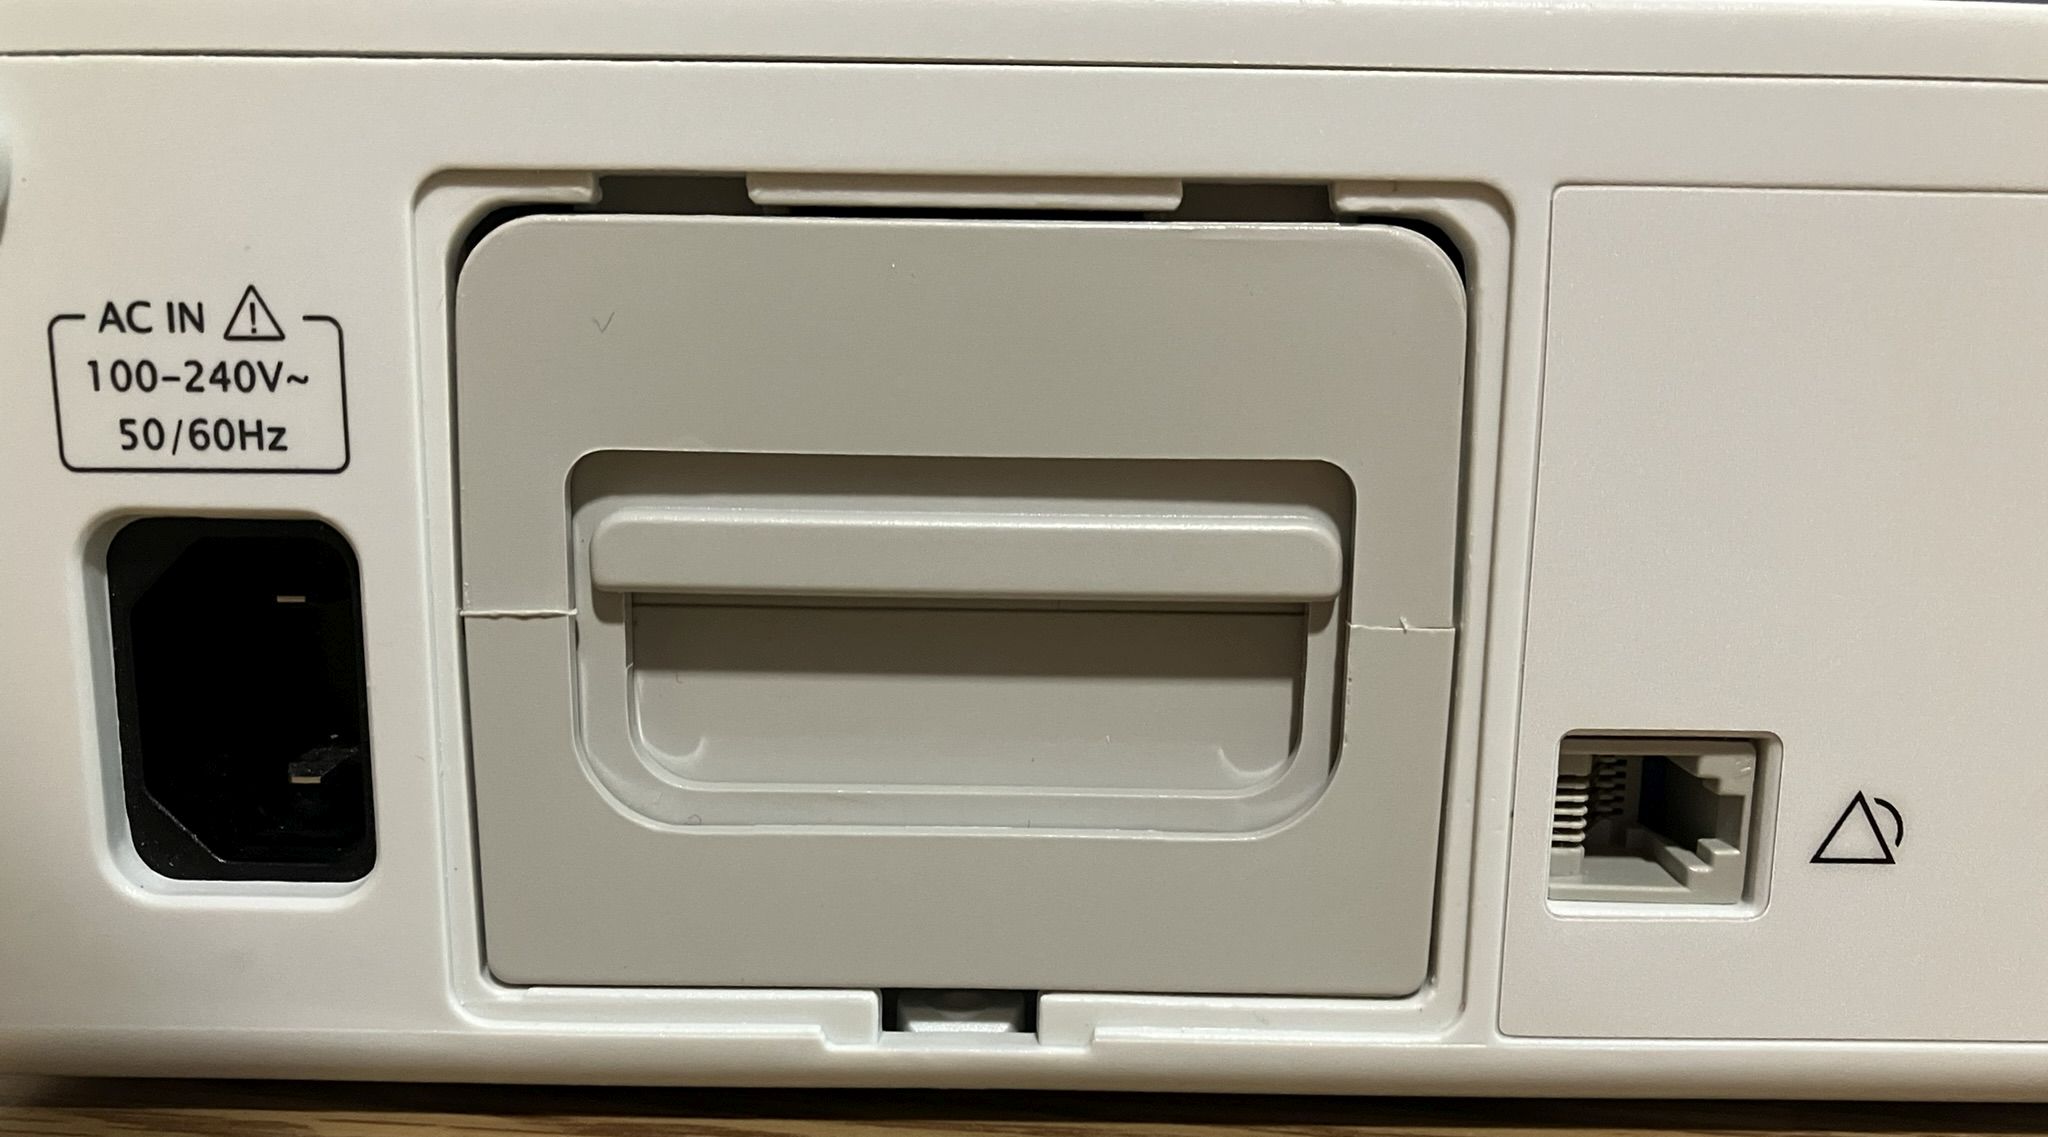
Rear of the unit, showing the ungrounded IEC power connector, RJ-11 port for connection to the nurse call system, and the battery slot with battery currently installed.
Teardown and component analysis
The top cover comes off easily after 6 screws are removed from the bottom of the case, revealing the internal electronics. Surprisingly, no warranty stickers or seals were present.
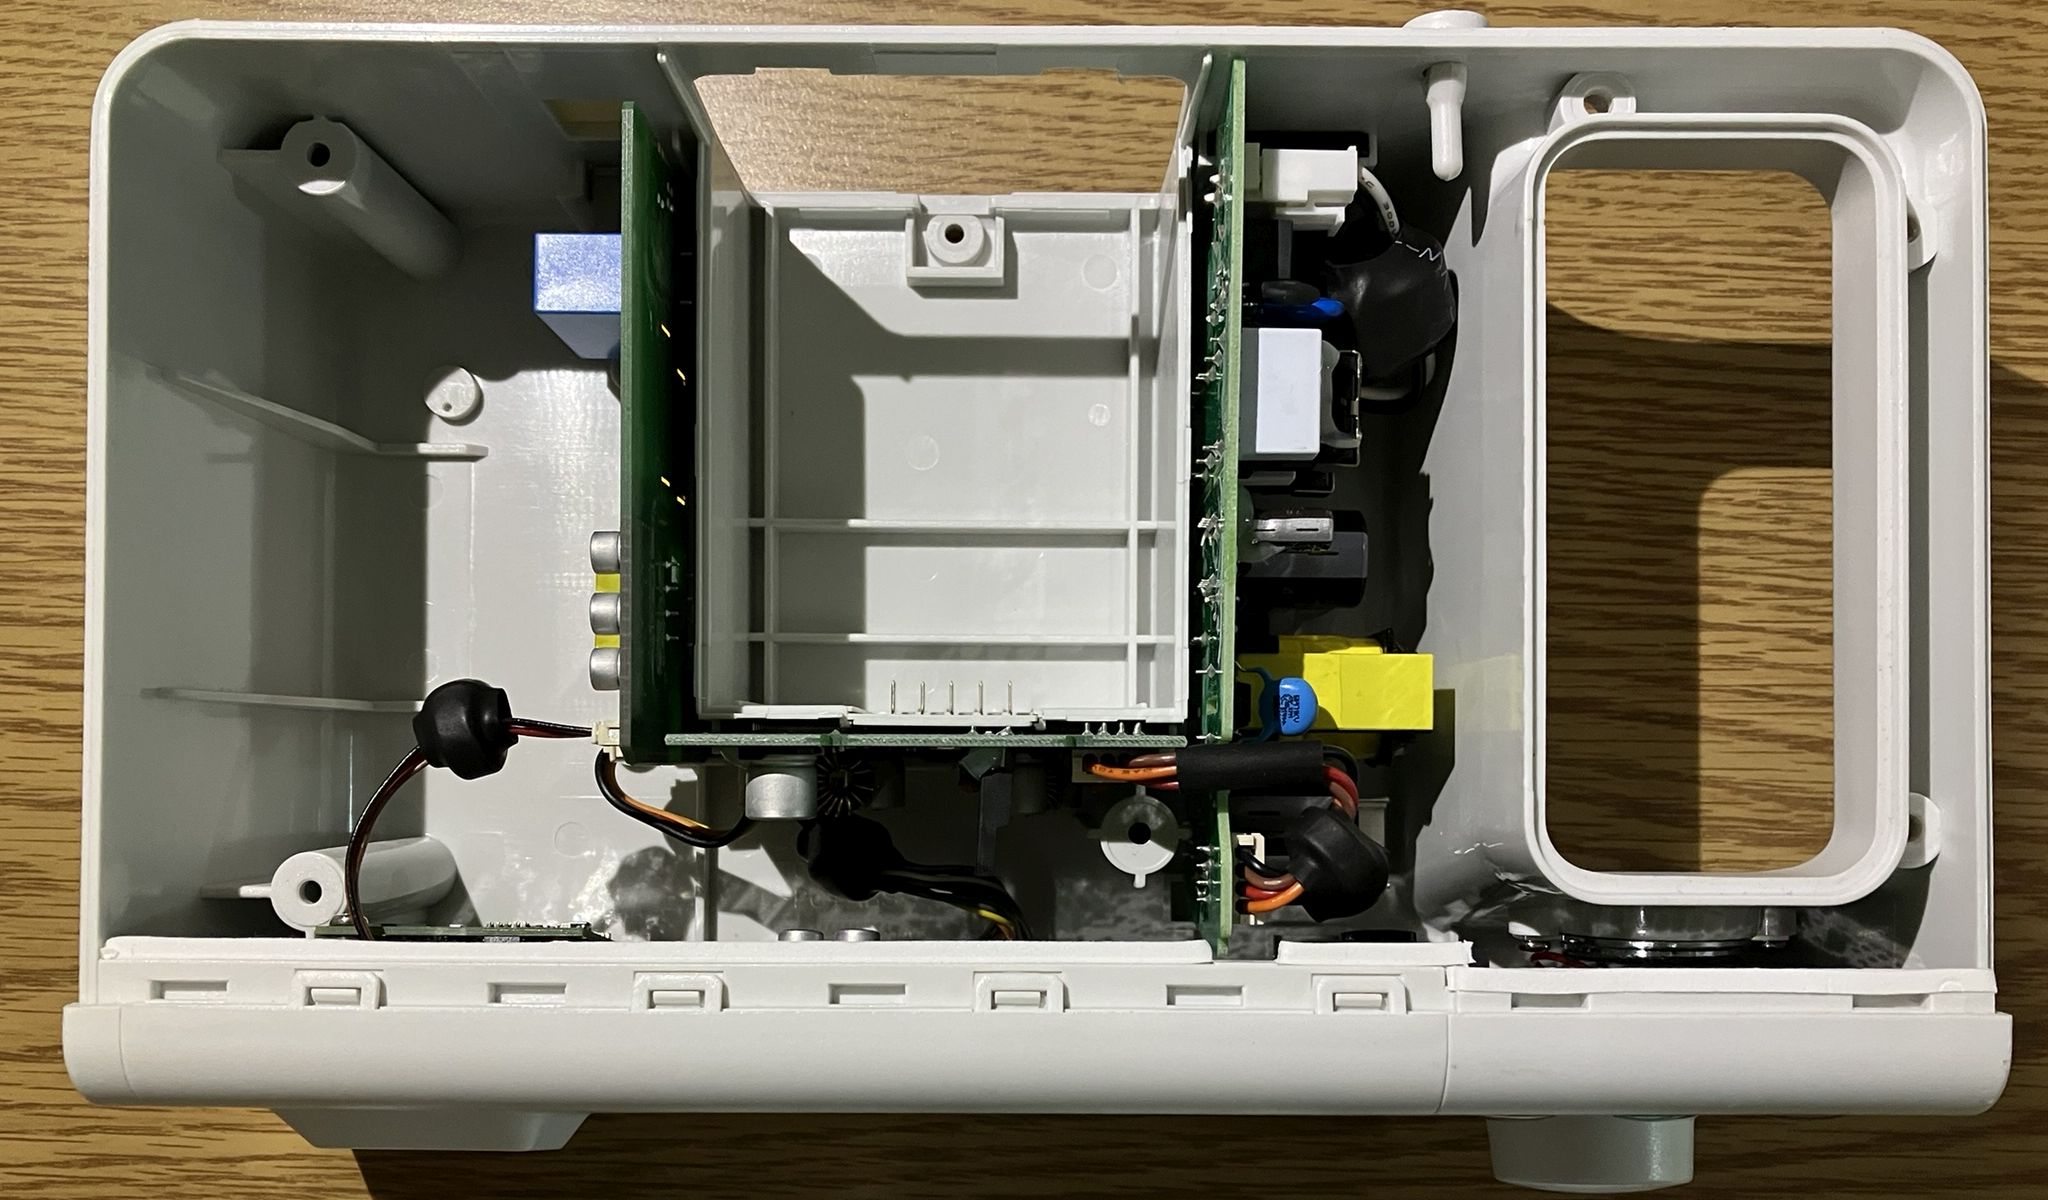
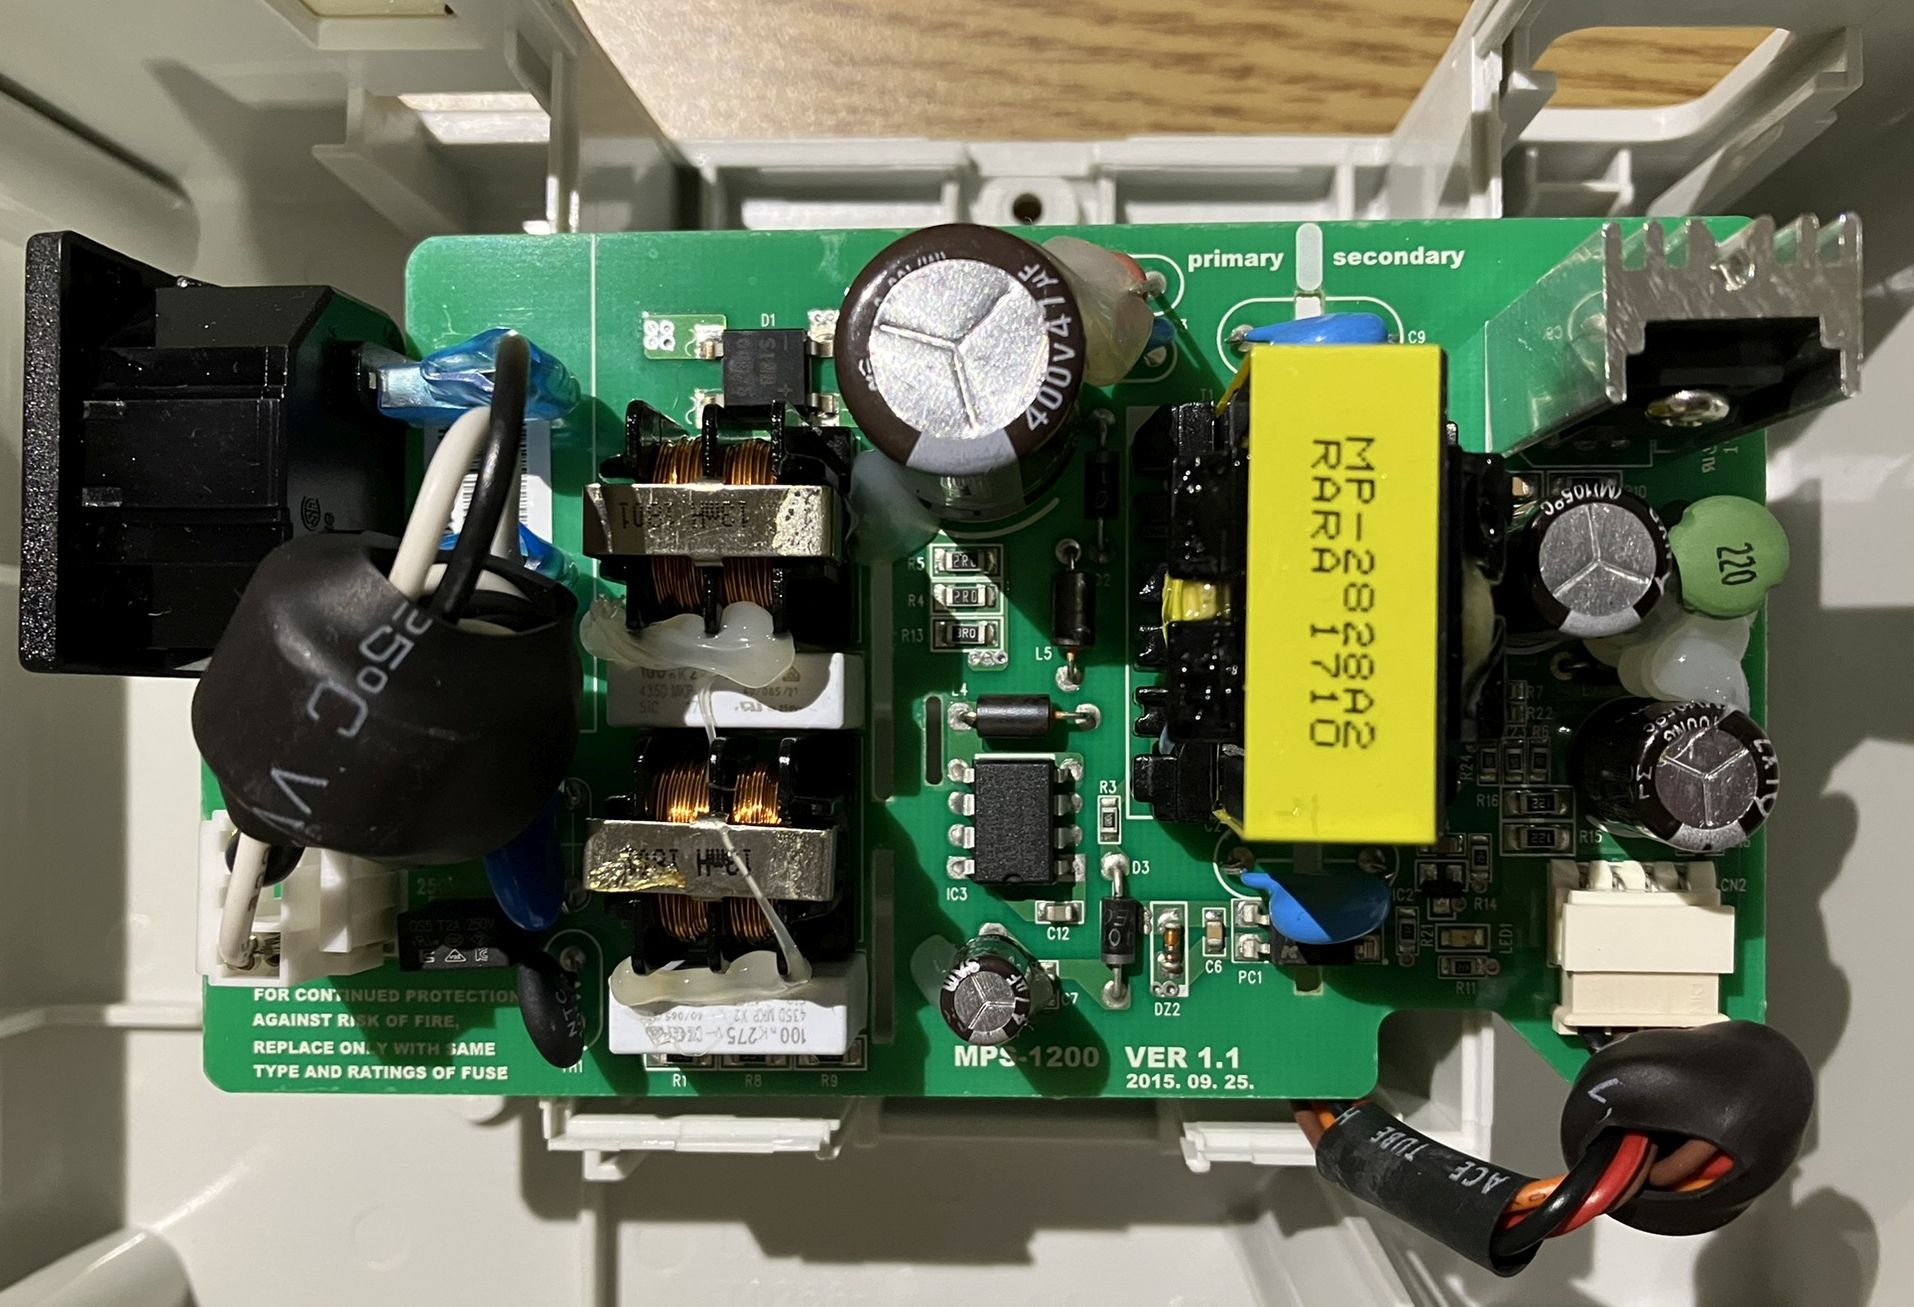
The power supply board is pretty typical, appears to have decent isolation and it was nice of them to label the primary and secondary sides.
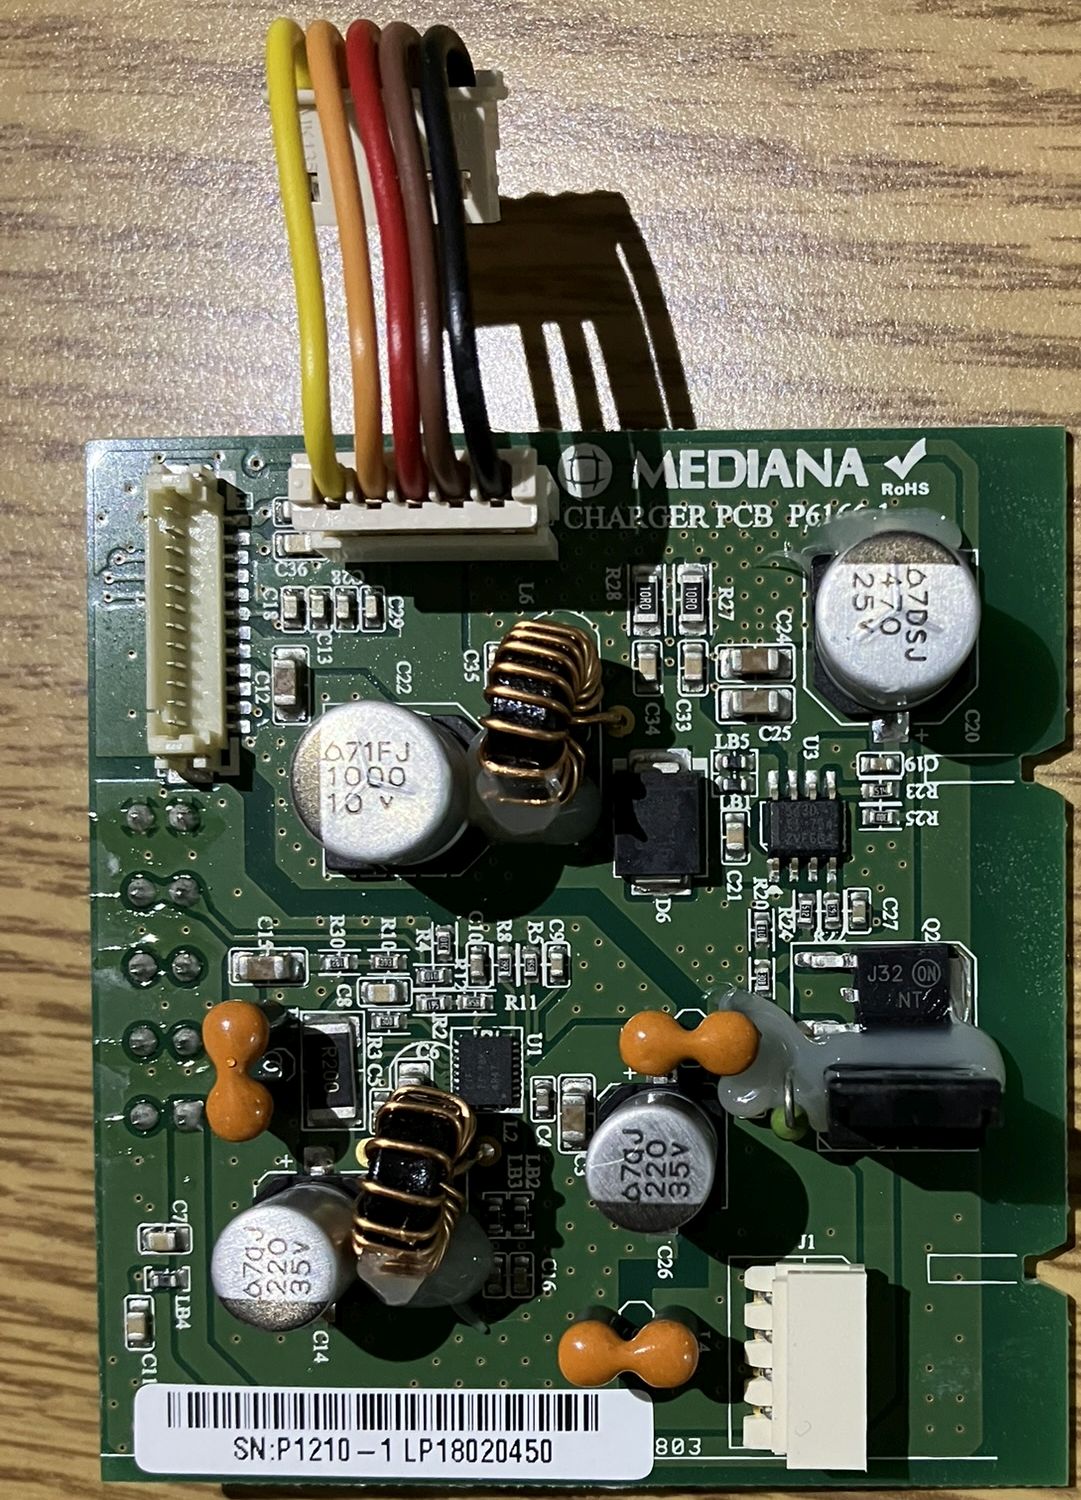
The charger PCB is responsible for managing the charge of the Lithium ion battery and also distributes power to the other boards. The battery slides in and mates to a 5 contact spade style connector on the reverse side of the charger PCB.
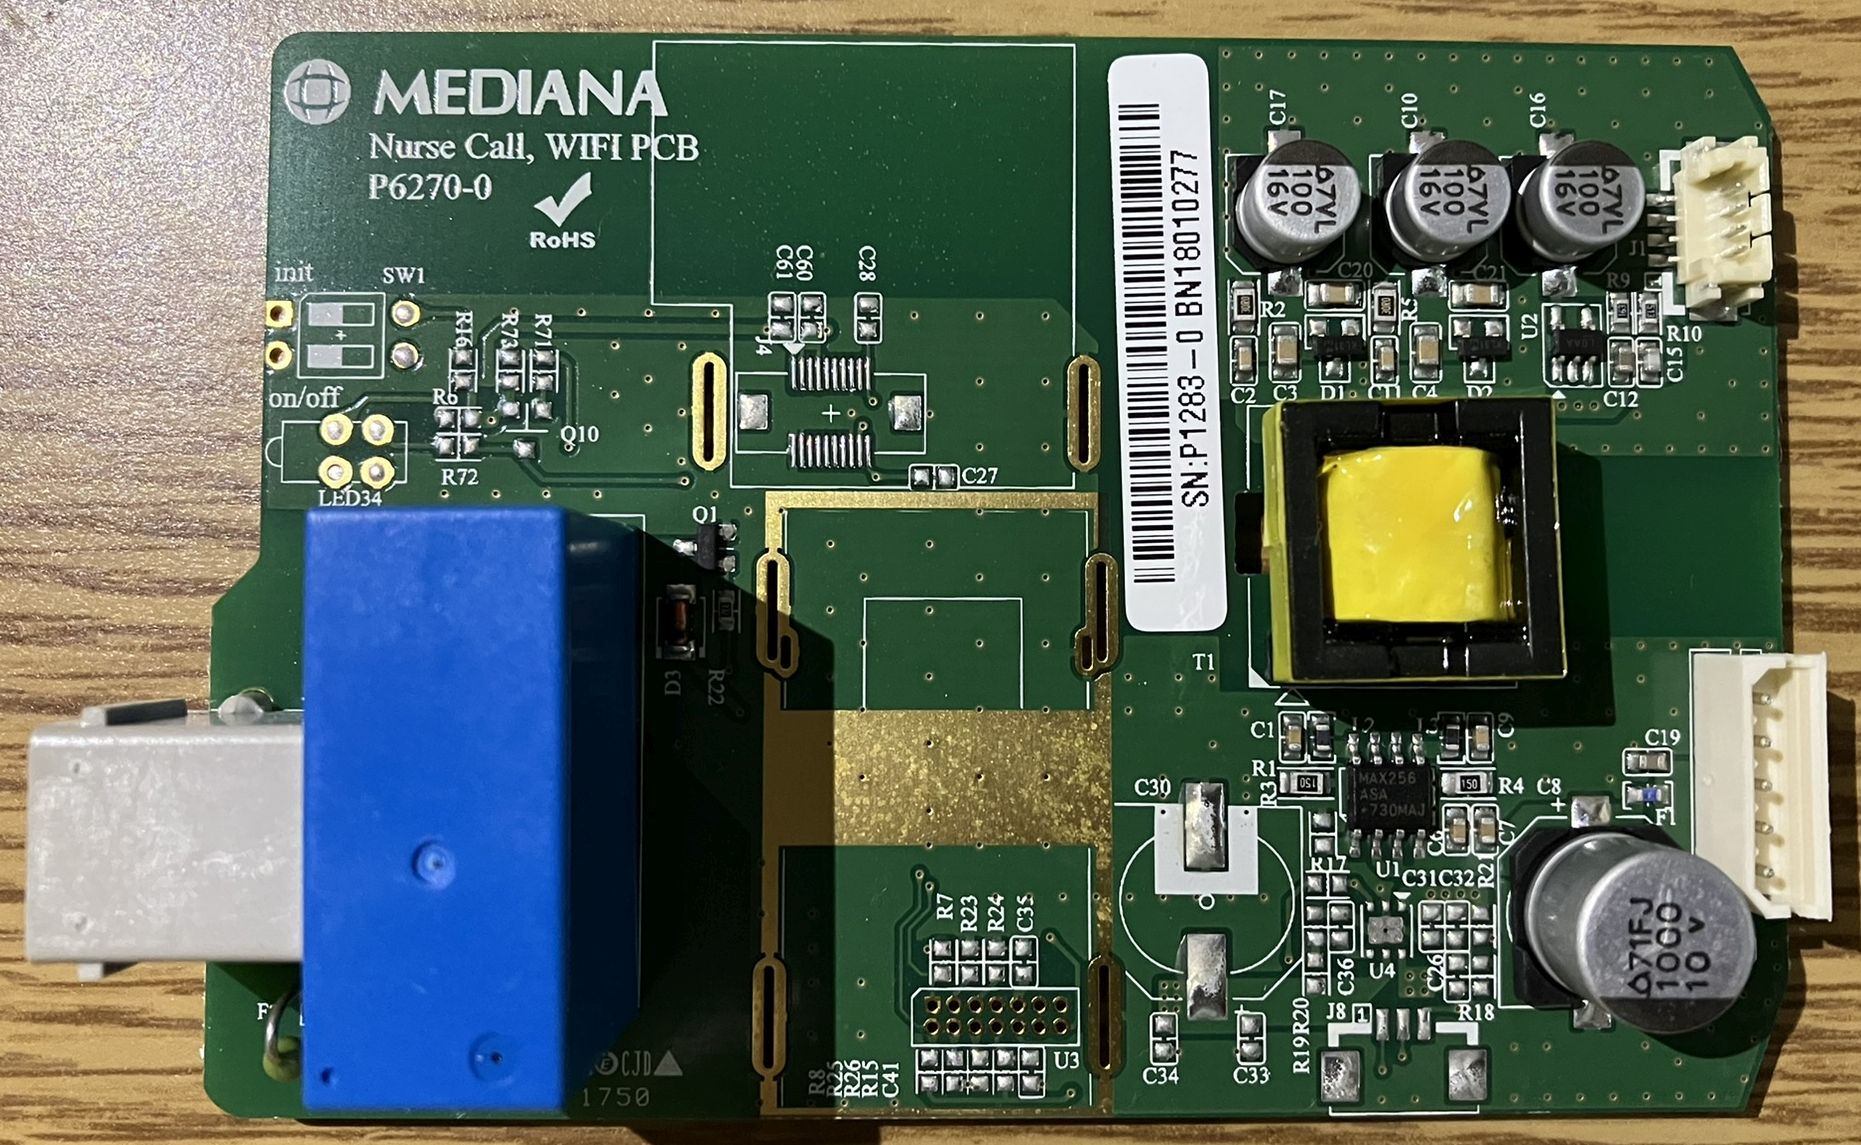
The nurse call and WiFi PCB contains a relay connected to an RJ-11 jack. The relay state depends on whether there is an active alarm or not. They relay is energized when there are no active alarms. The relay is de-energized when there is an active alarm or the unit it turned off. The is designed to be connected to the central nurse call system in a hospital so a nurse can be dispatched to a specific room based on an active alarm from this device. The relay has both NO and NC dry contact outputs for integration with most systems. This board also mentions WiFi and has provisions for a wireless antenna and related electronics, but the components are not populated on this unit.
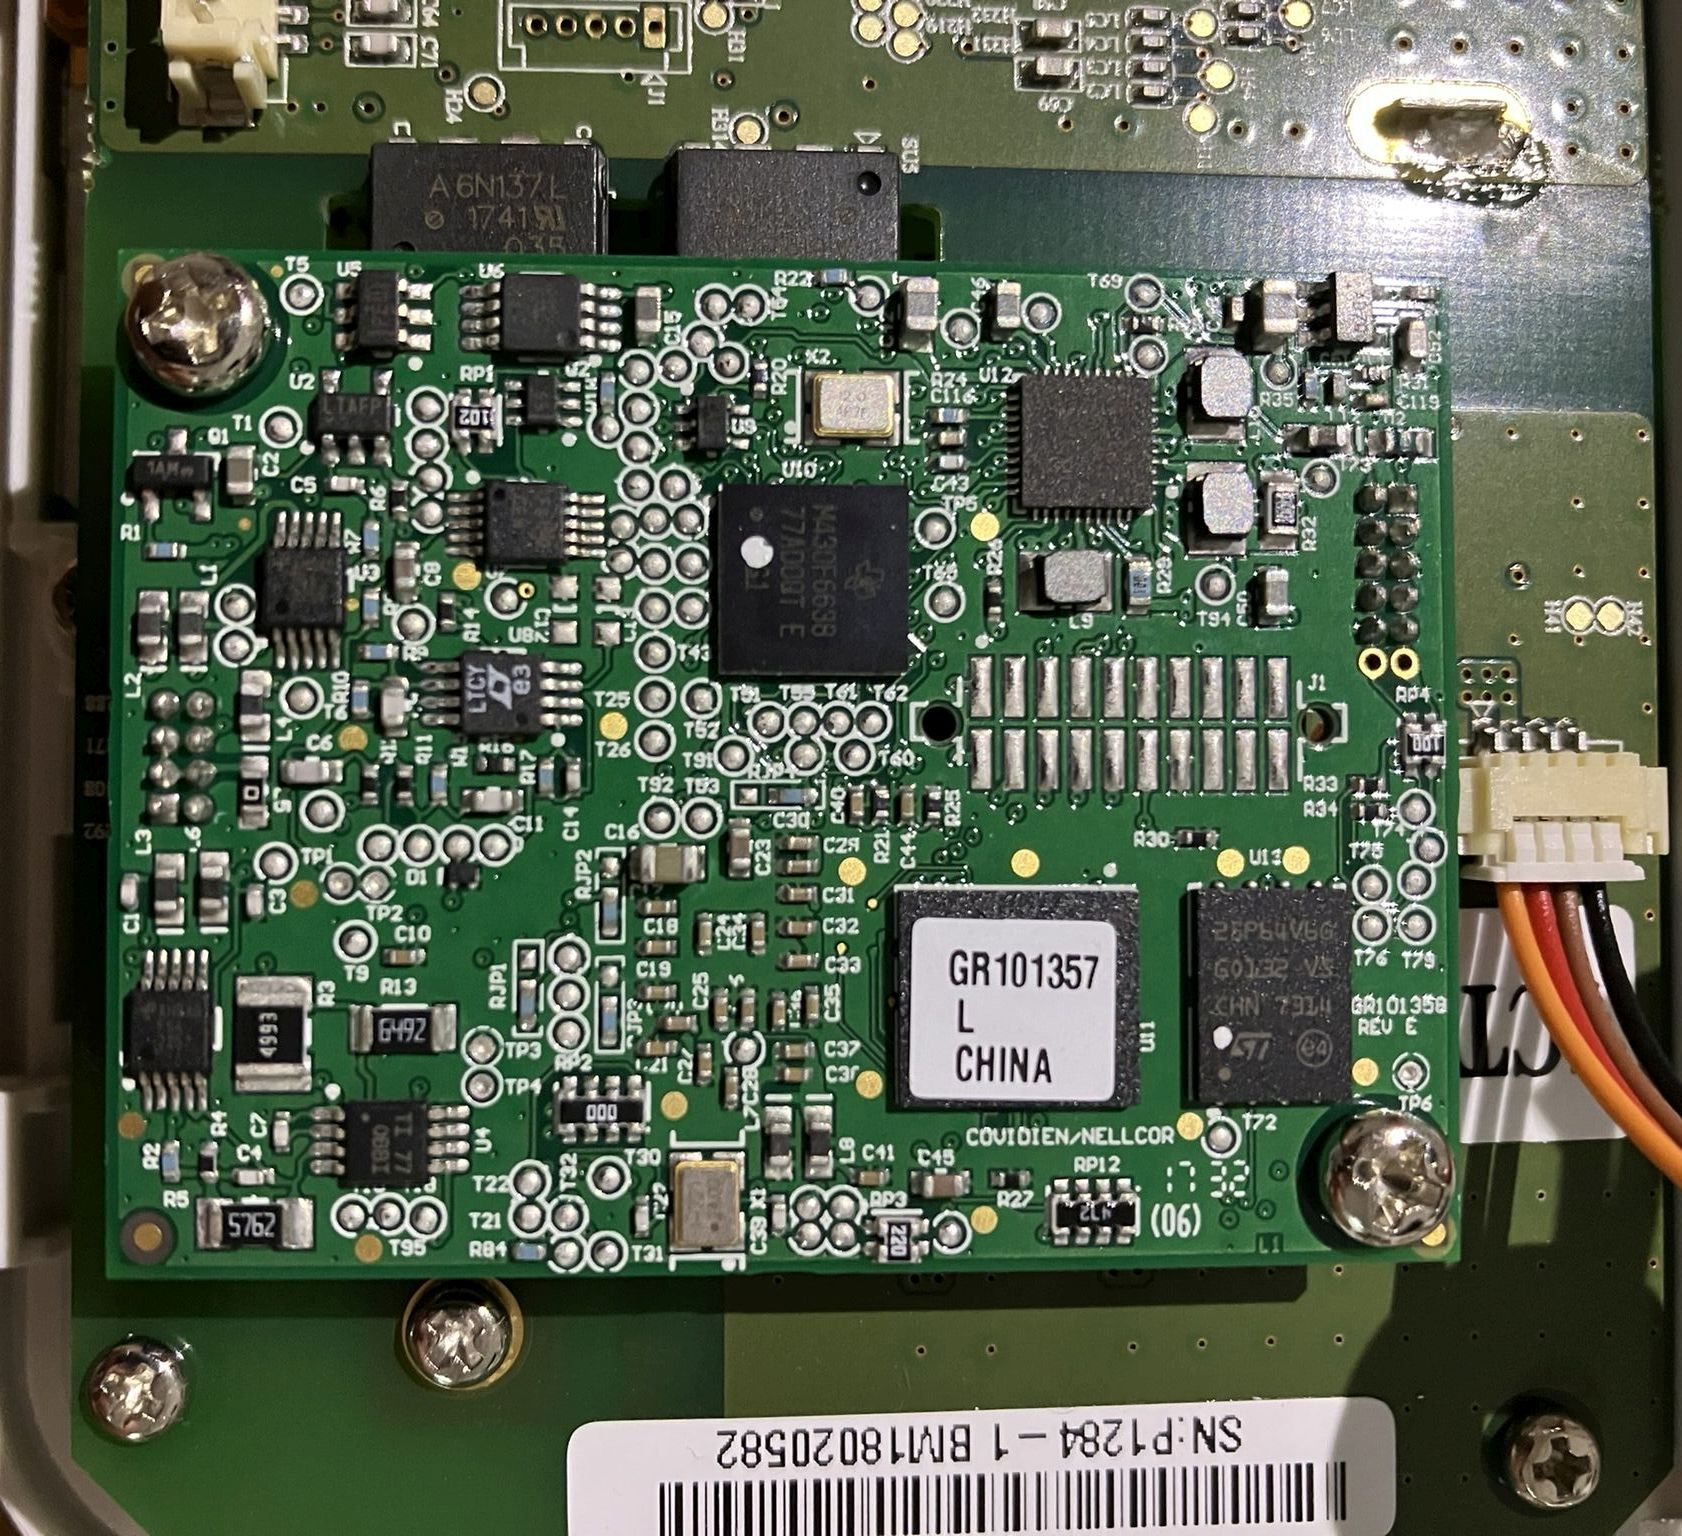
This is the back side of the main PCB. It contains the processor, non-volatile storage, memory, and all of the typical components seen in any sort of microprocessor-controlled piece of electronic equipment. The CR-2032 coin-cell battery is visible here, which is what we removed to allow us to override the password and subsequently perform a factory reset. The battery has since been replaced and the clock had to be reset. There is a small buzzer on the main PCB as well as a larger speaker mounted to the case. Most sounds and alarms emitted from the system come from the larger speaker mounted to the case. The small daughter board mounted to the main PCB is what we presume to be the Oximetry board due to the opto-isolated connections to the main PCB and its proximity to the SpO2 sensor connection on the front of the case.
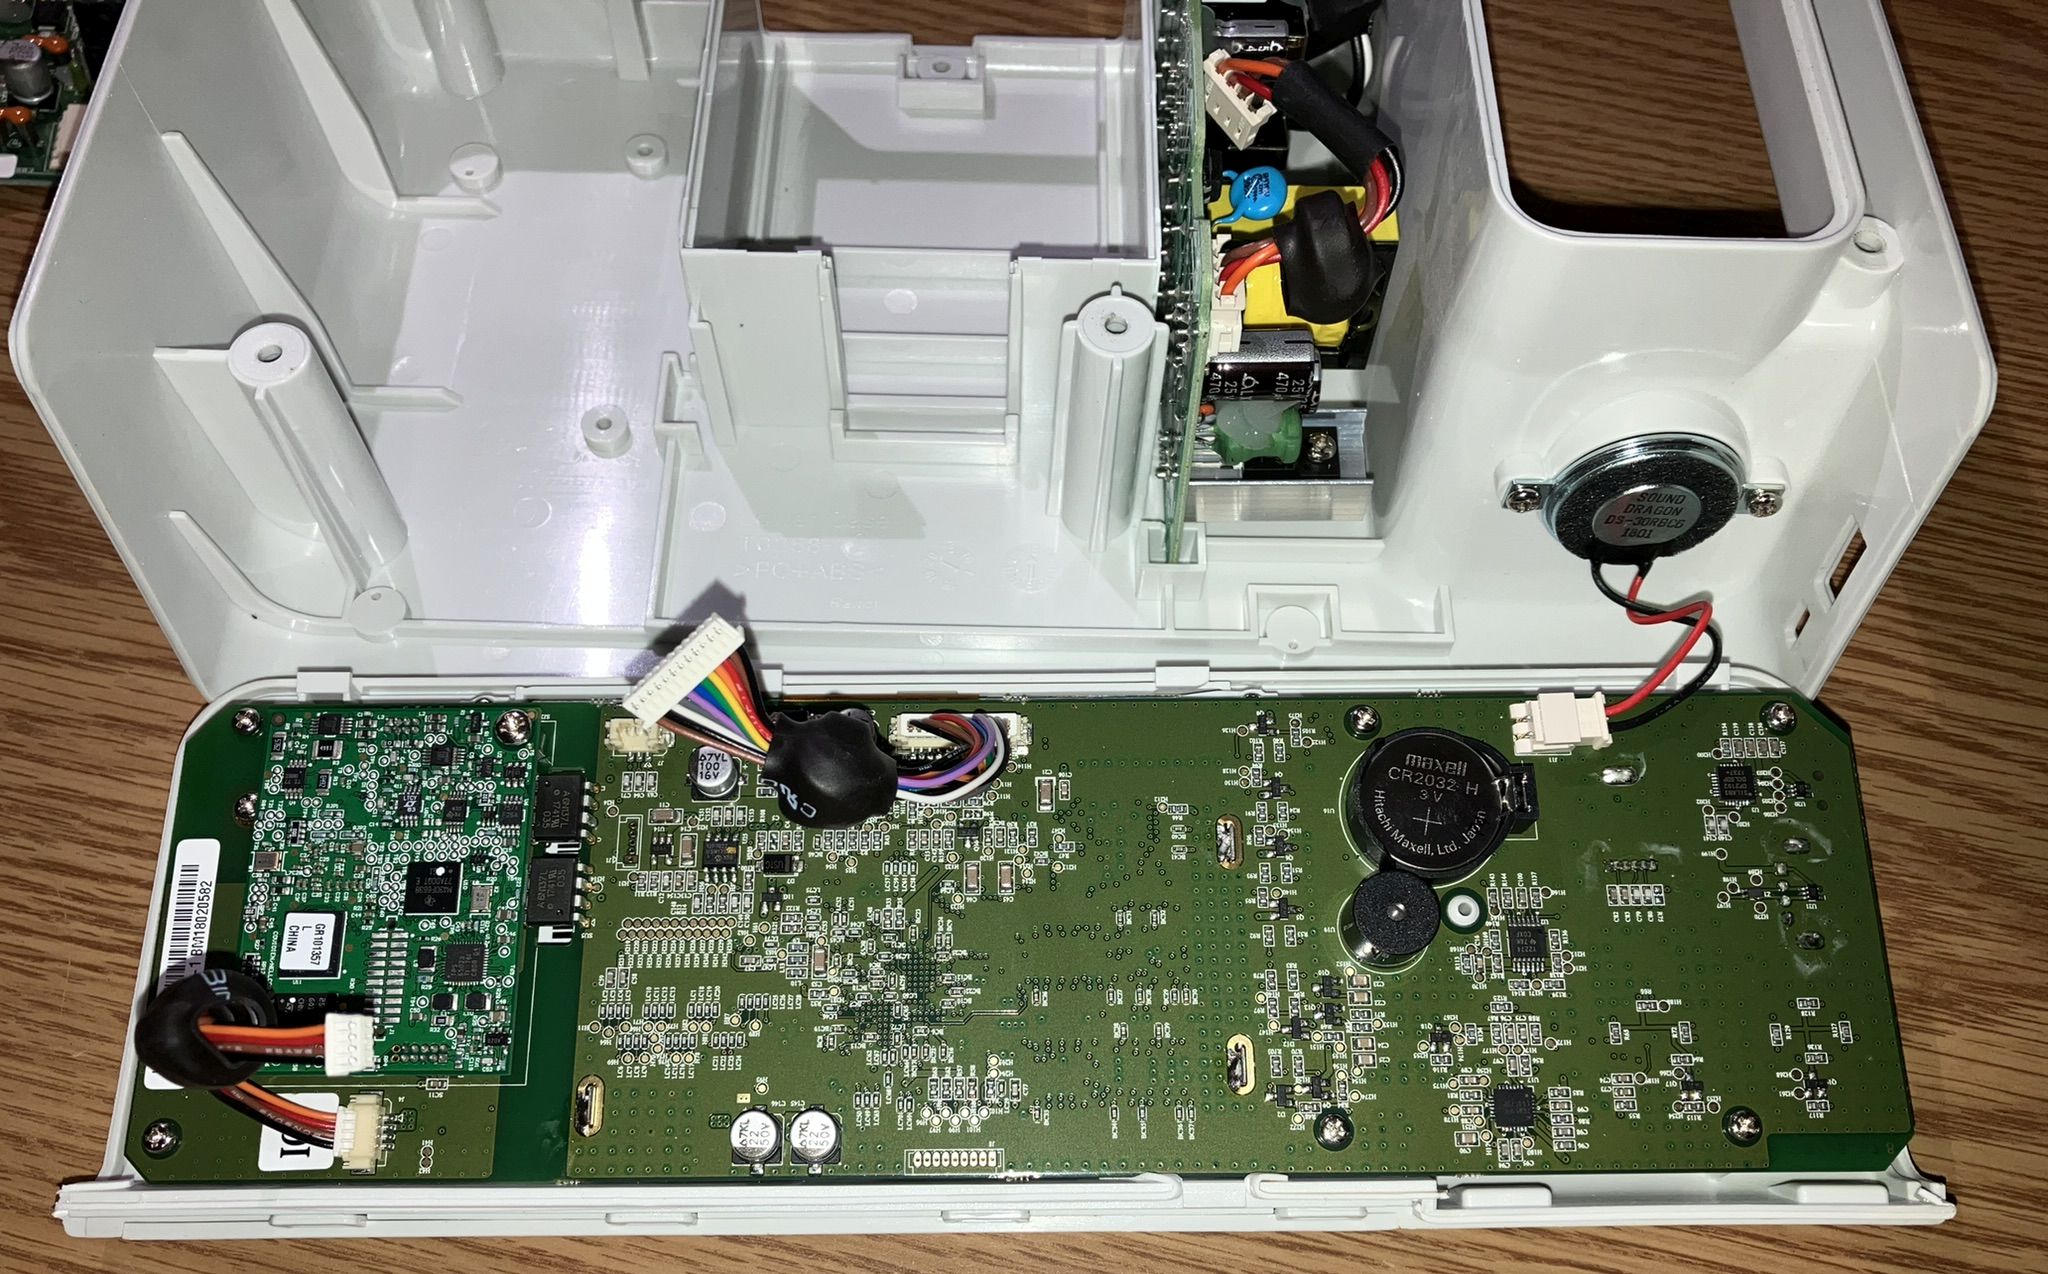
This board, which we presume to be the Oximetry board is likely responsible for all of the analog-to-digital processing of the data obtained by the SpO2 sensor.
Here is the front side of the main PCB. You can see the buttons, rotary encoder for the jog wheel and the LCD display panel. The SpO2 connection is also visible along with both of the USB connections. We decided not to de-solder the metal cover over the processor and memory at this time because this unit needs to remain functional and mostly unmodified. However we did replace some of the broken plastic clips that hold in the LCD panel with some small cotter pins.
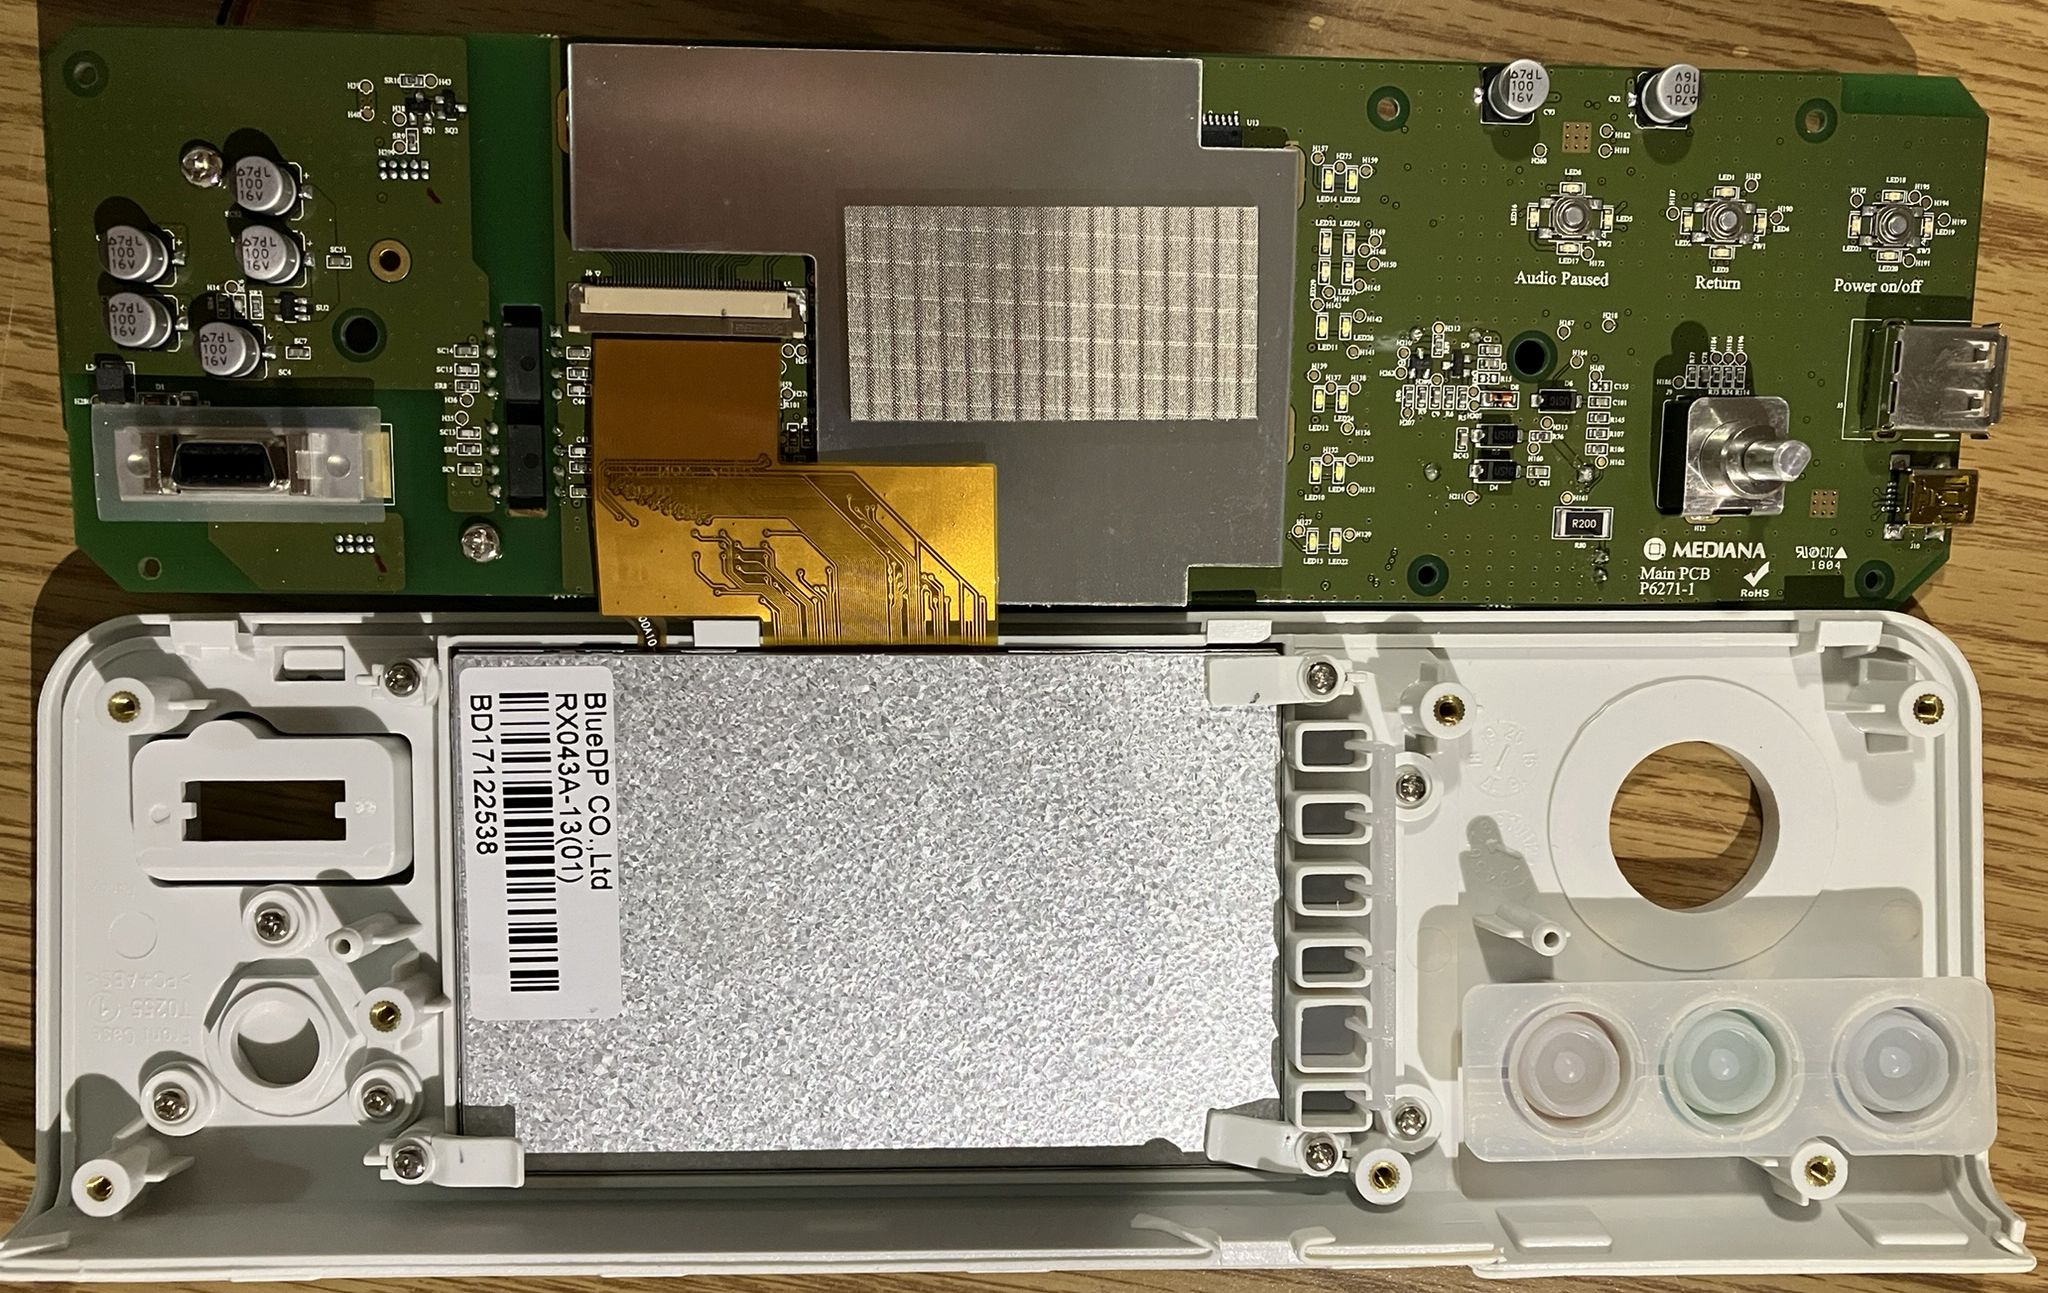
The cotter pins were later covered in electrical tape to prevent shorts.
It is worth noting that nearly all internal components and circuit boards within this device are branded "Mediana". Further research shows that these devices are manufactured by Mediana of Korea as an OEM product for Covidien. At the bottom of this page, you can find links to the PM100N on both companies' websites.
Software analysis
Below are some images of the service mode menus including the factory default passwords to switch between operating modes. The service mode menu is also password protected. In the interest of retaining our friendly relationship with Covidien/Medtronic, we recommend you reach out to their support team if you need the service mode password or any other passwords. There is also more evidence of WiFi connection features in the service menus, but this unit does not have the required WiFi connection hardware as mentioned earlier.
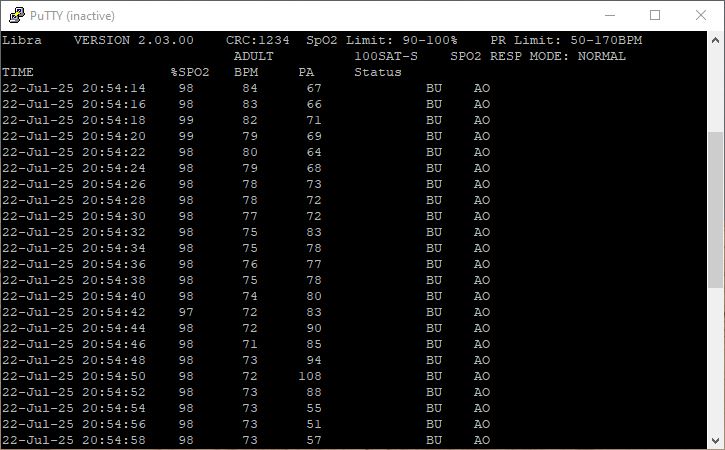
The USB Mini-B port is connected internally to a Silicon Labs CP210x USB to UART Bridge. This is used for the PC data connection. Older oximeters use a typical 9-pin serial port for data transmission. Since this unit is quite modern, they opted for USB port instead, but it serves exactly the same purpose and also works the same way as the older units. Starting a serial terminal session with a program such as PuTTY, using the correct COM port ID and default communication settings (19200/8/N/1) for this unit will yield a stream of data that is updated every 2 seconds. Each line contains the current date and time, SpO2 saturation percentage, BPM (heart rate), PA (perfusion index 0-255), followed by any status codes such as "SO" for "sensor off" and "BU" for "battery in use". A full list of status code and serial settings can be found in the operator's manual for this unit, which is linked at the bottom of the page. Periodically, the unit outputs a string of data containing static values such as software version, CRC, SpO2 and PR limits as well as a header for the data columns.
Software is available from Covidien and other 3rd-party companies to display, process, and analyze real-time and stored oximeter data. Directed Energy Systems has written a simple VB.NET program called NTPulseOxMonitor which can be used to display oximeter data from the USB/serial port in a simple manner on a computer screen. The software also has basic logging capabilities. It can be downloaded from the Programs page of this website if you have a compatible oximeter. Please note that this software is not intended for clinical use.

Useful links related to this device